Model One-Sided Constraints
🎉 Introduction
Welcome back to Set Up Equations and Inequalities! In the first lesson, you learned to write equations for exact targets, and in the second lesson you practiced matching everyday bound phrases to the correct inequality symbol. Now you will combine those skills by writing complete one-sided inequalities that model real-world constraints — staying within a budget, meeting a minimum purchase amount, or not exceeding a weight or capacity limit. The focus here is on translating situations into correct algebraic form, not on solving them.
Before jumping in, think about everyday moments when a quantity does not need to equal one exact value, but it does need to stay within a limit. A budget creates a ceiling: your spending can be below the limit or equal to it, but not above it. A minimum purchase amount creates a floor: your total must reach the limit or go beyond it. A one-sided inequality captures this kind of boundary using an expression, an inequality symbol, and a boundary value.
In this lesson, you will learn to:
- Recognize one-sided constraint situations that call for an inequality rather than an equation.
- Build an expression for the constrained quantity using the variable and operations described in the problem.
- Decide whether the constraint is a ceiling or a floor based on phrases like “no more than,” “at most,” “at least,” and “no fewer than.”
- Write a complete one-sided inequality with the correct symbol and boundary value.
Anatomy of a One-Sided Inequality 🧬
Every one-sided inequality we write in this lesson has three parts:
- An expression involving a variable — this represents the quantity that can change.
- An inequality symbol (, , , or ) — this captures the type of bound.
- A boundary value — this is the fixed number that serves as the limit.
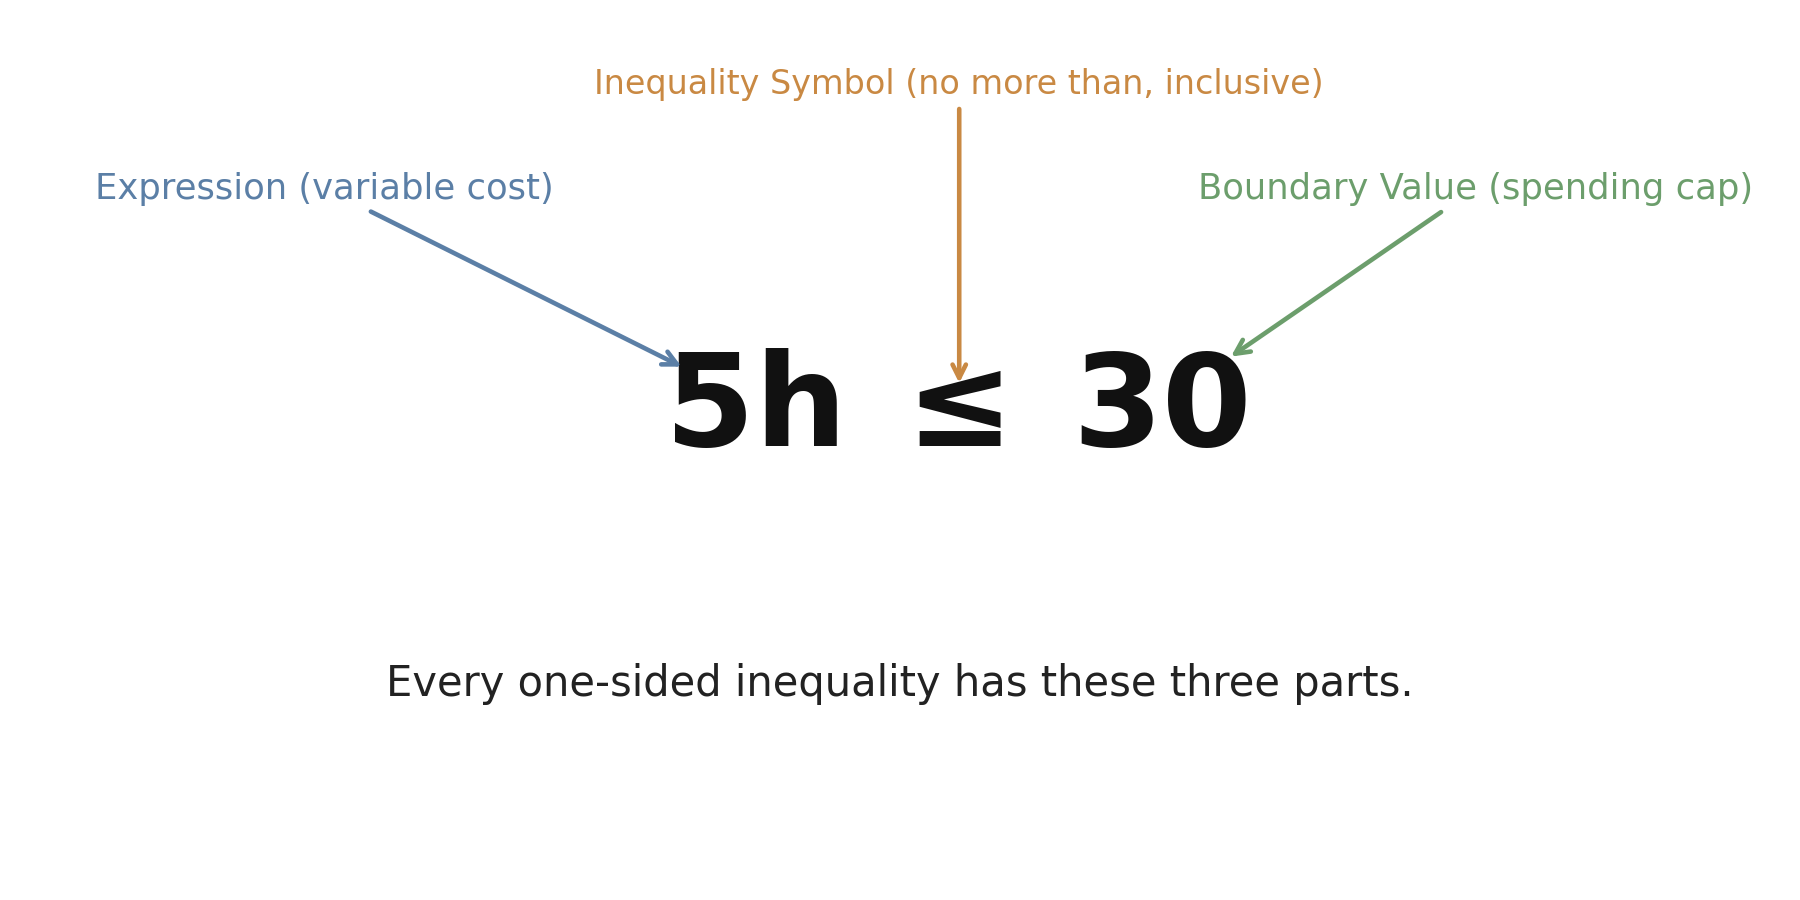
For example, suppose a parking garage charges $5 per hour and you want to spend no more than $30. If represents the number of hours you park, the three parts come together like this:
Here, is the expression (cost depends on hours), is the symbol ("no more than" is inclusive), and is the boundary value (your spending cap). Every one-sided inequality you write will follow this same three-part pattern — only the context changes.
Modeling Maximum Constraints ⬆️
A maximum constraint sets a ceiling: the quantity must not go above a certain value. Words and phrases like no more than, at most, cannot exceed, and must stay within all signal this type. These typically use , or when the boundary itself is excluded.
Example 1 — Budget limit: You are buying notebooks that cost $4 each, and your budget is $50. If is the number of notebooks:
The expression represents total cost. A $50 budget means you can spend up to $50 but not a penny more, so the symbol is .
Example 2 — Speed limit: A road sign posts a speed limit of 55 mph. Driving at exactly 55 is legal, so if is your speed:
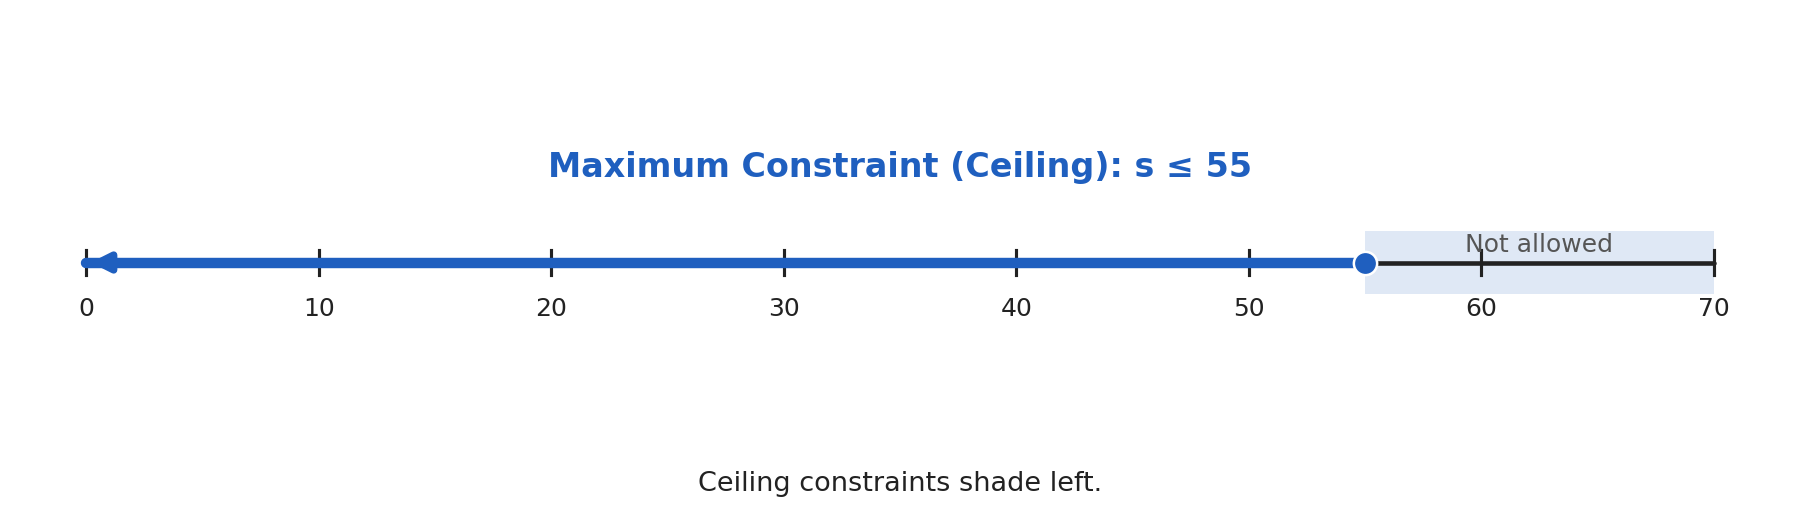
Notice that both examples use because the boundary value itself is allowed. If the sign instead read "speeds under 55 mph", you would switch to because "under" is strict — 55 itself would no longer be legal.
Modeling Minimum Constraints ⬇️
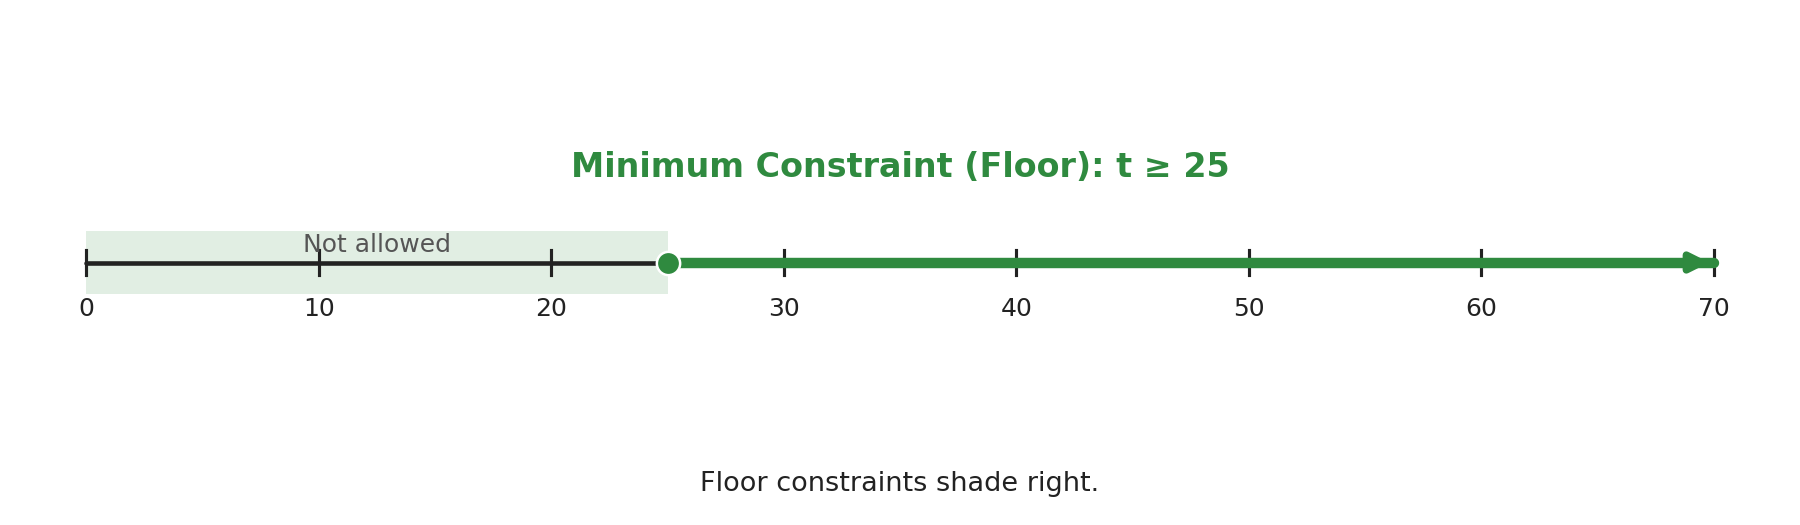
A minimum constraint sets a floor: the quantity must not drop below a certain value. Phrases like at least, no fewer than, must meet a minimum of, and or more all point to this type. These use , or when the boundary itself is excluded.
Example 1 — Free-shipping threshold: An online store offers free shipping on orders of $25 or more. If is the order total:
The phrase "or more" tells you that $25 itself qualifies, so you use .
Example 2 — Minimum weekly earnings: A part-time worker earns $18 per hour and needs to make at least $540 per week. If is the number of hours worked per week:
The expression captures total weekly pay. "At least" means $540 is acceptable, so the symbol is .
Building Multi-Term Expressions 🧱
Many real-world constraints involve more than a single operation. A cost might include a fixed fee plus a variable rate, or a total might combine items at different prices. The approach stays the same: build the full expression first, then attach the inequality symbol and the boundary value.
Example — Prepaid electricity plan: A utility plan charges a $15 fixed monthly fee plus $0.08 per kilowatt-hour. You want the total bill not to exceed $75. If is the number of kilowatt-hours used:
The expression represents the total bill (variable cost plus fixed fee), and captures the cap because "not to exceed" is inclusive.
The key habit is to get the expression right first. Start by asking, “What total quantity is being limited?” Then identify every component that contributes to that total, such as fixed fees, per-item costs, hourly rates, or multiple item types, and combine those parts into one expression. Once the expression accurately represents the quantity being constrained, place the inequality symbol and boundary value to show the rule it must satisfy. This order matters because the inequality is only correct if the expression on the left truly represents the total being compared to the limit.
A Four-Step Checklist ✅
Before you finalize any inequality, run through this short mental checklist:
- What quantity is being constrained? Identify the variable and build the expression that computes the quantity.
- Is it a ceiling or a floor? A ceiling means maximum ( or ). A floor means minimum ( or ).
- Is the boundary value included or excluded? If included, use or . If excluded, use or .
- Does the symbol point the right way? The expression typically sits on the left and the fixed boundary on the right, though both arrangements are valid as long as the symbol points correctly.
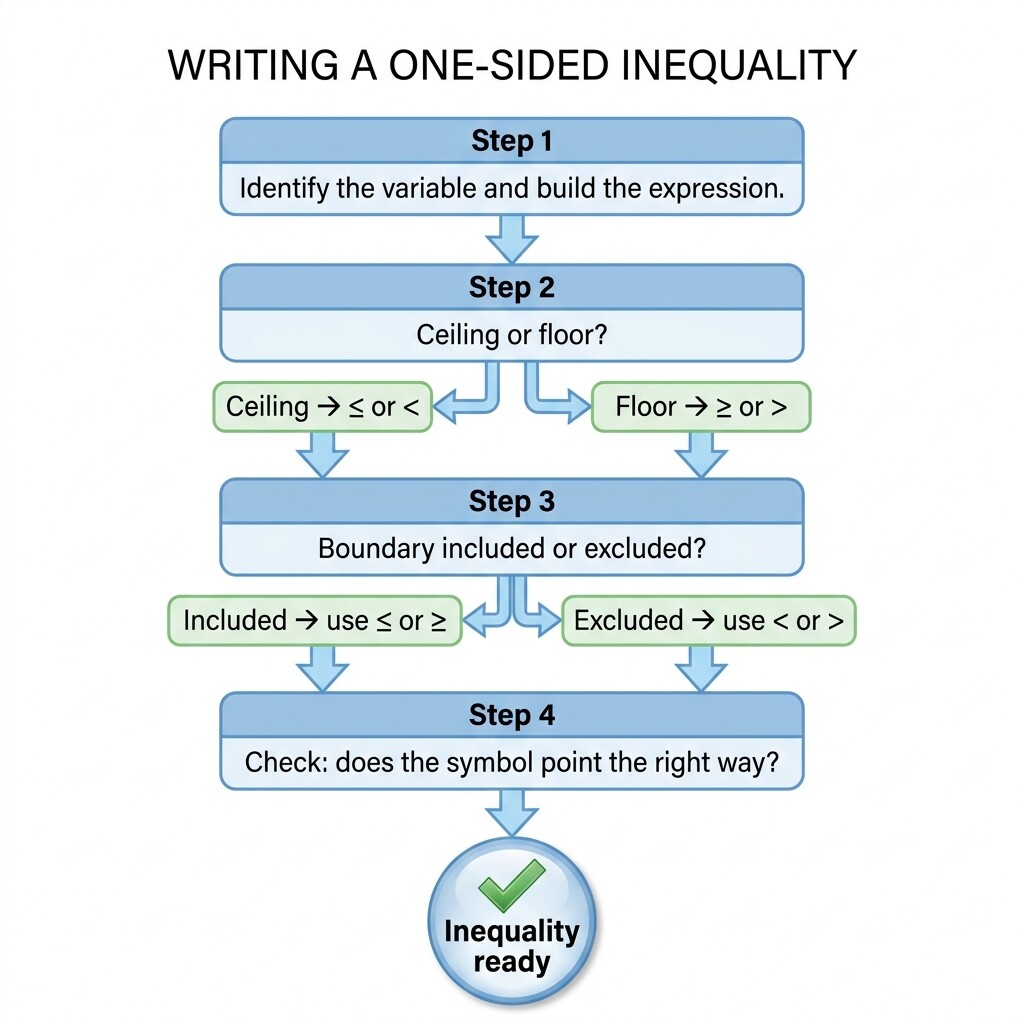
Following these four steps keeps you organized and helps prevent the most common mistakes, such as flipping the symbol direction or leaving a term out of the expression.
Conclusion and Next Steps
In this lesson you brought together expression-building and bound-language skills to write complete one-sided inequalities. You now know how to model maximum constraints (ceilings like budgets, weight limits, and speed limits) and minimum constraints (floors like earnings requirements and purchase thresholds), including situations where the expression contains multiple terms.
Up next is a set of practice exercises that will take you from selecting the correct inequality for a given scenario all the way to writing your own from scratch. You will work through contexts ranging from airline baggage rules to electricity bills and weekly wages, so get ready to turn real-world limits into clean mathematical statements!
