Measure Distance Around Circles
Introduction 🎉
Welcome back to Perimeter and Circumference! This lesson focuses on finding the circumference of circles. Circles show up in many everyday measurements, from garden beds and table edges to jar lids and circular patios. Because a circle has no straight sides to add, you cannot find its boundary length by summing side lengths. Instead, you will learn to use the radius and the special number called to calculate the distance around a circle.
In this lesson, you will learn to:
- Identify the radius, diameter, and circumference of a circle.
- Calculate circumference using the formula .
- Use whole-number and decimal radii to find circumference with correct units.
With polygons, calculating perimeter meant listing every side and adding them together. A circle, however, has no sides to list. Its boundary is one smooth, continuous curve, so our "add the sides" strategy simply does not apply.
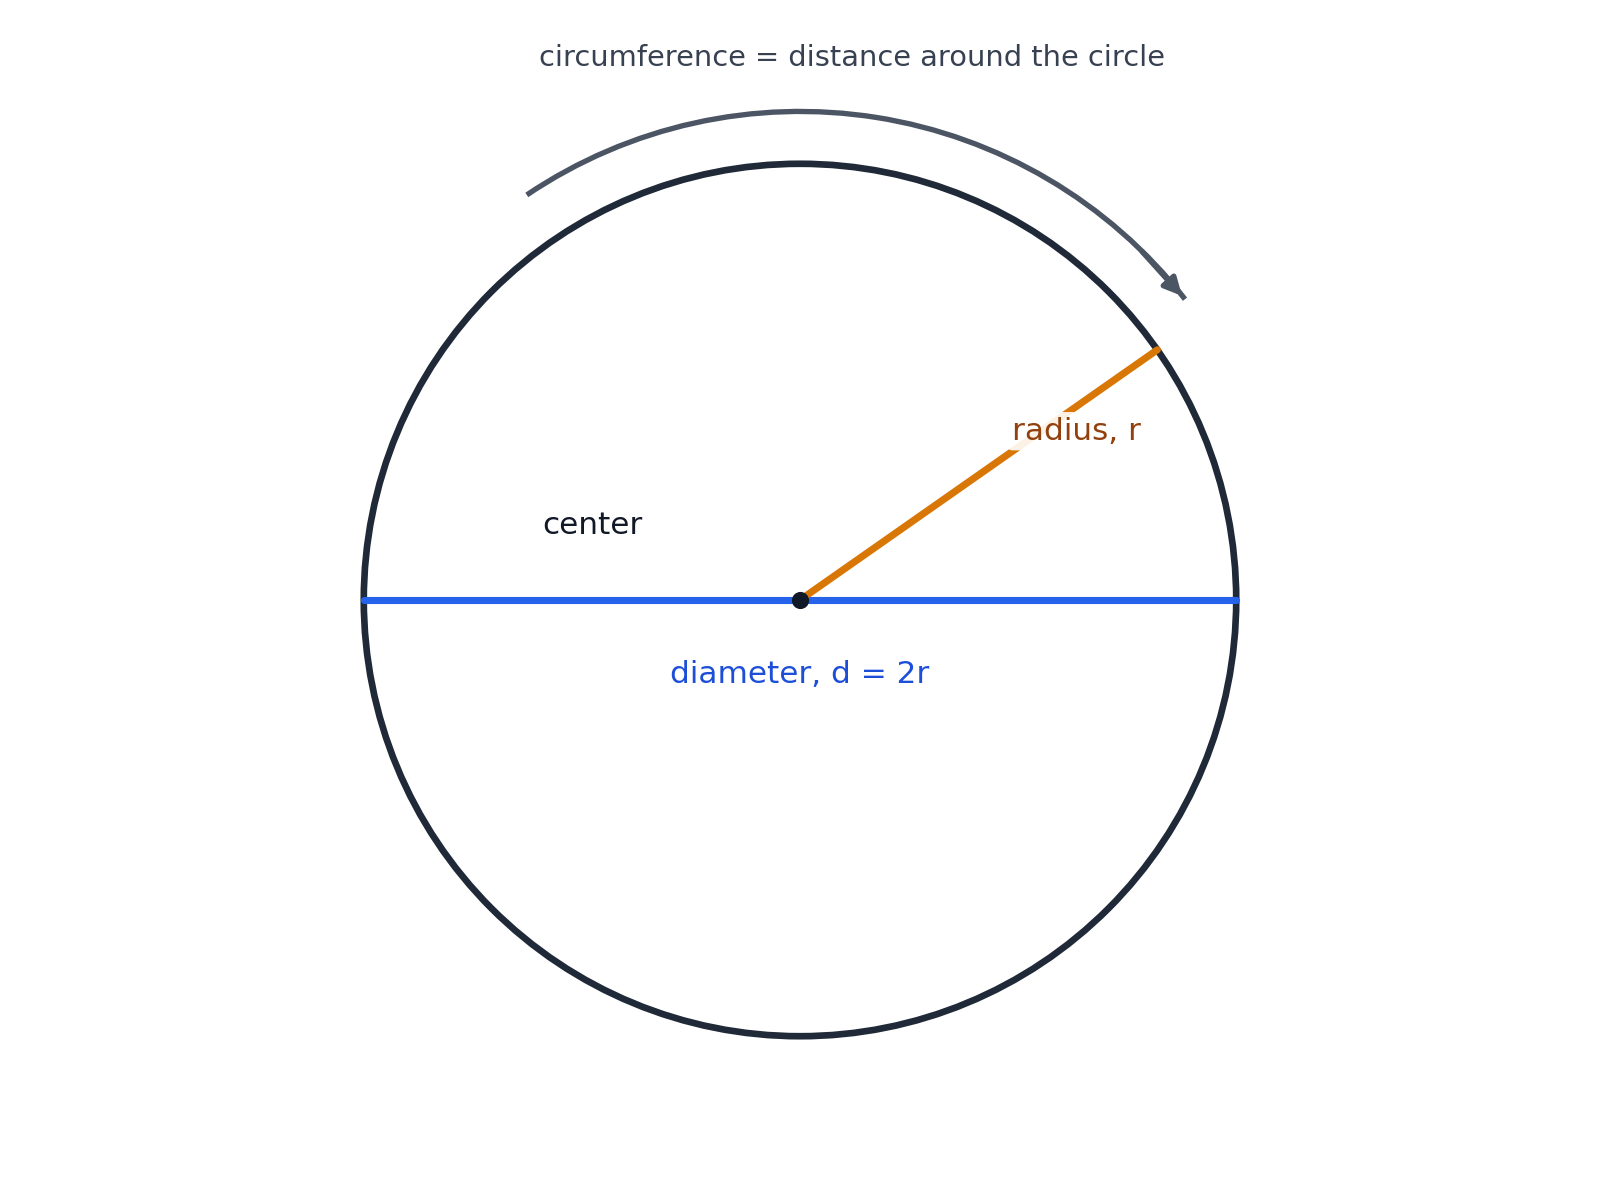
Imagine wrapping a piece of string around a circular plate. If you straightened that string out and measured it, you would get the circumference — the total distance around the circle. The concept is the same as perimeter (it is still the boundary length of a shape), but the method for calculating it will be different. Instead of addition, you will rely on multiplication with a very special constant.
🔑 Key Circle Measurements
Before introducing the formula, let's make sure you are comfortable with two measurements that describe a circle's size:
- The radius () is the distance from the center of the circle to any point on its edge.
- The diameter () is the distance straight across the circle through the center. It is always exactly twice the radius: .
For example, if a circle has a radius of , its diameter is . Throughout this lesson, you will work primarily with the radius, since that is the measurement most commonly provided when describing circular objects.
🥧 The Special Number Pi (π)
Thousands of years ago, people noticed something remarkable: no matter how large or small a circle is, dividing its circumference by its diameter always gives the same number. That number is called pi, written with the Greek letter .
The digits of go on forever without repeating, so we typically round it. For your calculations, you will use unless stated otherwise. The key takeaway is that is the constant ratio between every circle's circumference and its diameter — and this reliable relationship is what makes a circumference formula possible in the first place.
🧮 The Circumference Formula
Since equals the circumference divided by the diameter (), you can rearrange to get:
And because the diameter is twice the radius (), you can also write:
This second form is the one we will use most often. It tells us that to find the circumference, we multiply 2 by π by the radius. Just as with every perimeter answer in this course, circumference must include a correct linear unit. The unit for the circumference is always the same as the unit used for the radius. For example, if the radius is measured in centimeters, the circumference will also be in centimeters.
Let's walk through a complete example. Suppose a circular garden bed has a radius of .
Step 1: Write the formula.
Step 2: Substitute the known values (using ).
Step 3: Multiply from left to right.
The circumference is . That means if you walked along the edge of this garden bed, you would travel just over 25 meters to return to your starting point.
Here is one more. A circular table has a radius of .
If you wanted to wrap decorative trim around the table's edge, you would need of material.
🔢 Calculating Circumference with Decimal Radii
Just as with polygon perimeters, real-world circles often have measurements that are not whole numbers. The process stays exactly the same — only the arithmetic requires a bit more care.
Example: A circular fountain has a radius of .
Example: A jar lid has a radius of .
Depending on the context, you might round this to . When a problem does not specify rounding, keeping two decimal places is a safe and common choice.
📈 How Radius Affects Circumference
Take a look at the formula again: . Since is a constant (approximately ), the circumference is simply that constant multiplied by the radius. This means:
- Double the radius → double the circumference. A circle with has exactly twice the circumference of one with .
- A larger radius always means a larger circumference. There are no exceptions.
The table below makes this proportional pattern easy to see.
| Radius | Circumference () |
|---|---|
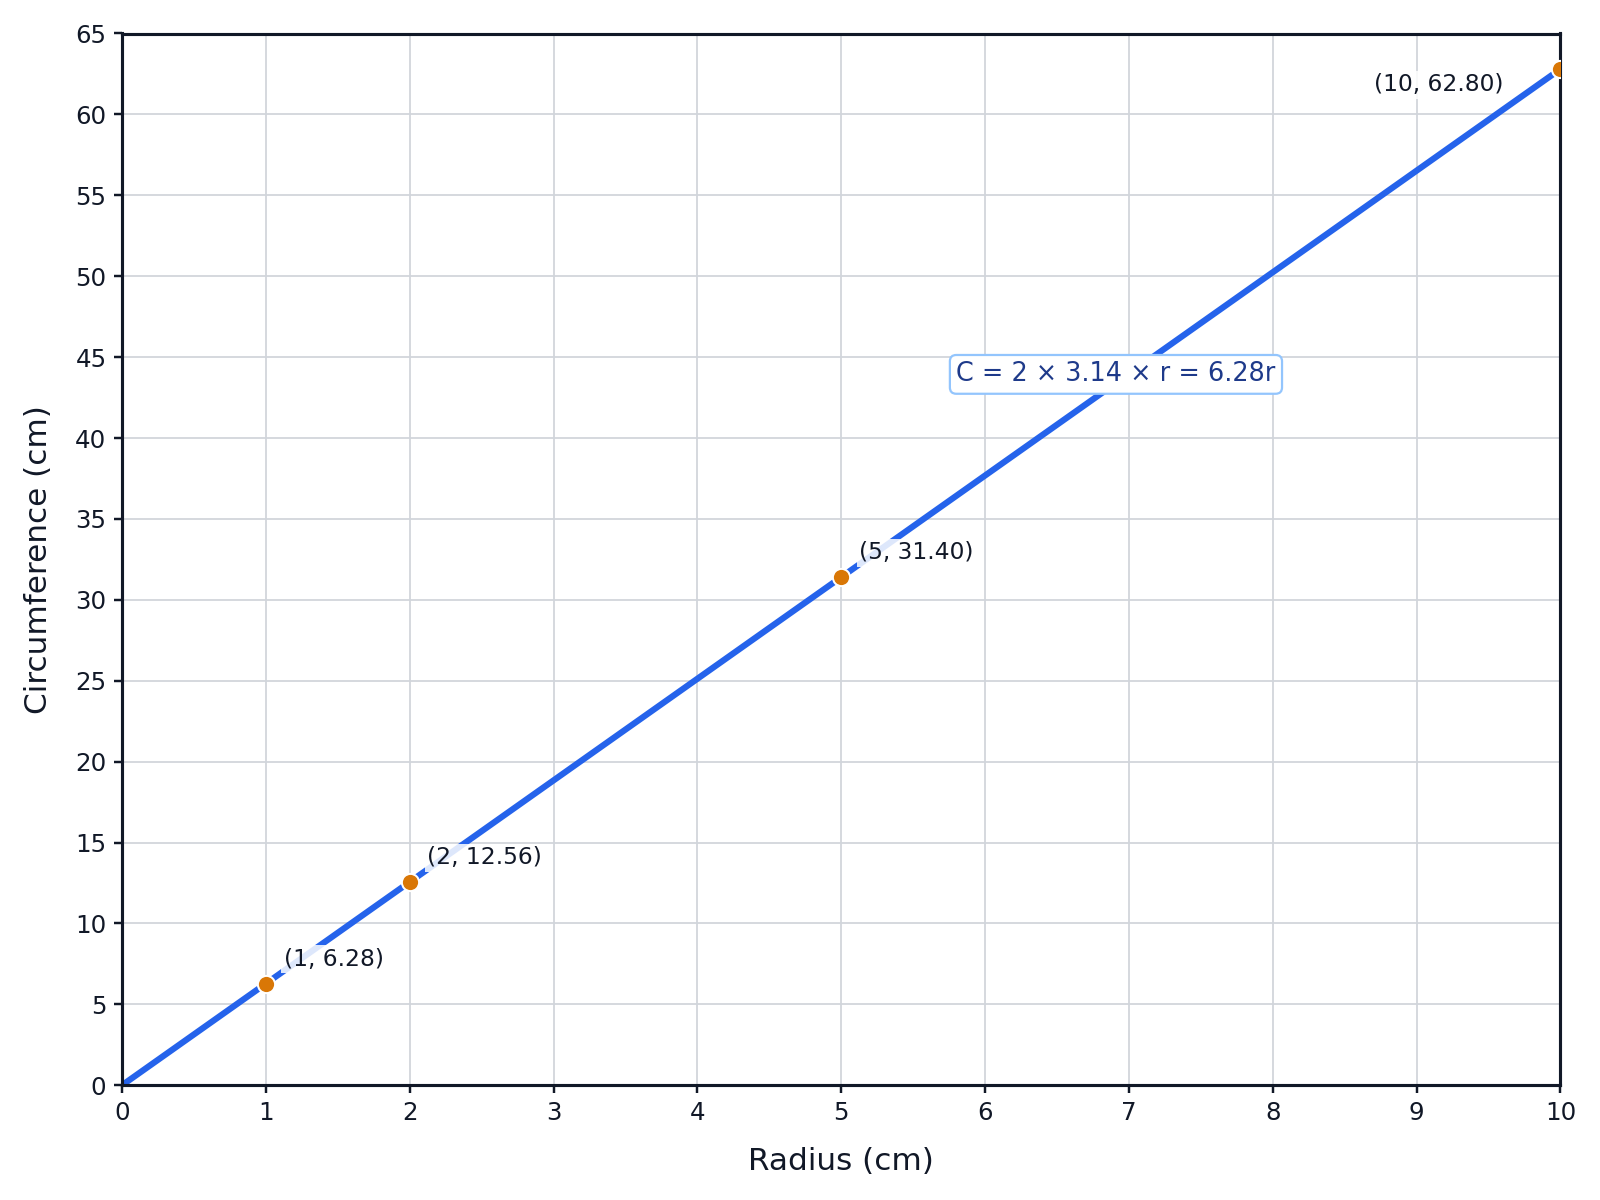
This proportional relationship also makes quick comparisons easy. If one plate has a radius of and another has a radius of , you already know the second plate's circumference is times the first, with no full calculation needed.
🚧 Common Circumference Pitfalls
A few errors show up regularly when learners first work with circumference. Keeping them on your radar will save you from frustrating mistakes.
- Forgetting the factor of 2. The formula is , not . Missing the 2 will cut your answer in half.
- Confusing radius and diameter. If a problem gives the diameter, you can use directly. If it gives the radius, use . Mixing these up will double or halve your result.
- Dropping or mismatching the unit. Every measurement needs a linear unit. The unit for your circumference must always match the unit of the radius. A circumference of without "" is incomplete.
Conclusion and Next Steps
In this lesson, you moved from straight-sided polygons to curves and discovered how the constant connects every circle's radius to its circumference through the formula . You practiced substituting whole-number and decimal radii, multiplying step by step, and attaching the correct linear unit to every answer. You also saw that circumference grows proportionally with the radius, making it straightforward to compare circles of different sizes.
Now it is time to build confidence with these ideas through hands-on practice! You will explore how circumference responds to changes in the radius, fill in calculation steps, compute circumferences independently, compare circular objects, and tackle real-world scenarios like wrapping string lights around a circular patio. Let's find out how well you can measure the distance around a circle!
