Welcome back to Document Structure and Layout! You are now in the fourth lesson of this course. So far, we have built a clear heading hierarchy with sections and subsections, generated an automatic table of contents, and organized content into bulleted and numbered lists. All of that work has focused on the content inside a page. In this lesson, we shift our attention to the page itself: its size, its margins, and the space available for your text. We will use a package called geometry that lets you control the entire page layout from a single line in the preamble.
Think about the difference between a printed novel, a homework assignment, and a bound thesis. Each of these documents uses different paper sizes and margin widths to suit the way it will be read, printed, or bound. A novel uses narrow margins to fit more words per page, while a thesis often has a wider left margin to leave room for binding.
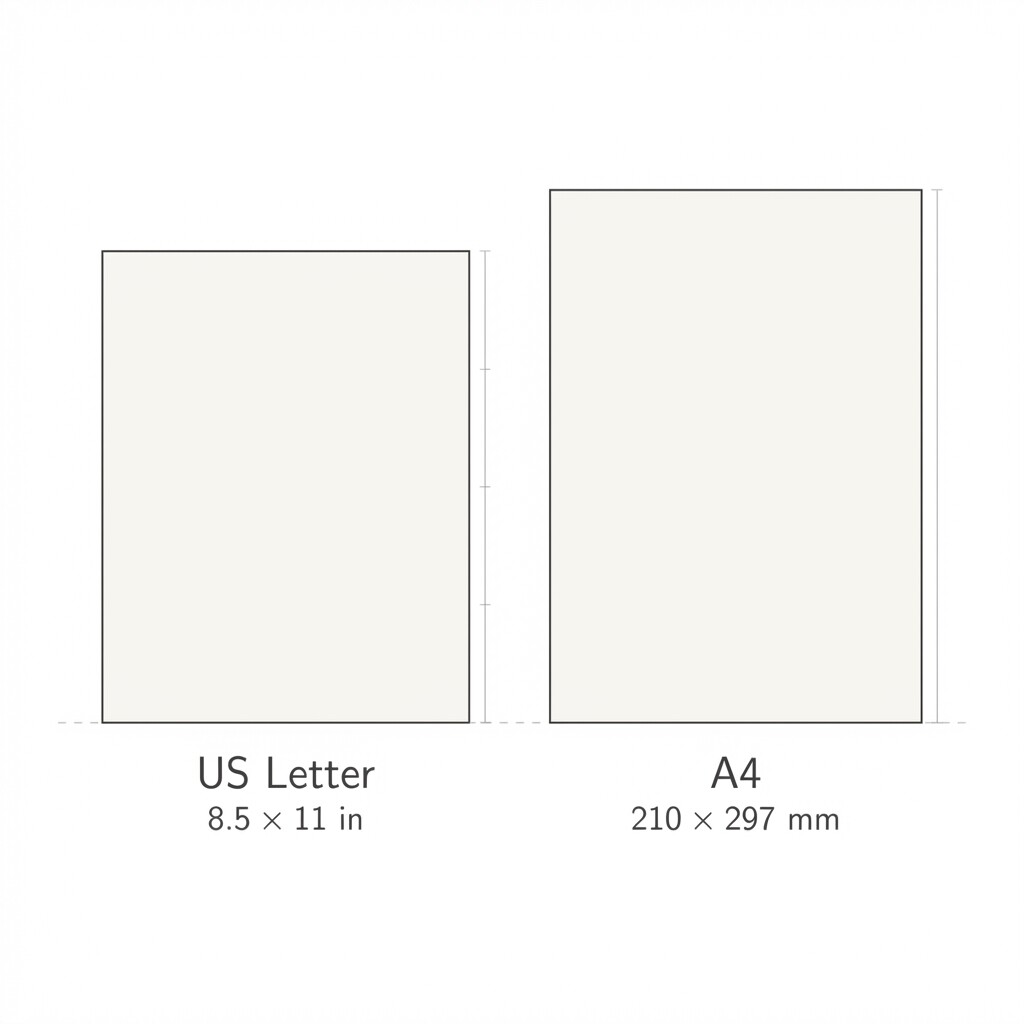
LaTeX's default margins depend on both the document class and the paper size. For the standard article class on US letter paper, they work out to approximately 1.5 inches on 12pt documents, 1.75 inches on 11pt documents, and 1.87 inches on 10pt documents — though these values shift when a different paper size or document class is used. Those defaults are chosen to keep lines at a comfortable reading length — the optimum line length is broadly somewhere between 60 characters and 75 characters — but they are not always right for every purpose. Setting page dimensions manually in LaTeX is not straightforward because you would need to adjust several interdependent native length variables. The geometry package solves this by giving you an easy, intuitive way to set page layout parameters without worrying about those low-level details.
In LaTeX, packages are loaded in the preamble with the \usepackage command. The simplest way to use geometry is to set all four margins to the same value at once using the margin option:
The geometry package provides a flexible and easy interface to change page dimensions. You can change the page layout with intuitive parameters. The parameters have to be written in the form parameter=value, using standard LaTeX units (mm, cm, pt, in). For instance, if you want 2 cm of space on each edge, you would write \usepackage[margin=2cm]{geometry}.
In our example above, margin=1in sets all four margins to one inch. After compilation, you will notice the text area is noticeably wider than the LaTeX default, because the default margins on a standard article are larger than one inch.
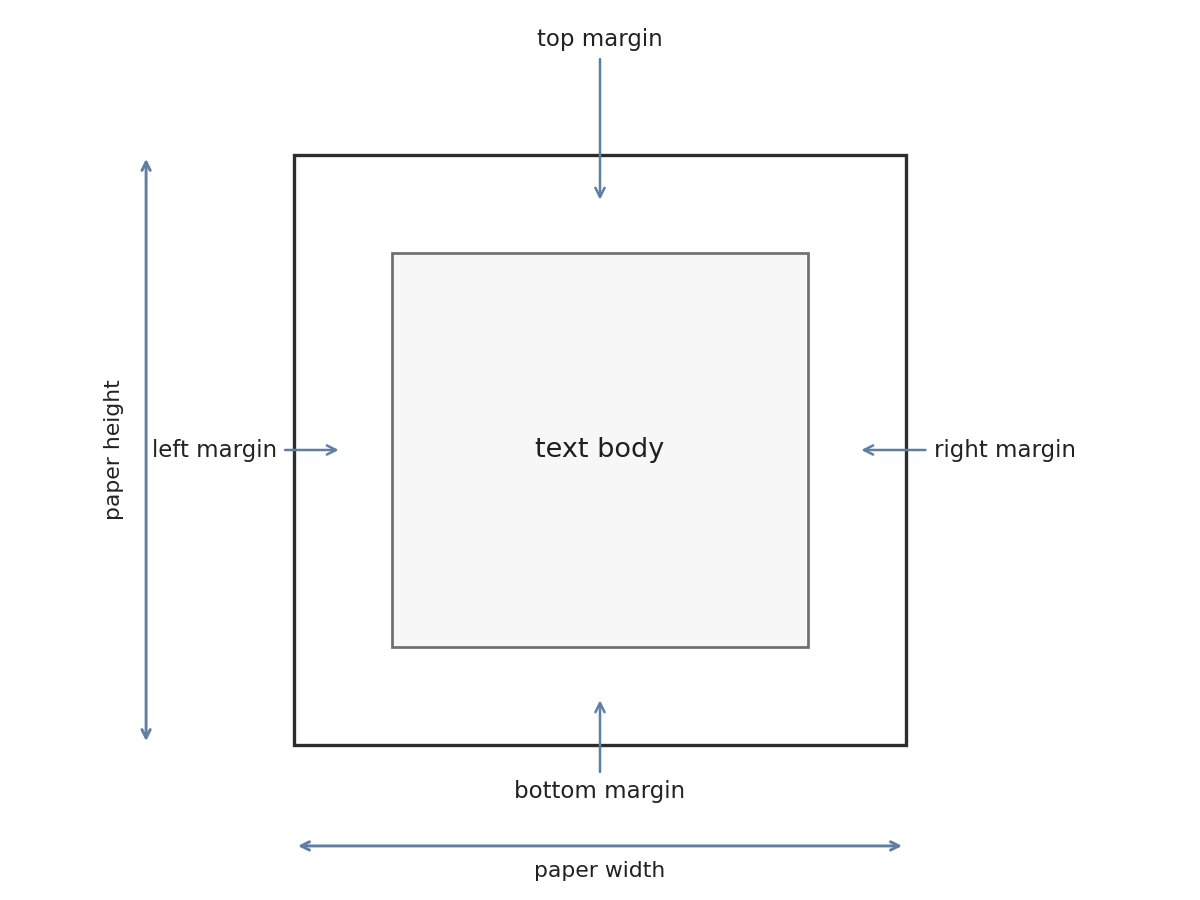
Often, a document needs different amounts of space on each side. The geometry package accepts separate options for left, right, top, and bottom. Here is an example with four distinct margin values:
When you compile this document, the left side will have noticeably more white space than the right side. All four margins are explicitly set, and geometry automatically computes the resulting text area to fit within the remaining space. Here is a quick reference for the four margin options:
| Option | Controls |
|---|---|
left | Distance from the left edge of the paper to the text |
right | Distance from the right edge of the paper to the text |
top | Distance from the top edge of the paper to the text |
bottom | Distance from the bottom edge of the paper to the text |
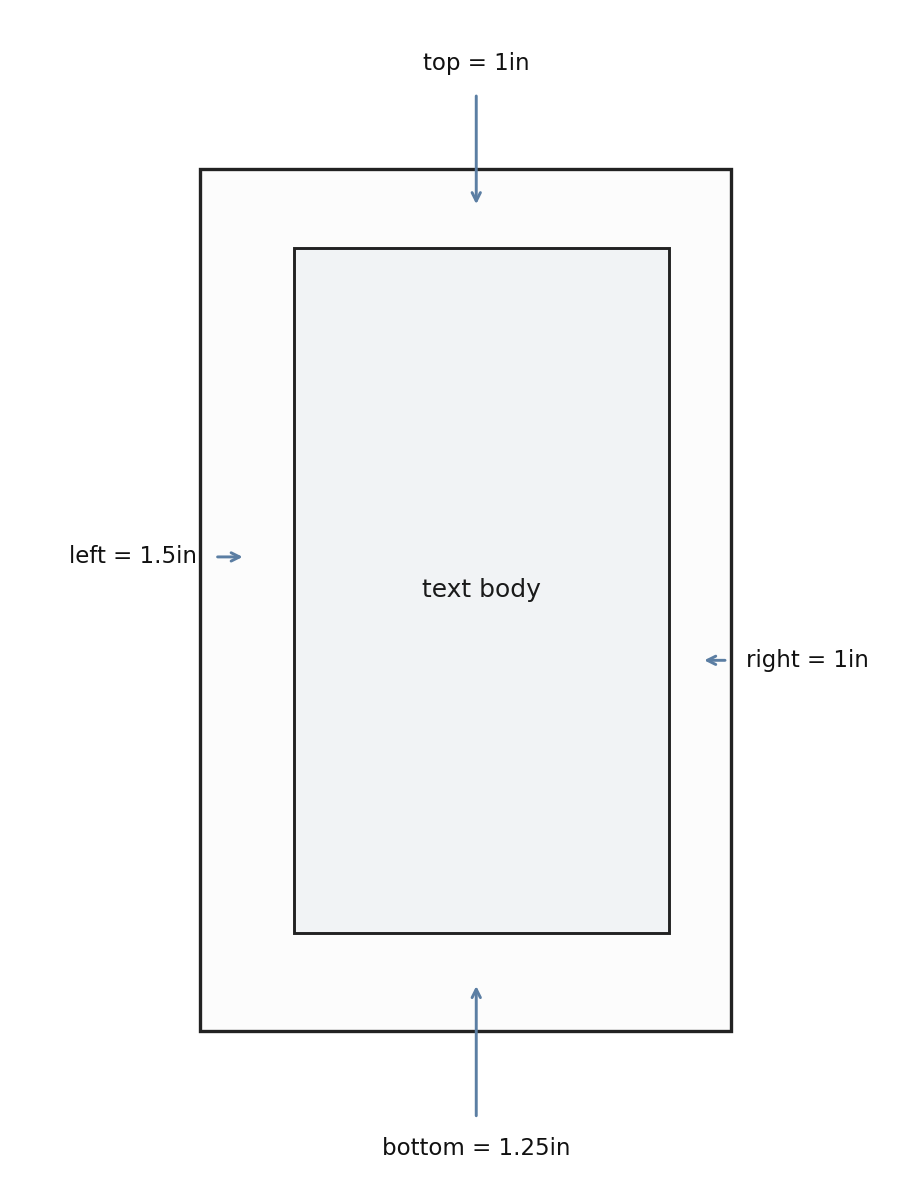
In practice, you will often combine a paper size with several margin settings in a single \usepackage line. All options are separated by commas. Let us look at a realistic scenario: preparing a report on US letter paper with a wider left margin for a binding edge, plus specific top and bottom margins:
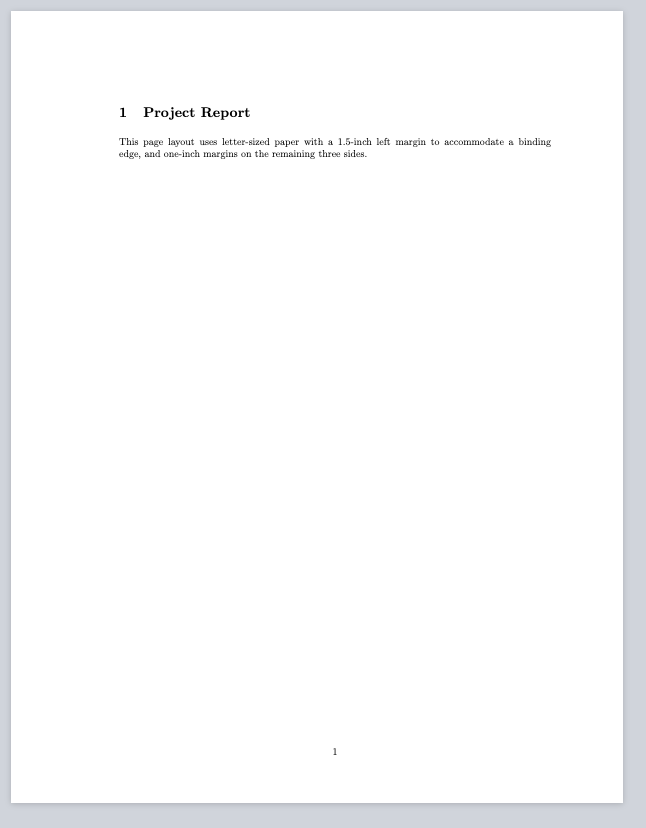
Notice how we placed each option on its own line inside the square brackets. This is purely for readability in the source file and does not affect compilation. After compiling, the output will show an asymmetric layout with extra space on the left — exactly what a bound document needs.
The key takeaway is that geometry keeps all layout decisions in one place in the preamble. If requirements change later, you update a single line rather than hunting through the document for manual spacing commands.
In this lesson, you learned how to control the overall shape of a LaTeX page using the geometry package. We started with a uniform margin for all four sides, moved to individual margin settings for asymmetric layouts, selected an explicit paper size, and finally combined all of these options into one declaration. These skills let you tailor any document to its intended use — whether that is a one-inch-margin homework assignment or a bound thesis with extra space on the left.
Now it is time to put these ideas into action. In the upcoming practice exercises, you will load the geometry package yourself, experiment with different margin combinations, and build a complete preamble that sets paper size and margins for a real-world document layout. Let's get started!