Welcome to lesson six of seven in Document Structure and Layout! You have come a long way — headings, tables of contents, lists, margins, and tables are all part of your toolkit now. Every one of those features deals with organizing text and data, but real-world documents rarely rely on words alone. Photographs, charts, diagrams, and screenshots often carry meaning that text simply cannot match. In this lesson, you will learn how to insert images into a LaTeX document using the graphicx package and control exactly how large they appear on the page.
Think about the last report, article, or presentation you read. Chances are it included at least one photograph, chart, or diagram. Images communicate information that words and tables sometimes cannot capture on their own — a single photograph of a lab setup, for example, can replace several paragraphs of written description.
In LaTeX, images are not typed directly into the source file the way text is. Instead, they are external files (such as .jpg or .png files) that we tell LaTeX to pull into the document at a specific location. This requires a dedicated package and a dedicated command, which we will explore step by step in the sections that follow.
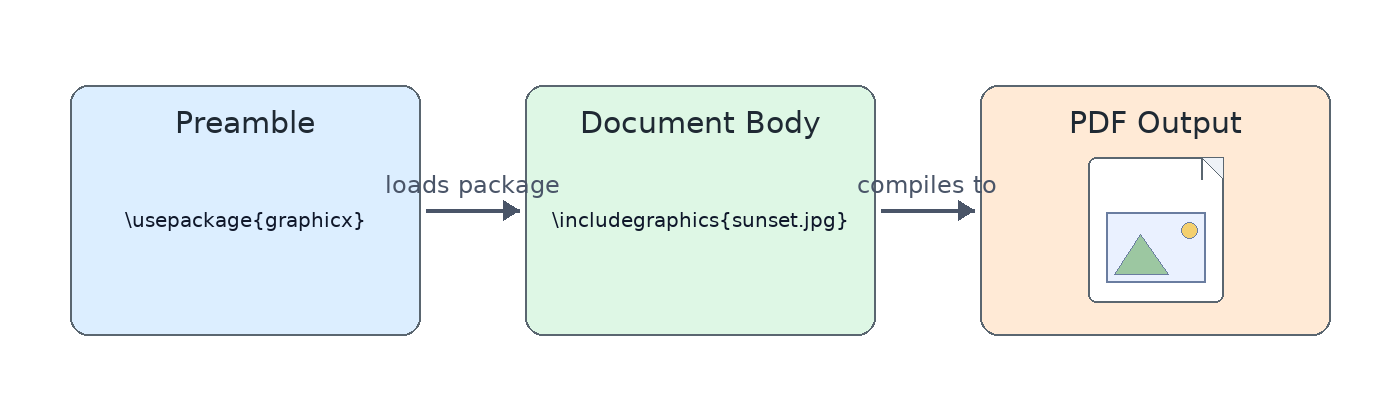
As you may recall from our work with the geometry package in lesson four, LaTeX gains extra abilities through packages loaded in the preamble with \usepackage. To work with images, we need the graphicx package. Add this single line to your preamble:
This gives us access to the \includegraphics command, which is the primary tool for bringing an image file into a document. Without loading this package first, LaTeX will not recognize the command and will report an error during compilation. Think of it as unlocking a feature before you can use it — package first, command second.
With the package loaded, inserting an image takes just one command in the document body:
Replace photo.jpg with the actual file name of your image. The file should be in the same folder as your .tex source, or you can supply a relative path like images/photo.jpg. When compiling with pdfLaTeX (the most common compiler), the supported image formats are:
- PNG — ideal for screenshots and graphics with sharp edges
- JPG — ideal for photographs
- PDF — ideal for vector diagrams and charts
Here is a minimal but complete document that loads and displays an image:
When compiled, the image appears at its original size. If the image file is large, it may overflow the margins or even extend off the page entirely. That is why controlling the display size is essential, and we will tackle that next.
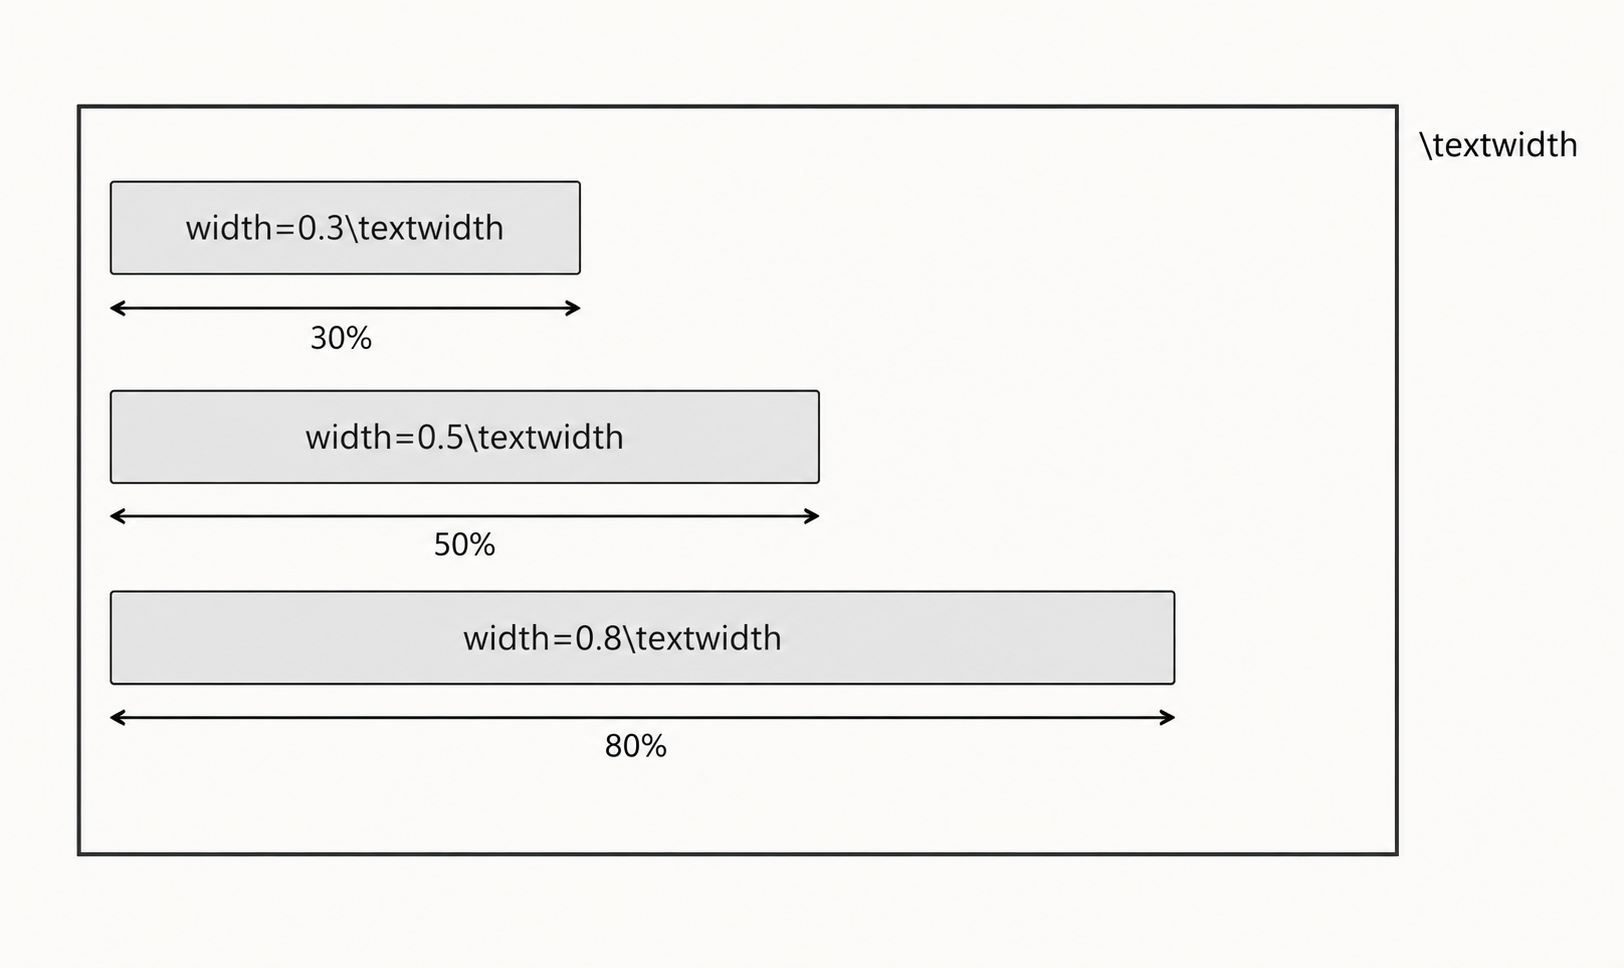
Let us put everything together in a realistic scenario. Suppose you are writing a short report section and want to include an image at 80% of the text width. The workflow follows three clear steps: load the package in the preamble, place the \includegraphics command at the desired point in the body, and size the image with an optional width argument.

Notice how the image sits naturally between two paragraphs of text, scaled to fit the layout without crowding the margins. This load, place, size pattern is the same every time you insert an image, regardless of the file format or document type. Once you internalize these three steps, adding visuals to any LaTeX document becomes routine.
In this lesson, you learned how to load the graphicx package, insert images with \includegraphics, and control their display size using width, height, and scale options. Among these, setting the width as a fraction of \textwidth is the most practical approach for keeping images well-fitted to any page layout.
In the next and final lesson of this course, we will wrap images in figure floats, add captions, and create labels that let us reference figures by number anywhere in the text. Head into the practice exercises now and try inserting and sizing images on your own — there is no better way to lock in a new command than writing it from scratch!