In the previous lesson, you learned how the CLAUDE.md file creates persistent context for Claude Code. Each time you start a session, Claude reads that file and automatically knows your project's color schemes, coding conventions, and quality standards. But what about tasks that you perform repeatedly — like checking color consistency or auditing chart styling? Even with great context, you would still need to type detailed instructions every time.
This is where custom slash commands come in. In this lesson, you will learn how to package common prompts into reusable commands stored in the .claude/commands/ directory. By the end, you will type something as simple as /review-colors penguin_scatter.py and have Claude instantly audit your visualization for color consistency — no lengthy prompts required.
Custom slash commands are reusable prompt templates that you invoke by typing a slash followed by the command name. Instead of writing a detailed prompt every time that you want Claude to perform a specific task, you write the prompt once, save it as a command, and trigger it whenever needed.
These commands live in a special directory: .claude/commands/ within your project folder. When Claude Code starts, it scans this directory and registers any command files that it finds. Each file becomes an available slash command that you can use during your session.
Here is how the discovery process works:
- You create a Markdown file in
.claude/commands/(for example,review-colors.md). Claude Codedetects this file when you start a session or use the/menu.- The command becomes available as
/review-colors. - When you type that command,
Claudereads the file contents and executes them as a prompt.
Commands stored in your project's .claude/commands/ folder are project-specific and available when working in that project. You can also create user-level commands in ~/.claude/commands/ that apply across all projects. For visualization workflows tied to a specific dataset and style guide, project-level commands are typically what you want.
Before creating your first command, you need the directory structure in place. Custom commands must be stored in a specific folder so Claude can discover them.
Here is how your project should be organized to support custom commands:
If the .claude/commands/ directory does not exist, you can create it with a single terminal command: mkdir -p .claude/commands. The -p flag creates both the .claude parent directory and the commands subdirectory in one step. Once this structure exists, any Markdown file you place inside will be registered as a new command the next time you start a session.
A command file is simply a Markdown file with a .md extension. The filename determines the command name, and the file contents become the prompt that Claude executes.
Here is how filenames map to command names:
| Filename | Command Name |
|---|---|
review-colors.md | /review-colors |
check-chart.md | /check-chart |
export-highres.md | /export-highres |
Notice that hyphens in the filename become hyphens in the command name. Use lowercase letters and hyphens for readability. Avoid spaces or special characters in filenames.
Command files can include optional YAML frontmatter at the top to provide metadata and constraints. Frontmatter is enclosed between triple dashes (---) and appears before your prompt content.
Two useful frontmatter fields are:
description: A short summary that appears when browsing available commands in the/menu. This helps you and your team quickly understand what each command does.allowed-tools: Restricts which toolsClaudecan use when executing the command. This is useful for safety — for example, limiting a review command to only read files without making changes.
Frontmatter is entirely optional. If you omit it, your command will still work — Claude will simply have access to all its default tools and the command won't have a description in the menu. However, adding frontmatter makes your commands more discoverable and predictable.
Let's create a practical command that checks whether your visualization scripts use the approved color palette. As a reminder from the previous lesson, your CLAUDE.md defined species colors: Adelie (#FF6B6B), Chinstrap (#4ECDC4), and Gentoo (#95E1D3).
Create a file named review-colors.md inside the .claude/commands/ directory with the following content:
This command includes frontmatter that describes its purpose and restricts Claude to only reading files — it cannot modify anything. The $ARGUMENTS placeholder on the first line of the prompt will be replaced with whatever filename you specify when running the command.
With the command file in place, you can now invoke it by typing /review-colors followed by the file you want to check. Claude reads the command file, replaces $ARGUMENTS with your input, applies the constraints from the frontmatter, and executes the prompt.
Here is what the interaction looks like when checking a Python script:
With a single command, Claude read your visualization script, compared colors against your standards, and provided actionable recommendations with exact code snippets. Notice that Claude only used the Read tool — the allowed-tools constraint in the frontmatter prevented it from making direct modifications to your file.
The same command works on exported visualization images. Claude can analyze the actual colors rendered in a PNG file, which is useful for verifying that your final output matches expectations — even if you don't have access to the source code.
Here is the visualization we want to check:
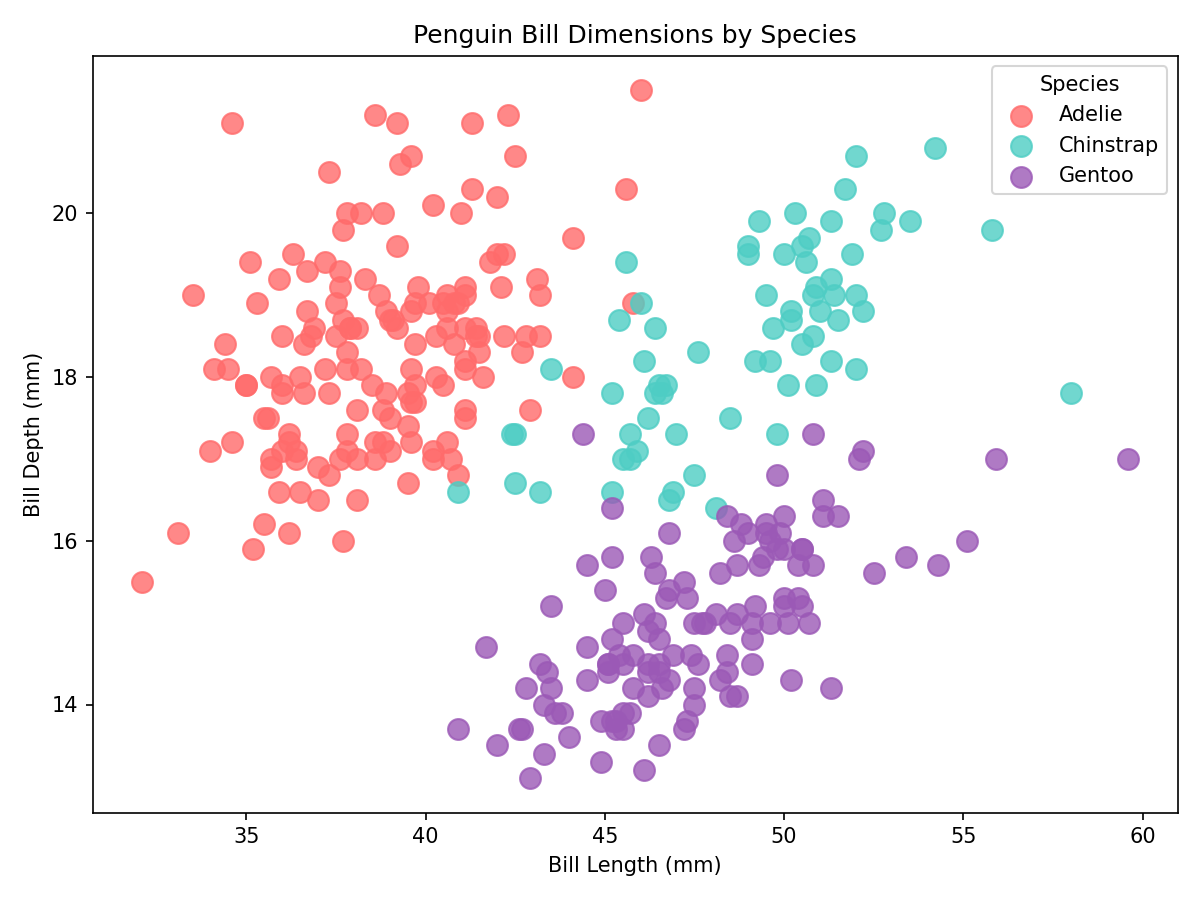
Running the same /review-colors command on this image:
Claude analyzed the image pixels directly and identified the same color deviation. This flexibility makes your command useful for auditing both source code and final outputs — catching issues regardless of where they appear in your workflow.
Your command library now works in harmony with the CLAUDE.md file that you created in the previous lesson. These two customization tools serve complementary purposes.
The CLAUDE.md file establishes what Claude should always know: color palettes, typography standards, coding conventions, and quality checklists. This context loads automatically at the start of every session. Slash commands define what Claude should do on demand: audit colors, check individual charts, export files, or suggest improvements. Each command can reference the standards in CLAUDE.md without repeating them.
For team workflows, commands ensure that everyone uses the same quality checks and processes. For solo work, they save you from typing the same detailed prompts across sessions. Either way, the combination of persistent context and active shortcuts creates a powerful, repeatable workflow.
You have learned how to extend Claude Code's customization from passive context into active, triggerable workflows. The key concepts are:
- Command files are Markdown files in
.claude/commands/that become slash commands - Frontmatter (optional) adds descriptions and tool restrictions using YAML between
---markers $ARGUMENTSplaceholder inserts user input (like filenames) into your prompt template- Commands work on multiple file types — the same command can analyze Python scripts and images
In the upcoming practice exercises, you will create your own command library for visualization workflows. You will write commands that audit styling, check individual charts, and verify color compliance — all triggered with a simple slash. Get ready to build the shortcuts that will make your visualization work faster and more consistent.
