Welcome back to our Advanced Geometry and Model Loading course! As we embark on this third lesson, we're building upon the solid foundation of face culling optimization and sophisticated 3D model loading we've established in our previous work. Now that you've mastered loading complex models using tiny_obj_loader and understand how face culling enhances rendering performance, we're ready to address a crucial element that transforms isolated 3D scenes into truly immersive experiences: environmental backgrounds using cubemap skyboxes.
In this lesson, we'll elevate your 3D applications from displaying models in empty space to creating rich, atmospheric worlds that extend infinitely in all directions. Skyboxes provide the illusion of vast landscapes, dramatic skies, or cosmic vistas that respond naturally to camera movement while maintaining perfect visual continuity. We'll implement a complete cubemap system that loads six individual texture faces, renders them as an infinite background that follows the camera, and integrates seamlessly with your existing model rendering pipeline.
By mastering these techniques, you'll possess the tools to create professional-quality 3D environments that rival those found in modern games and interactive applications, setting the stage for even more advanced rendering techniques in our final lesson.
A skybox creates one of the most convincing illusions in 3D graphics: the appearance of infinite environmental depth surrounding your scene. This technique renders environmental imagery on the inner surfaces of a large cube that encompasses your entire 3D world. The genius lies in how this cube follows your camera's rotation but never translates, ensuring that the background always appears infinitely distant regardless of where you move in the scene.
The foundation of effective skybox rendering rests on cubemap textures, a specialized form of texture mapping consisting of six individual 2D images. These images represent views along the positive and negative axes of your 3D coordinate system: right, left, top, bottom, front, and back. When properly assembled, these six faces form a seamless 360-degree panorama that can be sampled using simple 3D direction vectors.
For example, if you have the following equirectangular panorama:
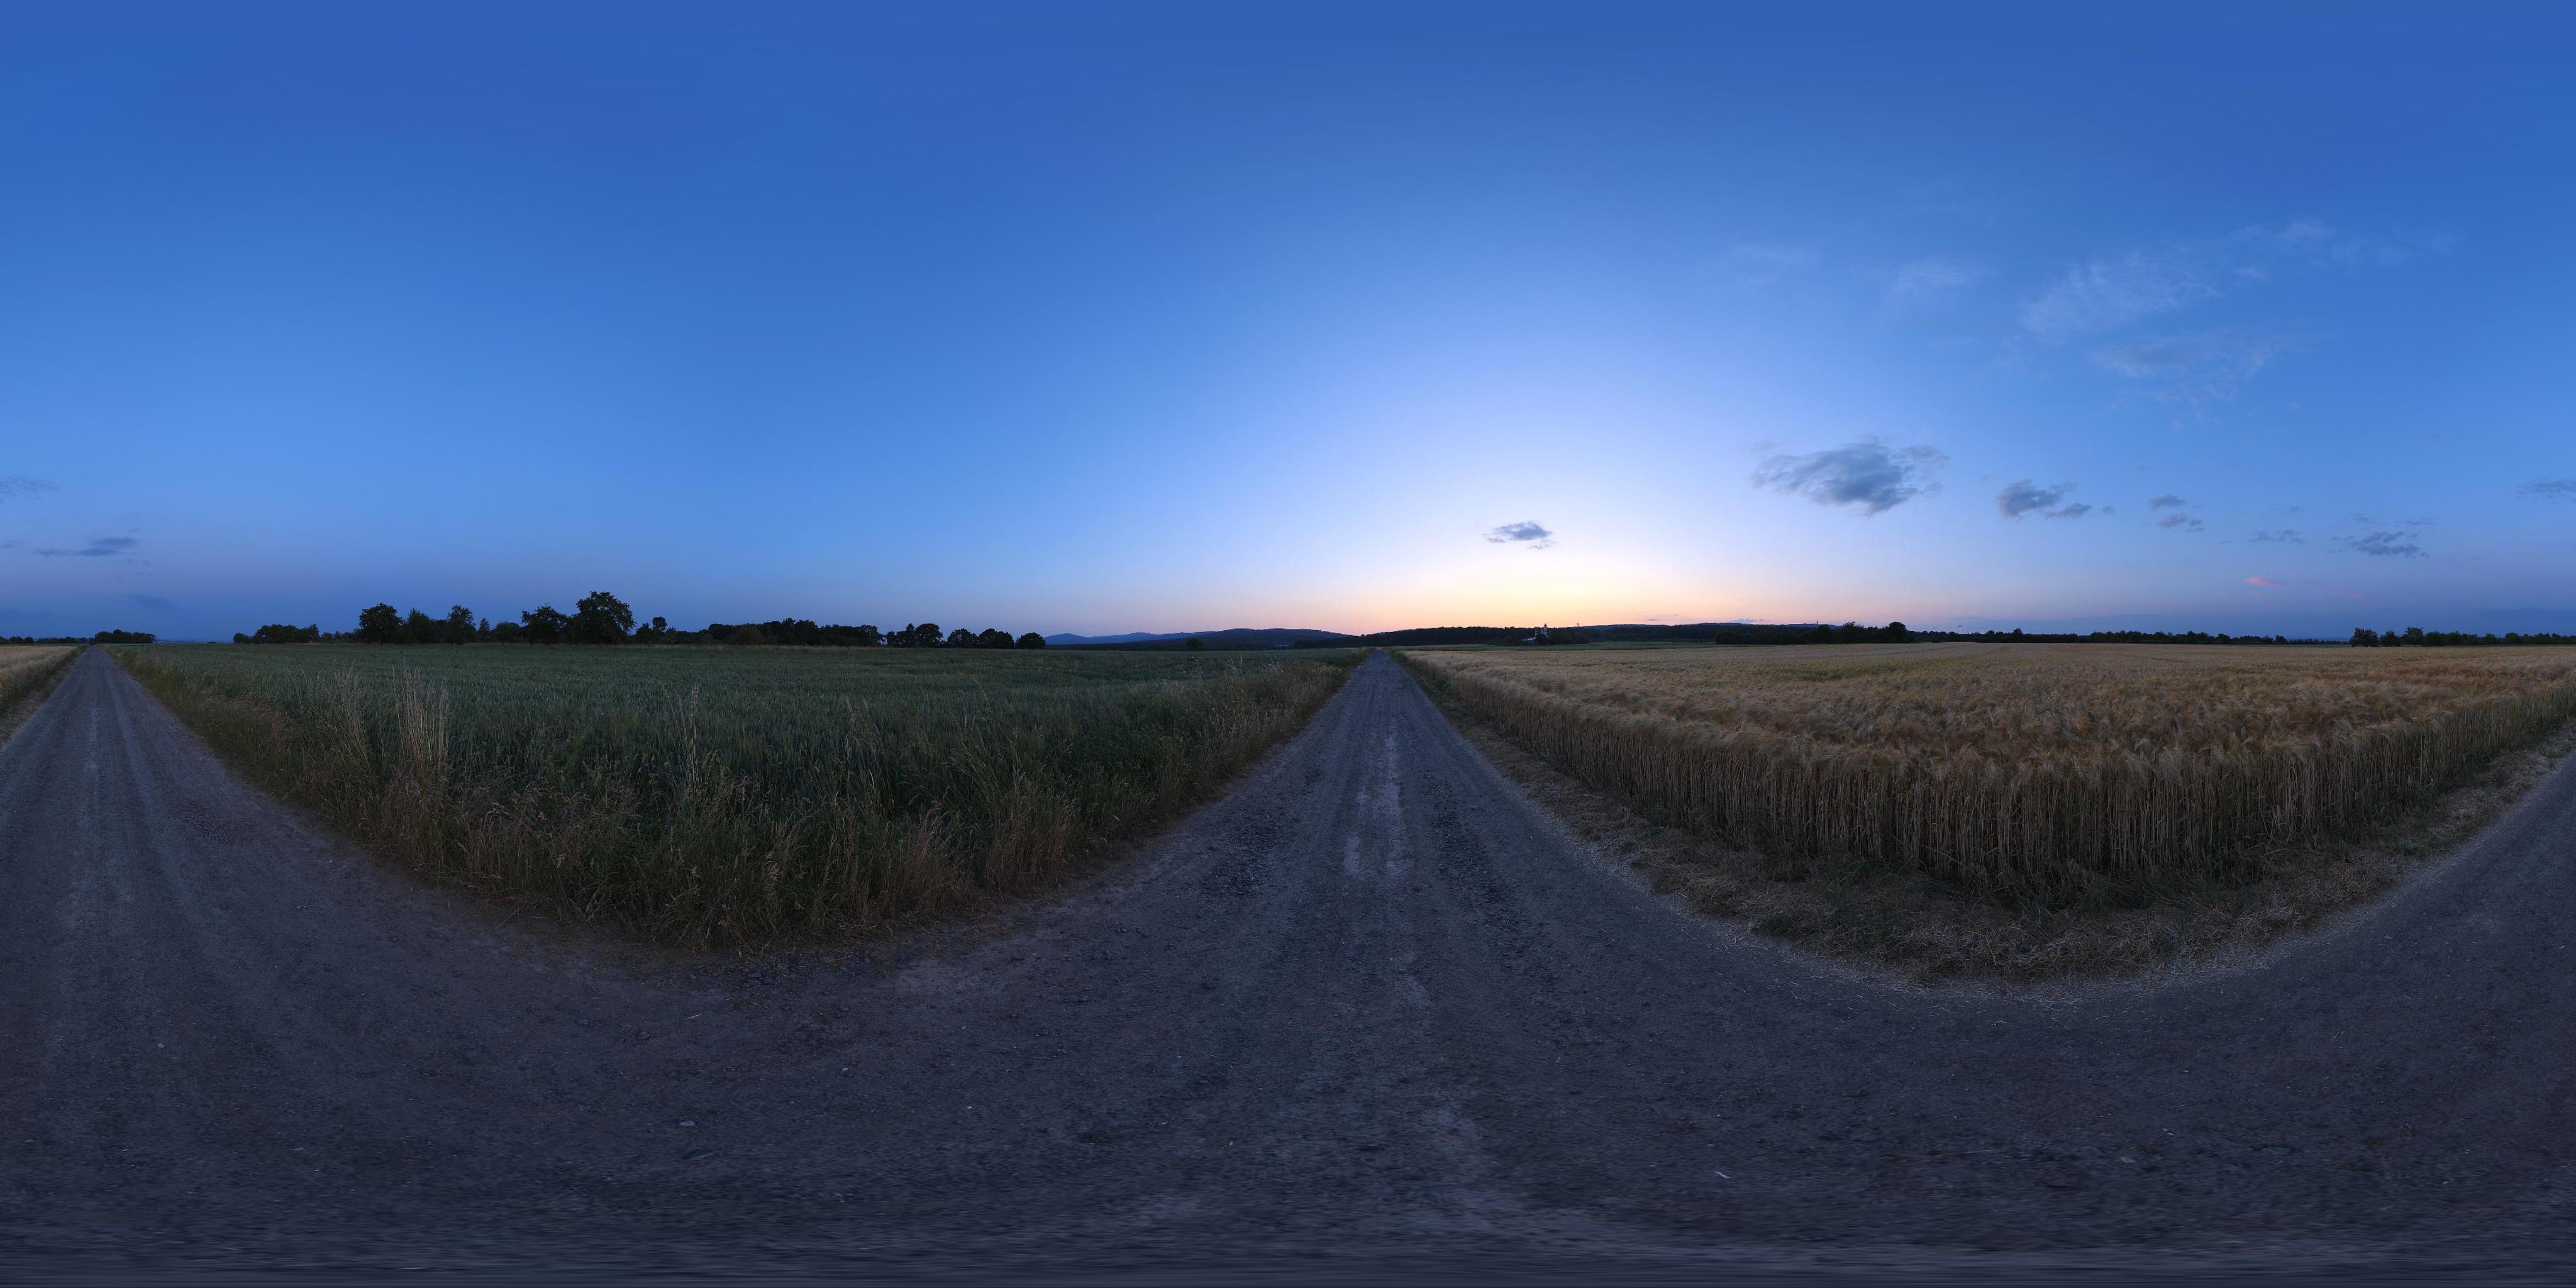
This panoramic format captures a complete 360-degree view but presents challenges for real-time rendering due to complex mathematical transformations and distortion artifacts, particularly near the poles where pixel density varies dramatically.
Cubemaps excel in environmental representation because they align naturally with how 3D graphics hardware processes directional information. Instead of complex UV coordinate transformations, you can sample a cubemap using a 3D direction vector that points from the center toward the desired sample location. This efficiency makes cubemaps invaluable not only for skybox rendering but also for advanced lighting techniques like environment mapping and realistic reflections.
The conversion from equirectangular panoramas to cubemap format involves projecting the spherical image data onto six planar surfaces, eliminating distortion while creating textures optimized for GPU sampling:
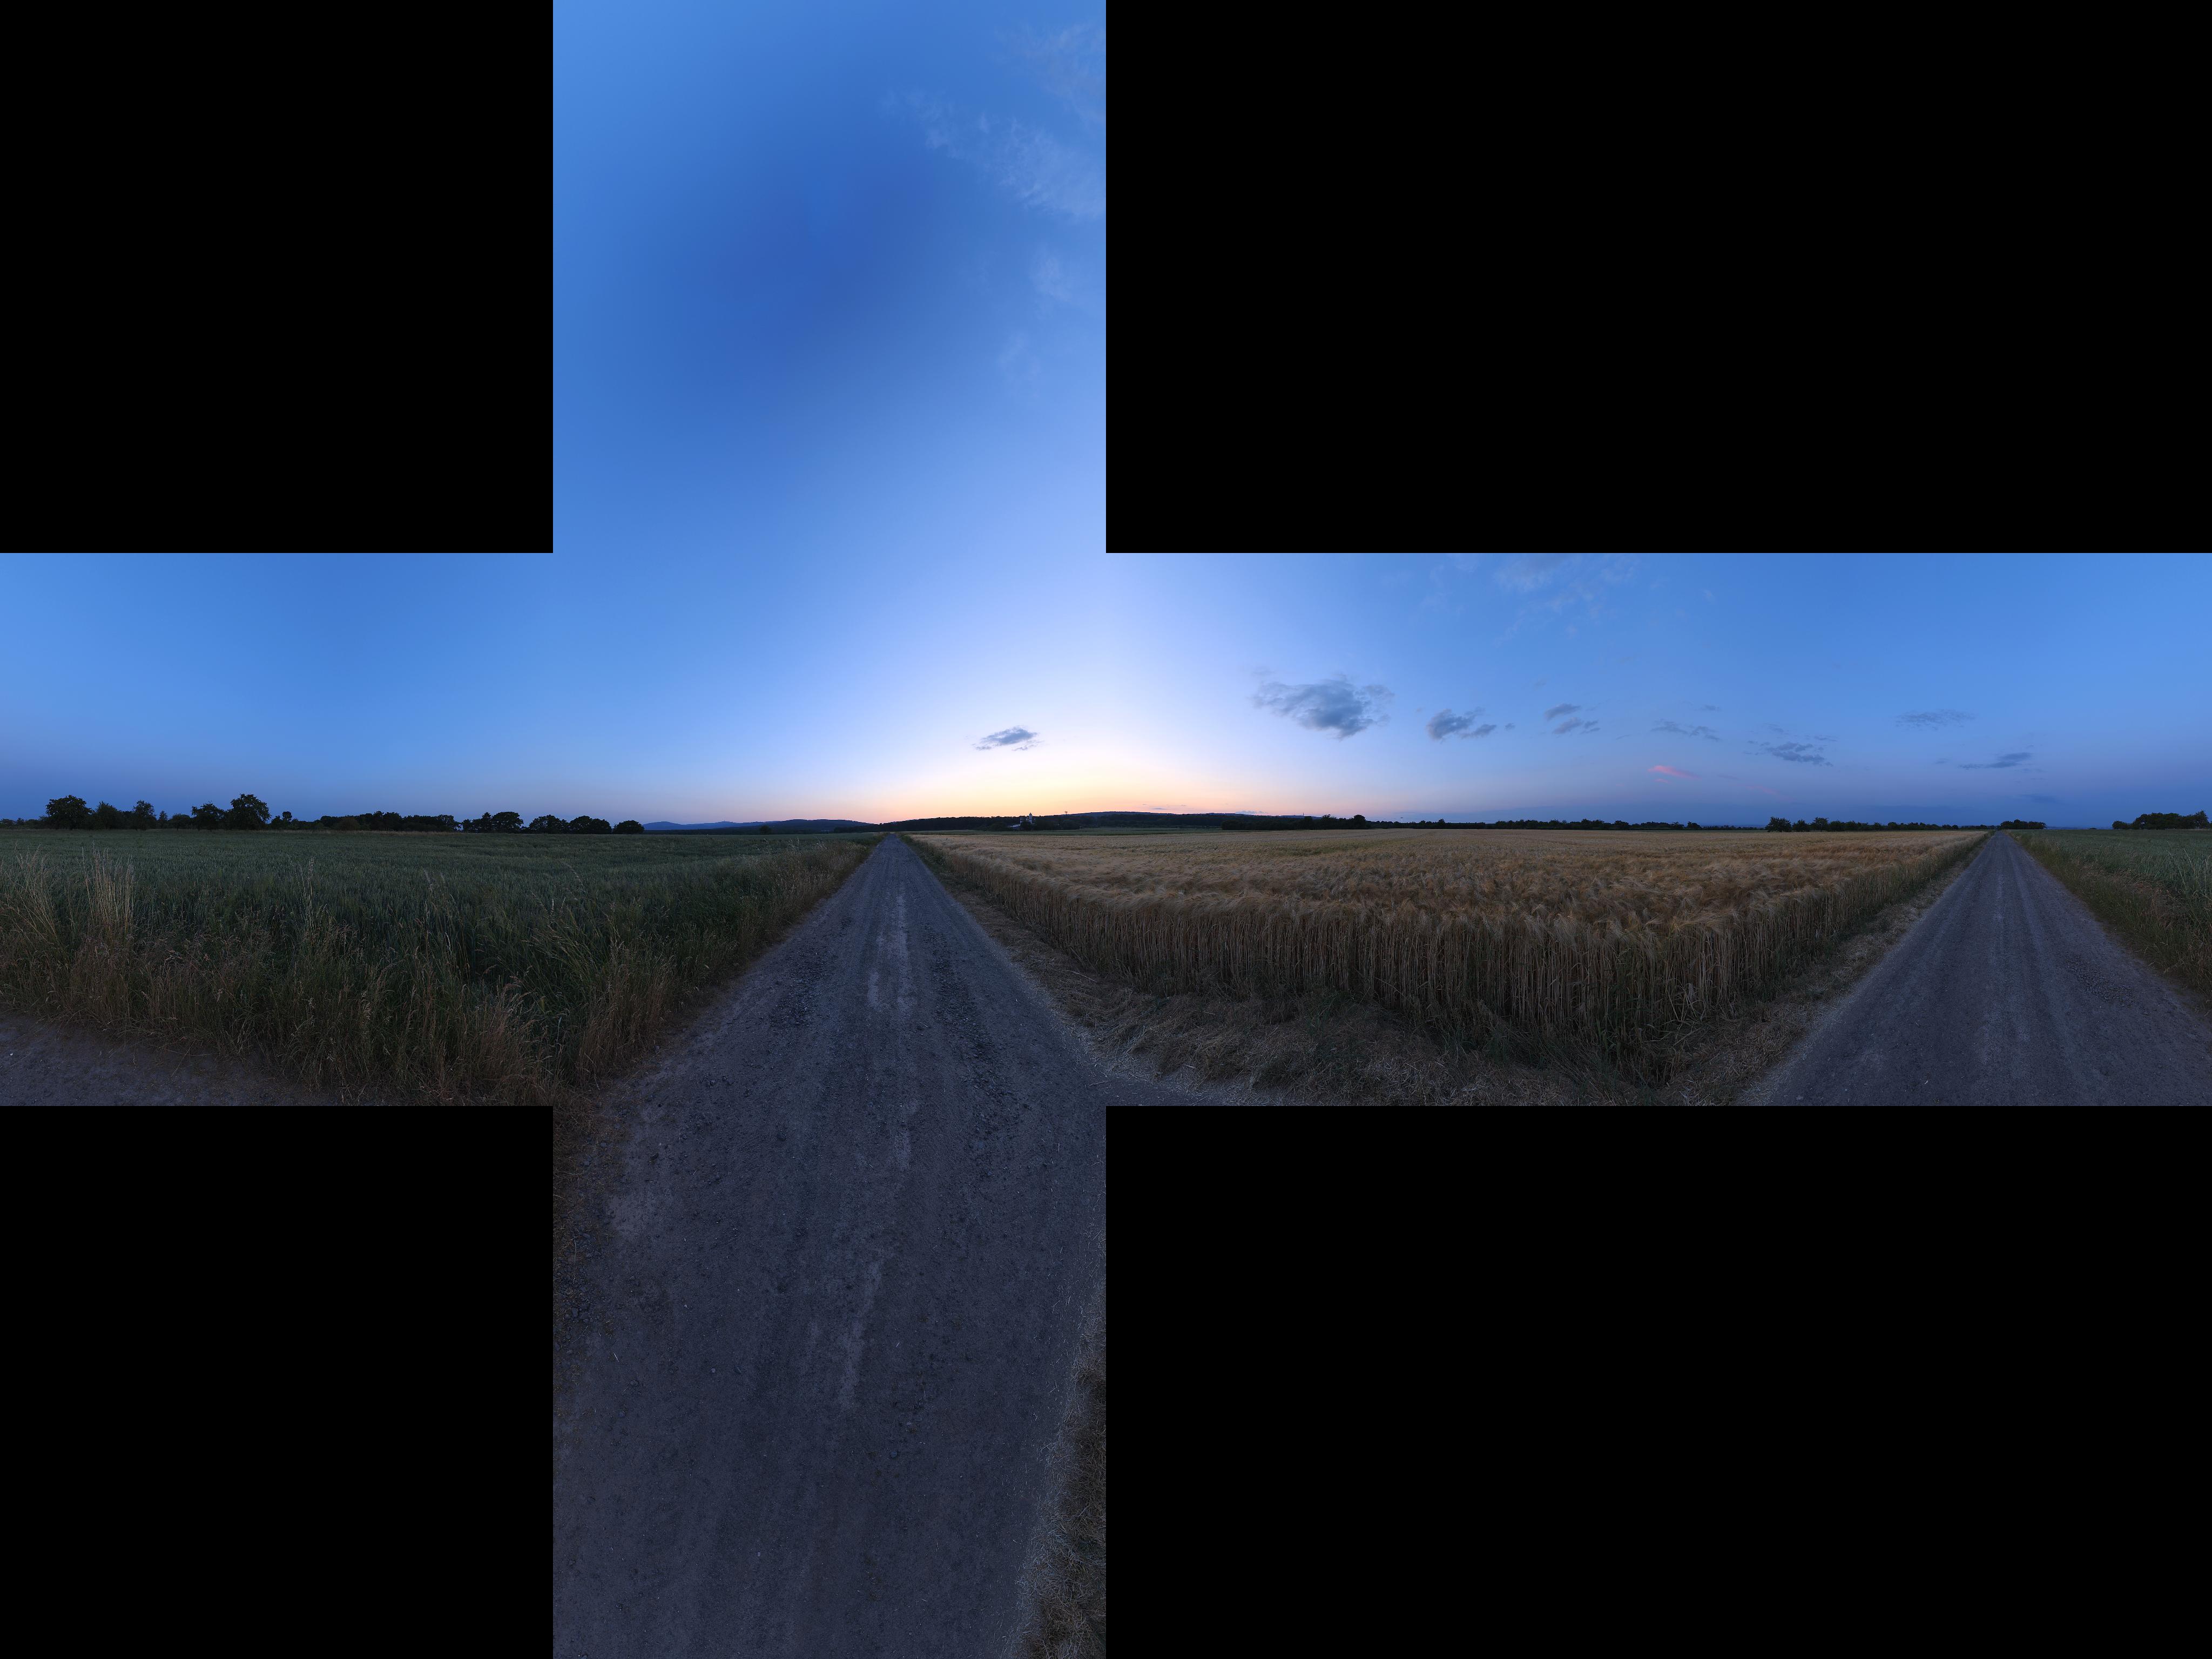
Each face maintains uniform pixel density and represents an undistorted view along its corresponding axis direction. This systematic organization ensures that adjacent faces align perfectly at their shared edges, creating seamless transitions when the GPU samples across face boundaries. Modern graphics hardware includes specialized sampling units designed specifically for cubemap textures, automatically handling face selection and filtering while delivering exceptional performance for real-time environmental mapping.
Our cubemap implementation begins with a specialized texture loading function that handles the unique requirements of six-sided environmental textures:
This function differs fundamentally from standard 2D texture loading in several critical ways. First, we bind to GL_TEXTURE_CUBE_MAP rather than GL_TEXTURE_2D, and we deliberately disable vertical flipping since cubemap faces must maintain specific orientations to align properly across face boundaries. The loop systematically loads each face into consecutive cubemap targets, beginning with GL_TEXTURE_CUBE_MAP_POSITIVE_X and proceeding through all six faces in OpenGL's standardized order.
The clamping parameters ensure that sampling near face edges doesn't wrap to opposite faces, which would create visual artifacts at cubemap boundaries.
The skybox geometry consists of a simple unit cube centered at the origin, but with a fascinating property: we only care about the cube's directional characteristics, not its actual size or position in world space:
Each vertex position serves a dual purpose: it defines the cube's geometric structure while simultaneously providing the sampling direction vector for our cubemap texture. This elegant design eliminates the need for separate texture coordinates because the vertex positions themselves indicate which direction to sample from the cubemap.
The vertex arrangement maintains proper winding order for face culling compatibility while ensuring the correct spatial relationship between geometric faces and their corresponding cubemap textures. This attention to winding order proves crucial when integrating with the face culling optimizations from our first lesson.
The skybox vertex shader implements several sophisticated transformations that create the convincing illusion of infinite distance:
This transformation applies several critical techniques that work together to create the skybox effect. The expression mat4(mat3(uView)) extracts only the rotational component of the view matrix by converting it to a 3x3 matrix and back to 4x4, effectively removing translation while preserving camera orientation. This ensures the skybox rotates with your camera but never moves closer or farther away.
The assignment gl_Position = pos.xyww represents a clever optimization: by setting the Z component equal to W, we ensure that after perspective division, the depth value becomes exactly 1.0 (the maximum possible depth in normalized device coordinates). This guarantees that skybox pixels always render behind all other geometry in your scene, regardless of the camera's position or orientation.
The skybox fragment shader demonstrates the remarkable elegance of 3D texture sampling:
This deceptively simple shader performs sophisticated 3D texture sampling operations behind the scenes. The vDirection vector, passed directly from our vertex positions, serves as a 3D texture coordinate that automatically determines the appropriate cubemap face and sampling location based on the vector's direction components.
The GPU hardware handles the complex mathematics of face selection, bilinear filtering between adjacent pixels, and maintaining seamless continuity across face boundaries. This hardware acceleration allows you to achieve professional-quality environmental mapping with minimal computational overhead and remarkably simple shader code.
The integration of skybox rendering into your main rendering loop requires careful consideration of depth testing and rendering order:
The rendering order proves crucial for optimal performance: you render all foreground geometry first, then render the skybox as a final background pass. This approach leverages early depth testing to automatically skip skybox pixel processing wherever scene geometry already exists, providing significant performance improvements in complex scenes.
The temporary modification to GL_LEQUAL allows skybox pixels to pass the depth test even when they're at maximum depth (1.0), while the subsequent restoration to GL_LESS maintains normal depth relationships for subsequent rendering operations.
The cubemap face organization must follow OpenGL's standardized layout conventions to achieve seamless environmental mapping:
This specific ordering aligns precisely with OpenGL's cubemap conventions, ensuring that your loaded images map correctly to their intended spatial directions. The right and left faces correspond to positive and negative X-axis views, top and bottom represent positive and negative Y-axis perspectives, and front and back cover the positive and negative Z-axis directions.
Proper face organization is absolutely critical for achieving visual continuity: adjacent faces must align perfectly at their shared edges to prevent visible seams or discontinuities in your final rendered environment. Many cubemap creation tools automatically generate faces in this standardized order to ensure compatibility with OpenGL applications.
When you run the complete implementation, the results demonstrate the transformative power of professional skybox rendering:

Your enhanced application now creates an immediate sense of spatial context and environmental scale. The teapot model from our previous lesson exists within a rich environmental setting that responds naturally to camera movement: rotating your view reveals different portions of the skybox panorama, while moving through the scene maintains the compelling illusion that the environment extends infinitely in all directions.
The seamless integration between detailed foreground geometry and expansive background imagery creates a cohesive visual experience in which complex 3D models coexist harmoniously with atmospheric environmental context. This integration showcases how individual graphics techniques combine synergistically to produce results that exceed the sum of their parts, demonstrating the professional-quality visual experiences achievable through careful implementation of fundamental rendering techniques.
We have successfully implemented a comprehensive skybox system using cubemap textures, transforming your 3D applications from isolated geometric displays into immersive environmental experiences. Your implementation now handles the complexities of six-sided texture loading, specialized vertex transformations for infinite distance effects, and optimized rendering integration that maintains excellent performance while delivering visually stunning results. The cubemap technology you've mastered serves as both an immediate visual enhancement and a foundation for advanced techniques like environment mapping, dynamic reflections, and physically based lighting systems.
The skybox system you've created integrates seamlessly with the model loading and face culling optimizations from our previous lessons, demonstrating how individual graphics programming techniques combine to create sophisticated rendering pipelines. The upcoming practice exercises will challenge you to experiment with different cubemap configurations and witness firsthand how environmental context dramatically enhances the impact and professionalism of real-time 3D graphics applications.
