Welcome back to Your First LaTeX Document! You are now on lesson five of six — just one more lesson after this and you will have completed the entire course. So far you have mastered the write-compile-view workflow, built documents from scratch, learned core syntax patterns, and styled text with bold, italic, and emphasis. Today the focus shifts from what text looks like to how big it looks.
By the end of this lesson, you will know how to use LaTeX's ten standard size commands, how to limit a size change to exactly the text you choose, and how to predict the order of every built-in size from smallest to largest.
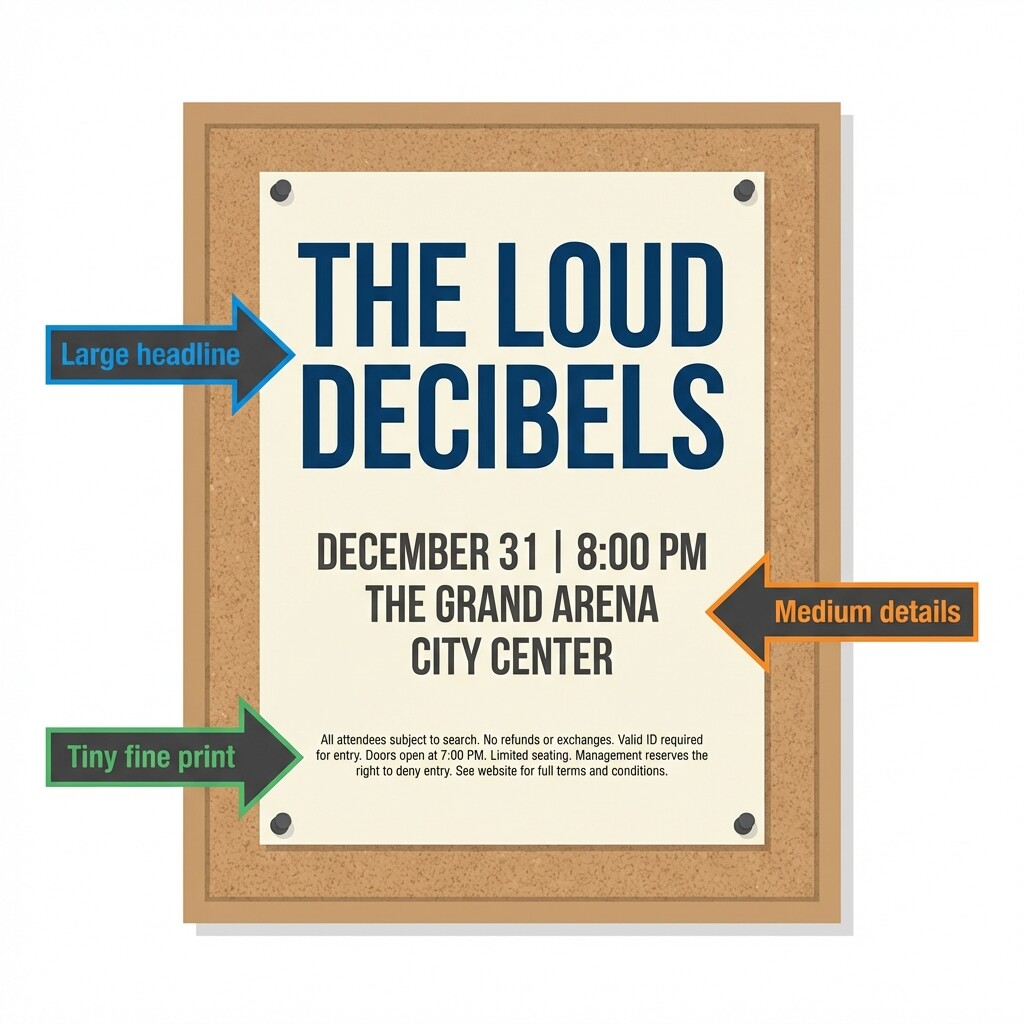
Think about a concert poster taped to a bulletin board. The band name is printed huge so you can read it from across the hall, the date and venue sit at a comfortable reading size in the middle, and the fine print about ticket policies appears tiny at the bottom. Each piece of information has a size that matches its importance.
The same idea applies to any document you create in LaTeX: headings, body text, captions, and disclaimers all benefit from intentional size choices. In the previous lesson, you used commands like \textbf{} and \textit{} that accept text as an argument between curly braces. Font size in LaTeX works a little differently, and understanding that difference is the key idea for today.
Commands like \textbf{bold text} are argument-based: you pass the target text inside braces, and only that text is affected. Size commands such as \large are declarations, sometimes called switches. They do not take a text argument. Instead, a size command changes the font size from that point forward until LaTeX hits a boundary.
When compiled, the first sentence appears at the default size. Every word after \large appears larger for the rest of the document. This behavior is useful to know, but in most real documents you want only some text to change size — so we need a way to contain the change, which we will cover shortly.
LaTeX provides ten size commands arranged in a fixed order from smallest to largest. The table below lists each one by rank:
| Rank | Command | Relative Effect |
|---|---|---|
| 1 | \tiny | Smallest |
| 2 | \scriptsize | Very small |
| 3 | \footnotesize | Footnote-level |
| 4 | \small | Slightly below normal |
| 5 | \normalsize | Document default |
| 6 | \large | Slightly above normal |
| 7 | \Large | Medium-large |
| 8 | \LARGE | Large |
| 9 | \huge | Very large |
| 10 | \Huge | Largest available |
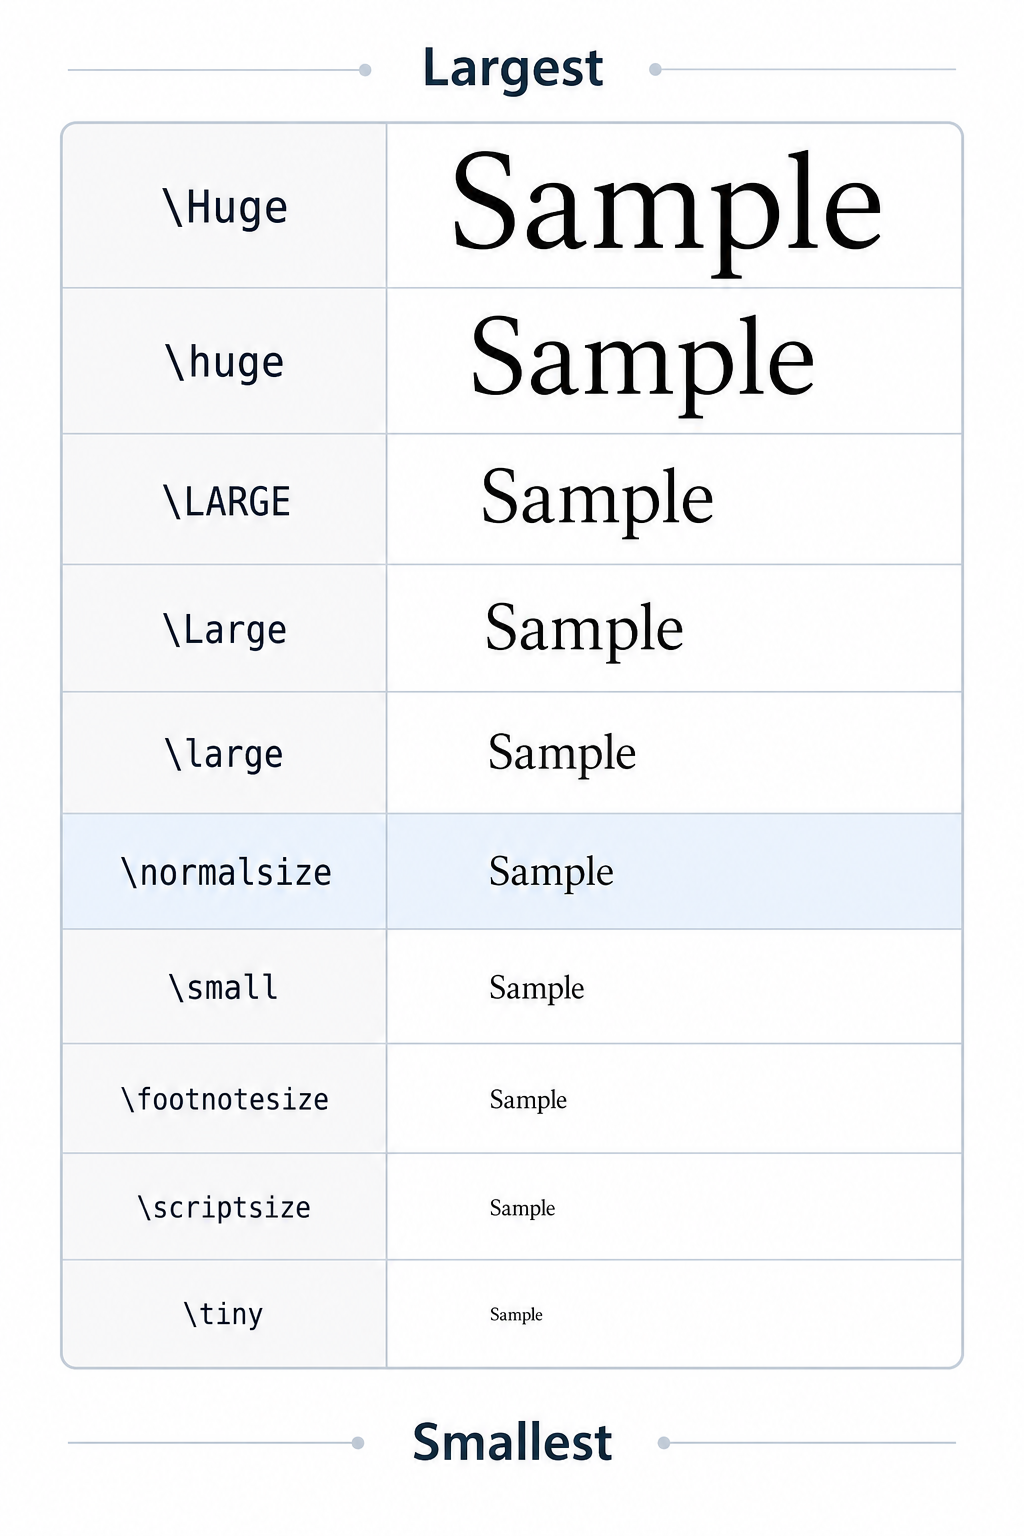
Pay close attention to capitalization once you move above \normalsize. The commands \large, \Large, and \LARGE differ only in case, yet each produces a noticeably different size. The same goes for \huge and \Huge. Mixing up the capitalization is one of the most common beginner mistakes. The exact point sizes depend on your document class and base font setting, but the order never changes.
Because size commands are switches, you need a way to turn them off. The most common method is brace grouping: wrap the size command and the text it should affect inside a pair of curly braces.
The opening brace starts a group, \large flips the size switch inside that group, and the closing brace ends the group. After the closing brace, the font size returns to whatever it was before. Here is the pattern to remember:
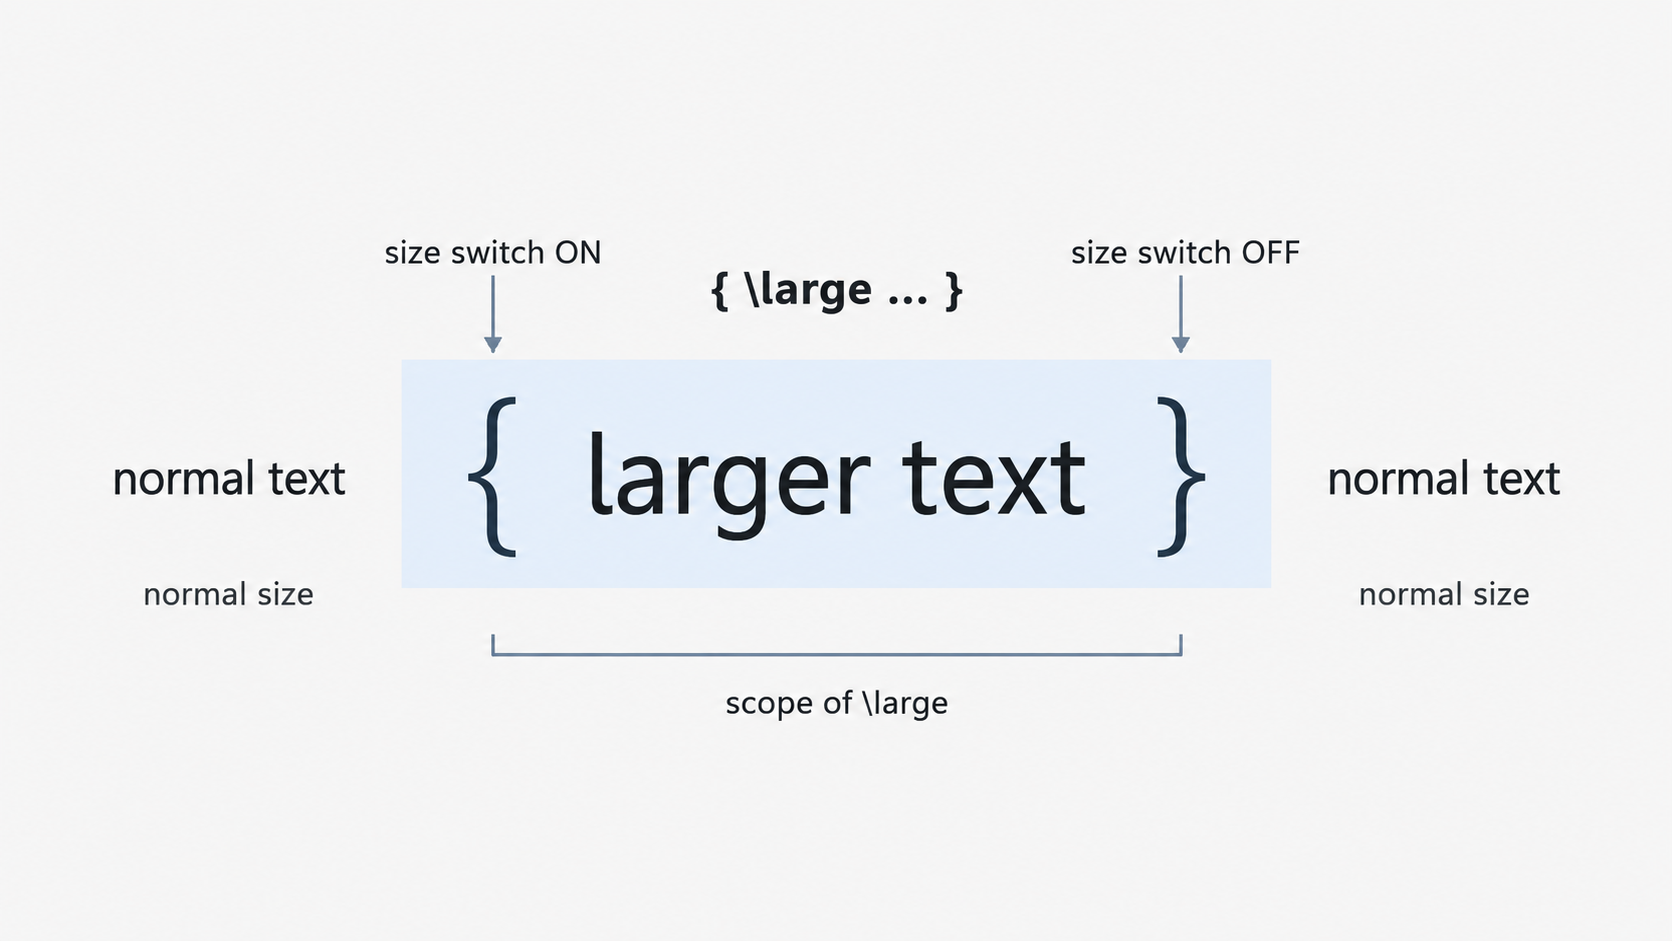
You can place any of the ten size commands in that slot. For instance, {\tiny fine print} produces very small text, while {\Huge headline} produces very large text. This will feel familiar because, as you learned in earlier lessons, curly braces define the scope of many LaTeX operations. The same principle is at work here.
Environments created with \begin{} and \end{} also form a group — a concept you practiced back in Lesson 3. This means a size switch placed inside an environment stays contained automatically:
Because the center environment acts as a group boundary, the \Large command does not leak into the paragraph that follows. You do not need extra braces when working inside an environment. Both scoping methods are valid: brace grouping is ideal for quick inline adjustments, while environment scoping is convenient when you are already using an environment for alignment or other formatting.
Let's combine everything in a small but realistic example. Imagine you are creating a one-page event flyer with a big title, a normal-sized description, and a small disclaimer at the bottom:
Each section sits inside its own brace group with a different size command. The title uses \Huge to grab attention, the body uses \normalsize for comfortable reading, and the disclaimer uses \footnotesize for fine print. After each closing brace the size resets, so no change bleeds into the next block. This pattern of matching size to importance is one you will reach for again and again in your own documents.
In this lesson, you learned that LaTeX size commands are switches rather than argument-based commands. You explored the ten standard sizes from \tiny to \Huge, and you practiced containing size changes with brace grouping and environment boundaries. The core takeaway is straightforward: braces and environments act as fences that keep a size change inside and let everything outside return to normal.
Up next are the practice exercises, where you will build a visual size sampler, prove that braces prevent size changes from leaking, and design your own event flyer with multiple font sizes working in harmony. Jump in and see the size ladder come to life on the page!
