Reading Pressure Gauges
Introduction
So far in Reading Everyday Measurements, we have built a steady toolkit: identifying value, unit, and attribute in any measurement statement, reading and scaling nutrition labels, and matching body measurements to size charts across different systems. With three lessons behind us and one more after this, we are now turning to a measurement you might check every week without thinking much about it — pressure. In this fourth lesson, we will learn how to read pressure values from analog and digital gauges, identify which unit a gauge is using, locate the recommended pressure for a piece of equipment, and decide whether a reading is too low, too high, or just right.
What Pressure Means in Everyday Life
Pressure is a measure of how much force is being applied over a given area. When we inflate a car tire, the air molecules inside push outward against the tire walls. The harder they push per unit of area, the higher the pressure reading climbs.
We run into pressure readings more often than we might realize — checking car or bicycle tires, adjusting an espresso machine, glancing at a blood pressure cuff, or scanning a weather report. The good news is that reading a pressure value relies on the same core skill from Lesson 1: find the number, note the unit, and understand what is being measured. The new piece here is learning the specific units and scales that pressure gauges use, which is exactly where we are headed next.
Three Common Pressure Units
Pressure is expressed in several units depending on the device and the region. The three we will encounter most often are:
| Unit | Abbreviation | Where You Will See It |
|---|---|---|
| Pounds per square inch | PSI | US car and bike tires, air compressors |
| Kilopascals | kPa | Metric tire placards, international specs |
| Bar | bar | Espresso machines, European tire markings |
A helpful set of approximate equivalences to keep in mind:
We do not need to memorize exact conversions right now. What matters most is being able to tell which unit a gauge is showing before we read the number. A reading of means very different things depending on whether the gauge says PSI, kPa, or bar — always look for the unit label printed on the gauge face, dial rim, or digital screen.
Reading an Analog Pressure Gauge
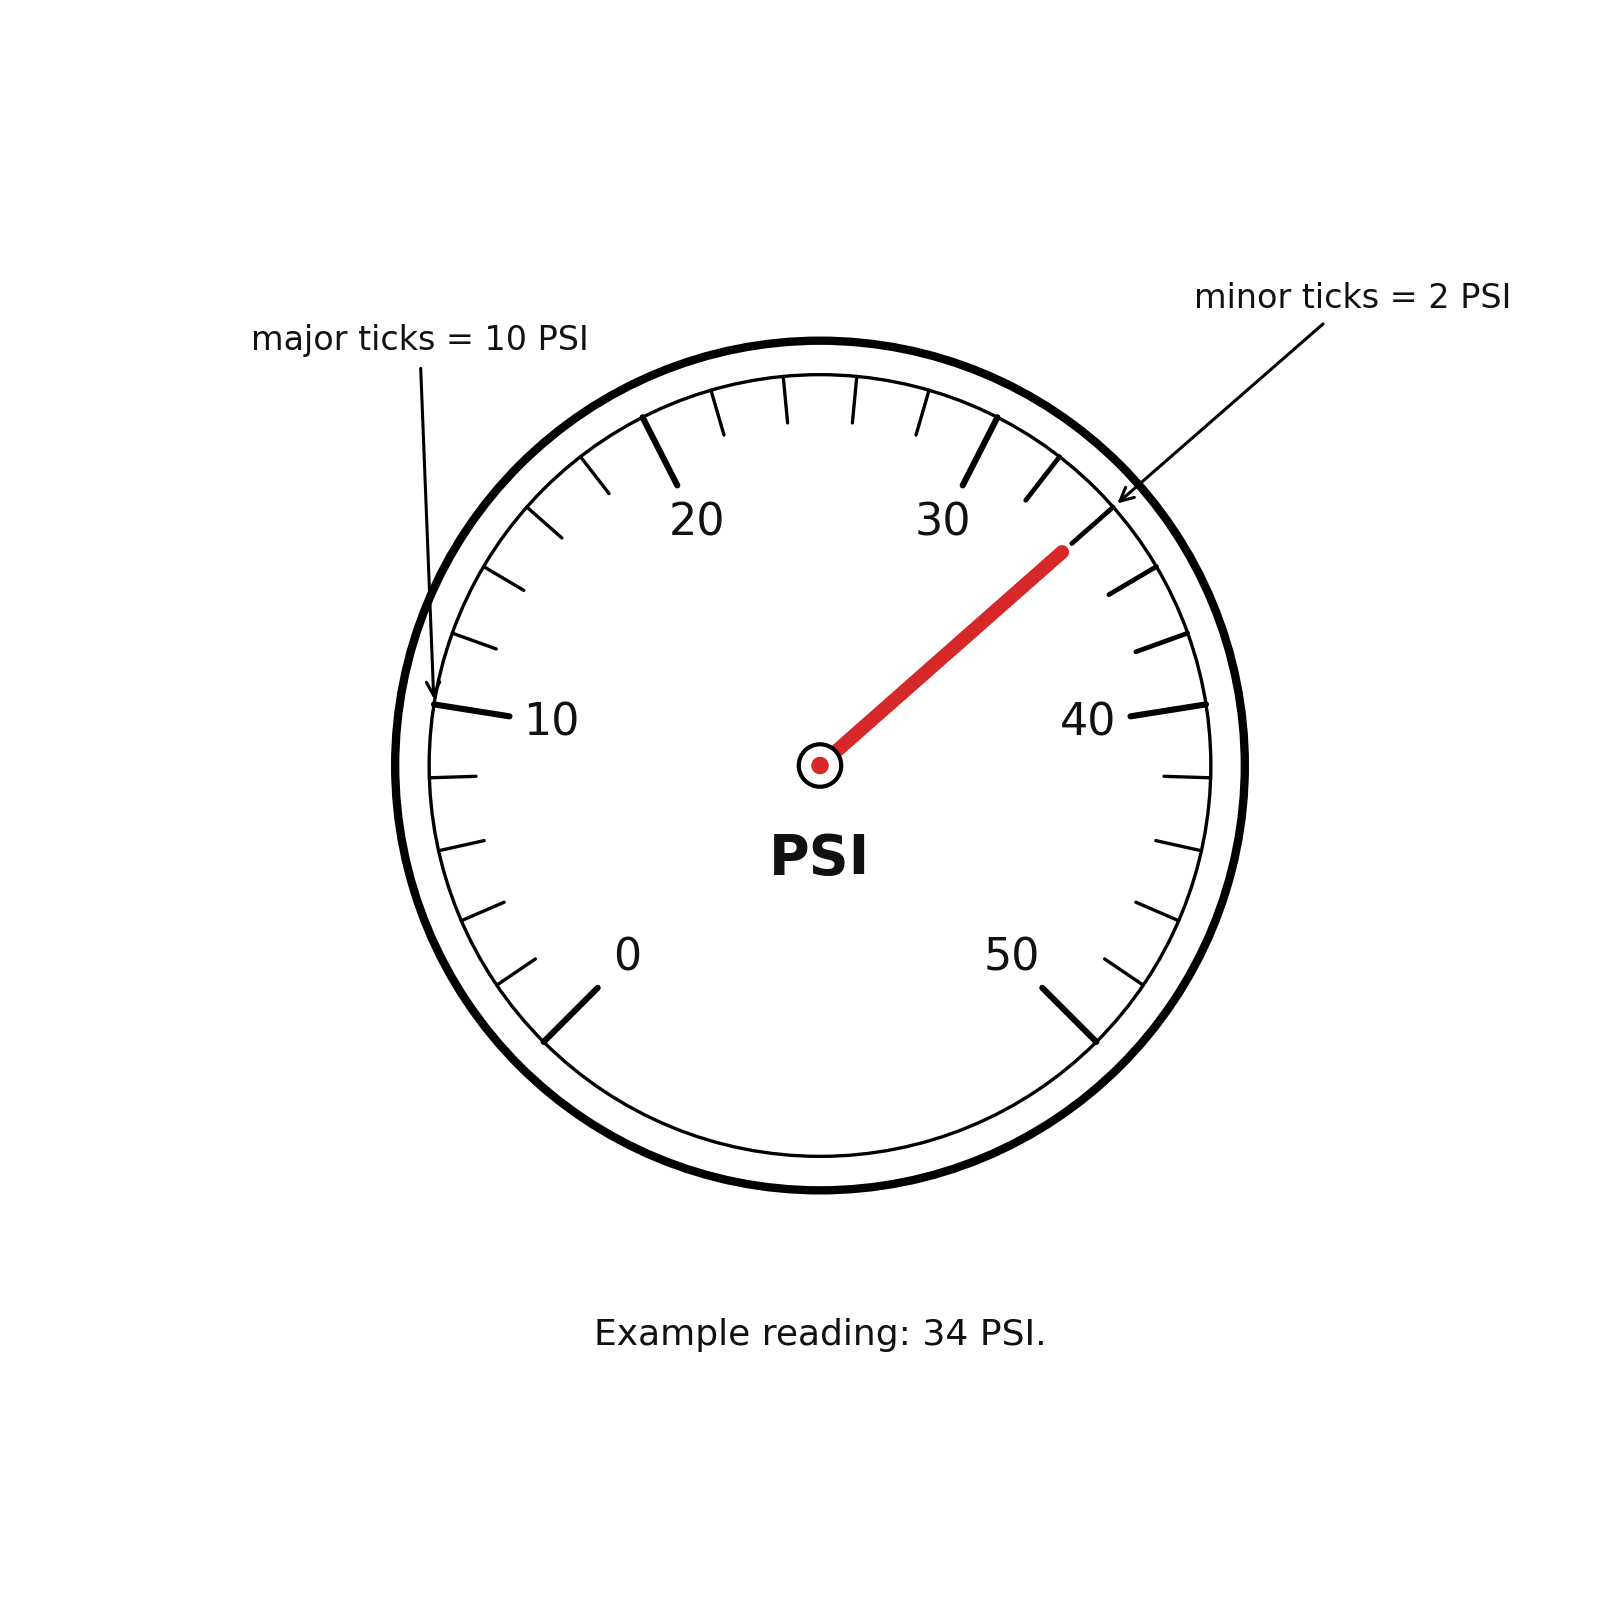
An analog gauge has a circular dial, a needle, and printed tick marks. Reading one accurately involves three quick steps:
- Identify the unit. Look for text on the dial face such as "PSI" or "kPa." Some gauges show two scales (an inner ring in PSI and an outer ring in kPa), so confirm which scale the needle is pointing to.
- Read the major ticks. The large numbered marks tell us the scale. If the dial shows , , , , and so on, each major tick represents PSI.
- Estimate between ticks. If there are five small divisions between and , each small tick equals PSI. A needle resting on the second small tick past reads PSI.
When the needle lands between two small ticks, we estimate to the nearest whole number. For example, if the needle sits roughly halfway between and , we call it about PSI. This is the same interpolation idea we use whenever we read any analog scale — a kitchen thermometer, a bathroom scale, or a fuel gauge.
Reading a Digital Pressure Display
Digital gauges and electronic tire inflators remove the guesswork of reading a needle. The screen shows the pressure as a number, often to one decimal place — for example, 2.4 bar or 33.5 PSI. Reading the value itself is straightforward, but two details still deserve attention.
First, check which unit the display is set to. Many digital gauges have a button that cycles through PSI, kPa, and bar. If the screen reads and the unit shown is kPa, that is very different from PSI — one is a normal car tire, the other would be dangerously extreme. Second, note whether the display shows a single decimal or a whole number. A reading of 2.4 bar is a normal espresso machine operating pressure, while 24 bar would be unusually high. Paying close attention to the decimal point prevents costly misreads.
Locating the Recommended Pressure
Knowing how to read a gauge is only half the job. We also need to know what the reading should be. Manufacturers print a recommended pressure — or a recommended range — in specific places:
- Cars and trucks: A sticker called the tire placard, usually found on the inside edge of the driver's door or door jamb, lists the recommended tire pressure in PSI and sometimes in kPa. This is the number to trust — not the "Max Pressure" printed on the tire sidewall, which is the tire's upper safety limit.
- Bicycles: The recommended pressure range is printed directly on the tire sidewall, often as something like "Inflate to 80–130 PSI."
- Espresso machines and other appliances: The owner's manual or a label on the machine specifies the normal operating pressure, typically in bar.
As a quick reminder from Lesson 1, every measurement has a value, a unit, and an attribute. When we read a tire placard that says "35 PSI (cold)", the value is , the unit is PSI, and the attribute is the recommended cold tire inflation pressure. Recognizing all three parts helps us avoid confusing the recommended pressure with unrelated numbers printed nearby, such as load ratings or tire dimensions.
Comparing a Reading to the Acceptable Range
Once we have both a gauge reading and the recommended specification, the final step is a simple comparison. Most specs give either a single target value or a range. Let's walk through an example with a tire placard that reads 32–35 PSI.
If our gauge shows PSI, we compare:
The reading is below the low end of the range, so the tire needs air. Now imagine the gauge reads PSI:
The reading is above the upper end, so we should let out a small amount of air. Finally, if the gauge shows PSI:
The reading falls within the range, and no action is needed. The number line below illustrates these three scenarios at a glance.
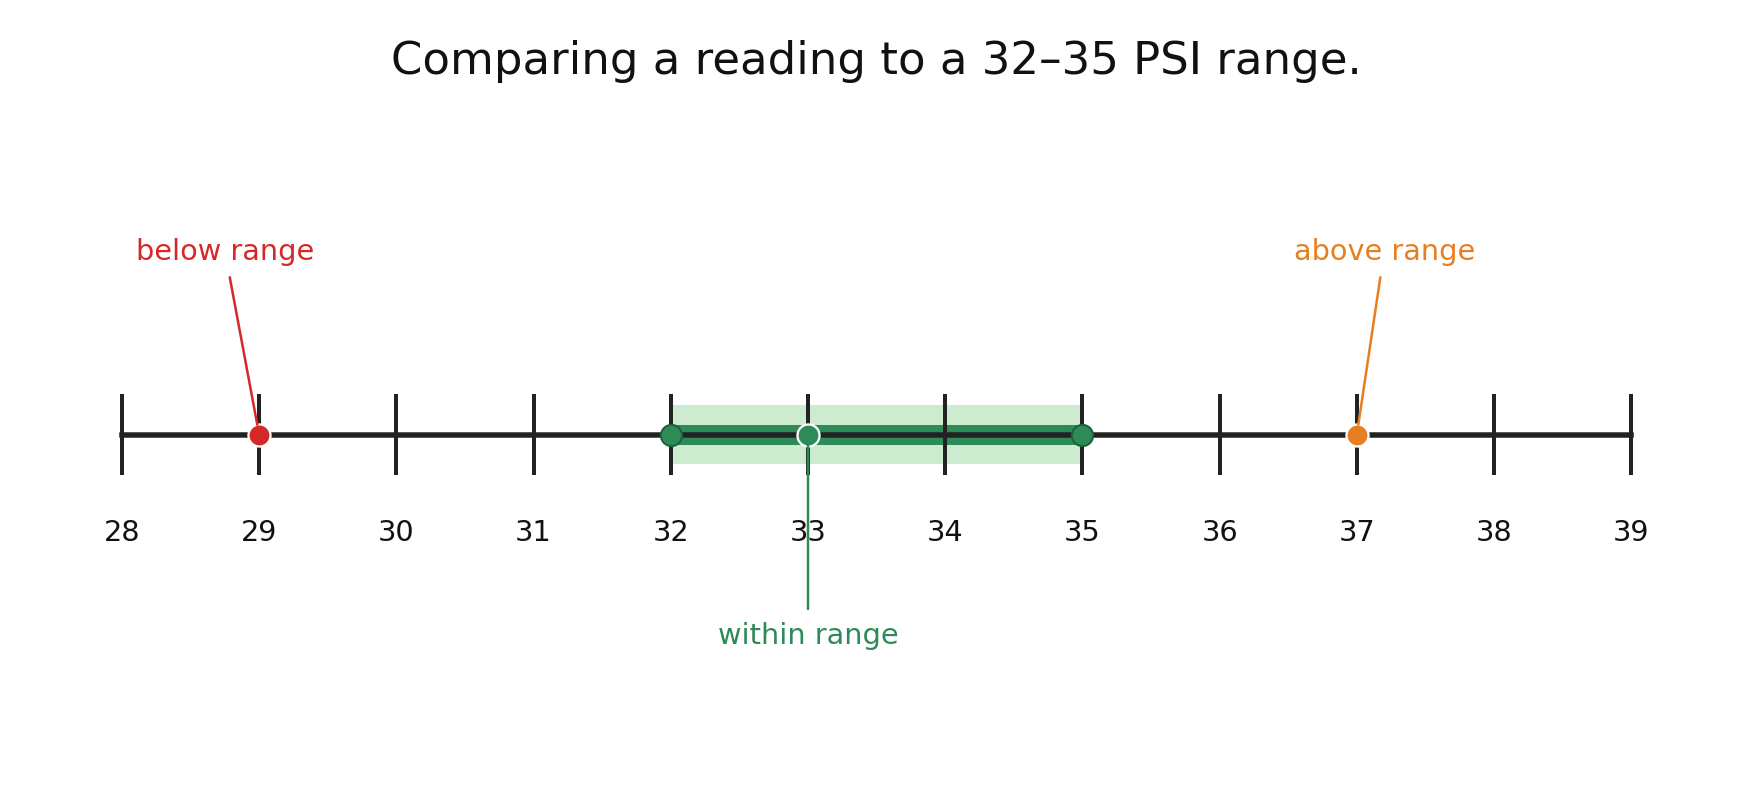
In every case, the decision follows the same pattern: below range → add air (or increase pressure), within range → no change needed, above range → release some air (or reduce pressure). This logic works for any equipment. A bike tire rated for – PSI reading PSI is low; an espresso machine rated at bar showing bar is high. The math is always the same — check whether the measured value sits inside, below, or above the recommended window.
Conclusion and Next Steps
In this lesson, we learned how to identify the three most common pressure units — PSI, kPa, and bar — read values from both analog and digital gauges, locate recommended pressure specifications on placards and labels, and compare a reading to an acceptable range to decide on the right course of action. Together, these skills turn a pressure gauge from a confusing dial into a clear, actionable number.
Up next, you will put all of this into practice: identifying gauge units on sight, reading values from different display types, finding recommended specs on real labels, and writing your own verdict on whether a tire needs attention. Let's see how well you can handle the pressure!
