Welcome back to Interactive Camera and Texturing! We've reached lesson 4, and you've made excellent progress on our interactive 3D graphics journey. In our previous lesson, we successfully integrated texture mapping into our 3D pipeline, transforming plain geometric surfaces into visually rich objects using external images and UV coordinates. Our camera system now displays beautifully textured cubes that we can explore from any angle.
Today, we're taking texturing to the next level by learning how to combine multiple textures to create sophisticated materials. This technique allows us to layer different visual elements, create complex surface effects, and build materials that dynamically change their appearance. We'll explore texture units, multi-texture sampling, and animated blending to create engaging visual effects that respond to time and user interaction.
Multi-texture techniques unlock powerful possibilities for creating realistic and dynamic materials. Instead of limiting ourselves to a single texture image, we can combine multiple textures to achieve effects like layered materials, animated surfaces, or context-sensitive appearances.
Consider how a weathered metal surface might combine a base metallic texture with an overlay of rust patterns, or how a magical effect could blend between different mystical patterns over time. In computer graphics, we accomplish this by binding multiple texture images to different texture units and accessing them simultaneously within our fragment shader. The shader can then perform mathematical operations like mixing, multiplying, or conditionally selecting between textures to create the final surface appearance. This approach provides incredible flexibility for creating materials that go far beyond what any single texture image could achieve.
OpenGL provides multiple texture units that allow us to bind different textures simultaneously for use within a single shader. Each texture unit acts like a separate slot where we can place a texture, and our shaders can access any combination of these slots during rendering:
The glActiveTexture() function selects which texture unit we're currently working with, while glBindTexture() associates our texture object with that unit. By using GL_TEXTURE0 and GL_TEXTURE1, we're binding our base texture to unit 0 and our overlay texture to unit 1. Modern graphics hardware typically supports dozens of texture units, allowing for incredibly complex material combinations. This system enables our fragment shader to sample from multiple textures simultaneously, opening up endless creative possibilities for surface effects.
Our fragment shader must be updated to handle multiple texture inputs and perform the blending operations:
This shader declares two separate sampler2D uniforms, each representing a different texture unit. The texture() function samples each texture at the same UV coordinates, giving us two color values to work with. The mix() function performs linear interpolation between the two colors based on our uMixFactor uniform: when the factor is 0.0, we see only the base texture; when it's 1.0, we see only the overlay texture; values in between create smooth blends. This simple mixing creates compelling visual effects, especially when the mix factor changes over time.
During shader initialization, we must inform the fragment shader which texture units correspond to each sampler uniform:
The crucial step is setting the texture uniform values to match our texture units: uBaseTex gets value 0 (corresponding to GL_TEXTURE0), and uOverlayTex gets value 1 (corresponding to GL_TEXTURE1). These uniform values create the connection between our shader samplers and the actual texture units we bind during rendering. Once set, these values typically remain constant throughout the application's lifetime, as we control the visual effects through the mix factor rather than changing texture unit assignments.
The most compelling aspect of our multi-texture system is the ability to animate the blending between textures:
This simple calculation creates a smooth oscillation between the two textures using a sine wave. The base value of 0.5 ensures the blend is centered, while the amplitude of 0.3 causes the mix factor to vary between 0.2 and 0.8. As time progresses, the surface smoothly transitions between emphasizing the base texture and the overlay texture within this range. This animation technique can be applied to any uniform parameter, opening up possibilities for animated materials that respond to game events, user interaction, or environmental conditions.
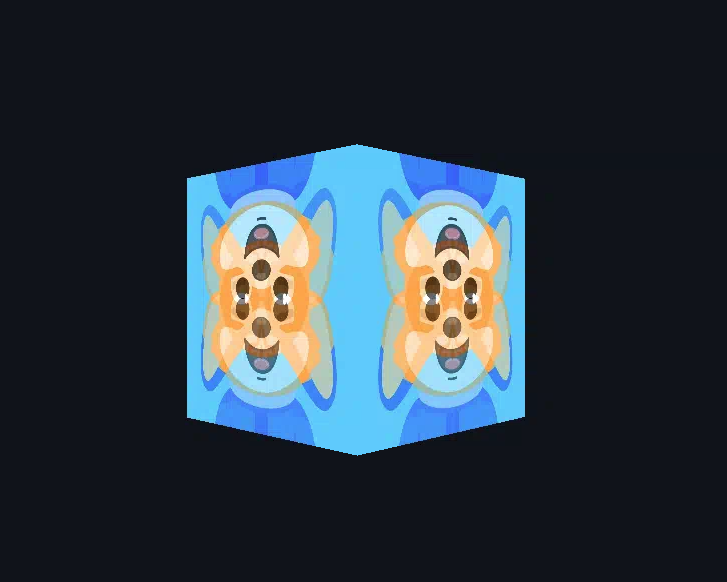
The rendered cube now displays a living, breathing surface that smoothly transitions between two texture layers as we navigate around it. The animation creates the impression of a material that changes over time while maintaining the responsive camera controls we developed in earlier lessons. This combination demonstrates how advanced rendering techniques can be seamlessly integrated into interactive applications, creating engaging visual experiences that respond to both time and user input.
We've successfully implemented advanced multi-texture materials that combine multiple images into dynamic, animated surfaces. Our implementation covers the complete multi-texture pipeline: binding textures to different texture units, updating shaders to handle multiple samplers, and creating time-based animations through uniform parameters. The result is a sophisticated material system that opens up countless creative possibilities for surface effects, from simple blending to complex layered materials.
This multi-texture foundation provides the building blocks for creating truly impressive visual effects: imagine materials that respond to lighting conditions, surfaces that reveal underlying layers based on damage states, or magical effects that cycle through different mystical patterns. You now have the tools to create materials limited only by your imagination, and it's time to put these advanced texturing techniques into practice through hands-on exercises that will solidify your understanding of multi-texture systems.
