Stating the Theorem
Introduction
Welcome back to Foundations of the Pythagorean Theorem! This is lesson four of five, so the finish line is close. In the first three lessons, you learned to spot a right triangle by its angle, label its sides as legs and hypotenuse, and see that , , and represent the areas of squares built on those sides.
Today, all of those ideas come together in one powerful equation: the Pythagorean theorem. By the end of this lesson, you will be able to state the theorem as and confidently assign , , and to the correct sides of any right triangle, no matter how it is oriented.
A Surprising Pattern
In the previous lesson, we built three squares on the sides of a 3‑4‑5 right triangle and found their areas: , , and . Let's do a little arithmetic with the two smaller areas:
The two leg‑square areas add up exactly to the hypotenuse‑square area. Could this be a lucky coincidence? Let's test a completely different right triangle before drawing any conclusions.
Testing With Another Triangle
Consider a right triangle whose legs measure and and whose hypotenuse measures . Building a square on each side gives:
| Side | Length | Area of square |
|---|---|---|
| Leg | ||
| Leg | ||
| Hypotenuse |
Adding the two leg‑square areas:
It happens again — the two smaller squares combine to equal the larger square. This is not a coincidence. It is a rule that holds for every right triangle, and it has a famous name.
The Pythagorean Theorem
Here is the statement in plain words: In any right triangle, the sum of the squares of the two legs equals the square of the hypotenuse. Written as an equation:
where:
- and are the lengths of the two legs (the sides that form the right angle),
- is the length of the hypotenuse (the side opposite the right angle).
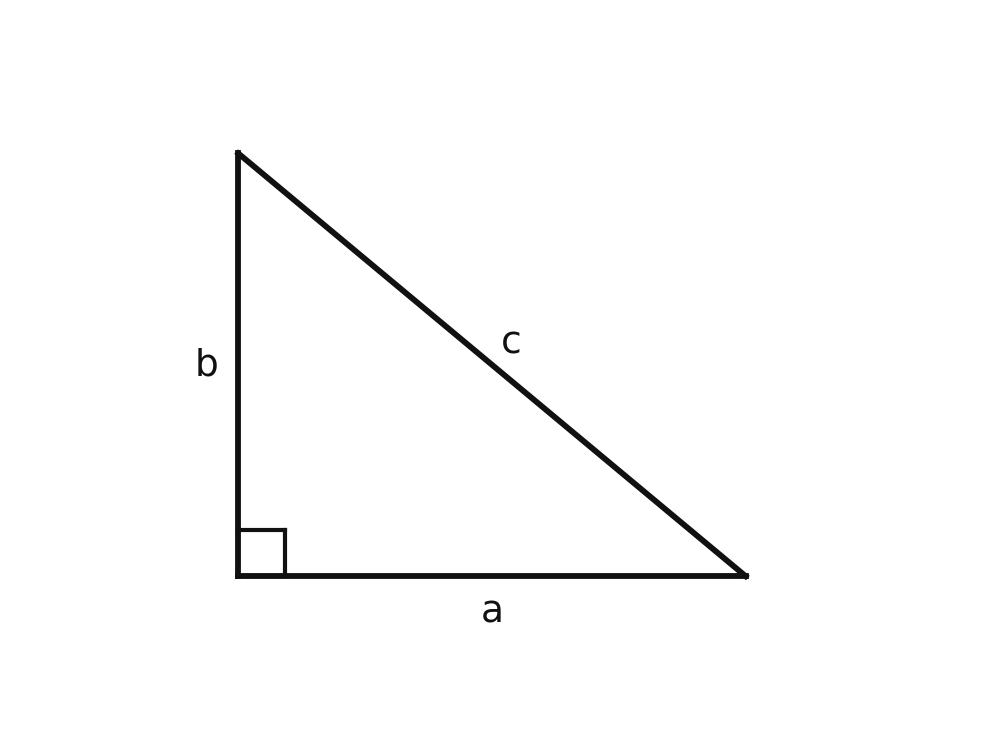
Notice that the equation is really a statement about areas: the two smaller square‑areas on the legs add up to the larger square‑area on the hypotenuse — exactly the visual picture from the previous lesson. This single relationship appears everywhere, from computing the diagonal of a TV screen to figuring out how long a ramp needs to be.
Assigning a², b², and c² Correctly
The most important step when using the theorem is deciding which side is . Here is a reliable two‑step method:
- Find the right angle — look for the small square symbol at the vertex.
- Identify the hypotenuse — it is the side directly opposite that right angle. Label it .
Once is settled, the remaining two sides are the legs. You can call either one and the other because addition is commutative: gives the same result as . The key rule is simple: the hypotenuse must always go on the side of the equation.
Using Different Letters
Not every triangle you encounter will use the letters , , . Suppose a right triangle has sides labeled , , and , with opposite the right angle. Then plays the role of the hypotenuse, and the theorem becomes:
The same logic applies in real life. Imagine a carpenter measuring two walls that meet at a right angle: one wall is feet long and the other is feet long. The diagonal distance across the floor satisfies . The letter names change, but the pattern stays the same: the hypotenuse stands alone on one side of the equals sign, and the two legs share the other side.
Any Orientation, Same Rule
A right triangle can sit on any side or be flipped in any direction. The orientation never changes which side is the hypotenuse — always start from the right angle:
- If the right angle sits at the bottom‑left, the hypotenuse stretches from the top vertex to the bottom‑right.
- If the right angle is at the top, the hypotenuse runs along the bottom.
- If the right angle is on the right, the hypotenuse is the side on the left.
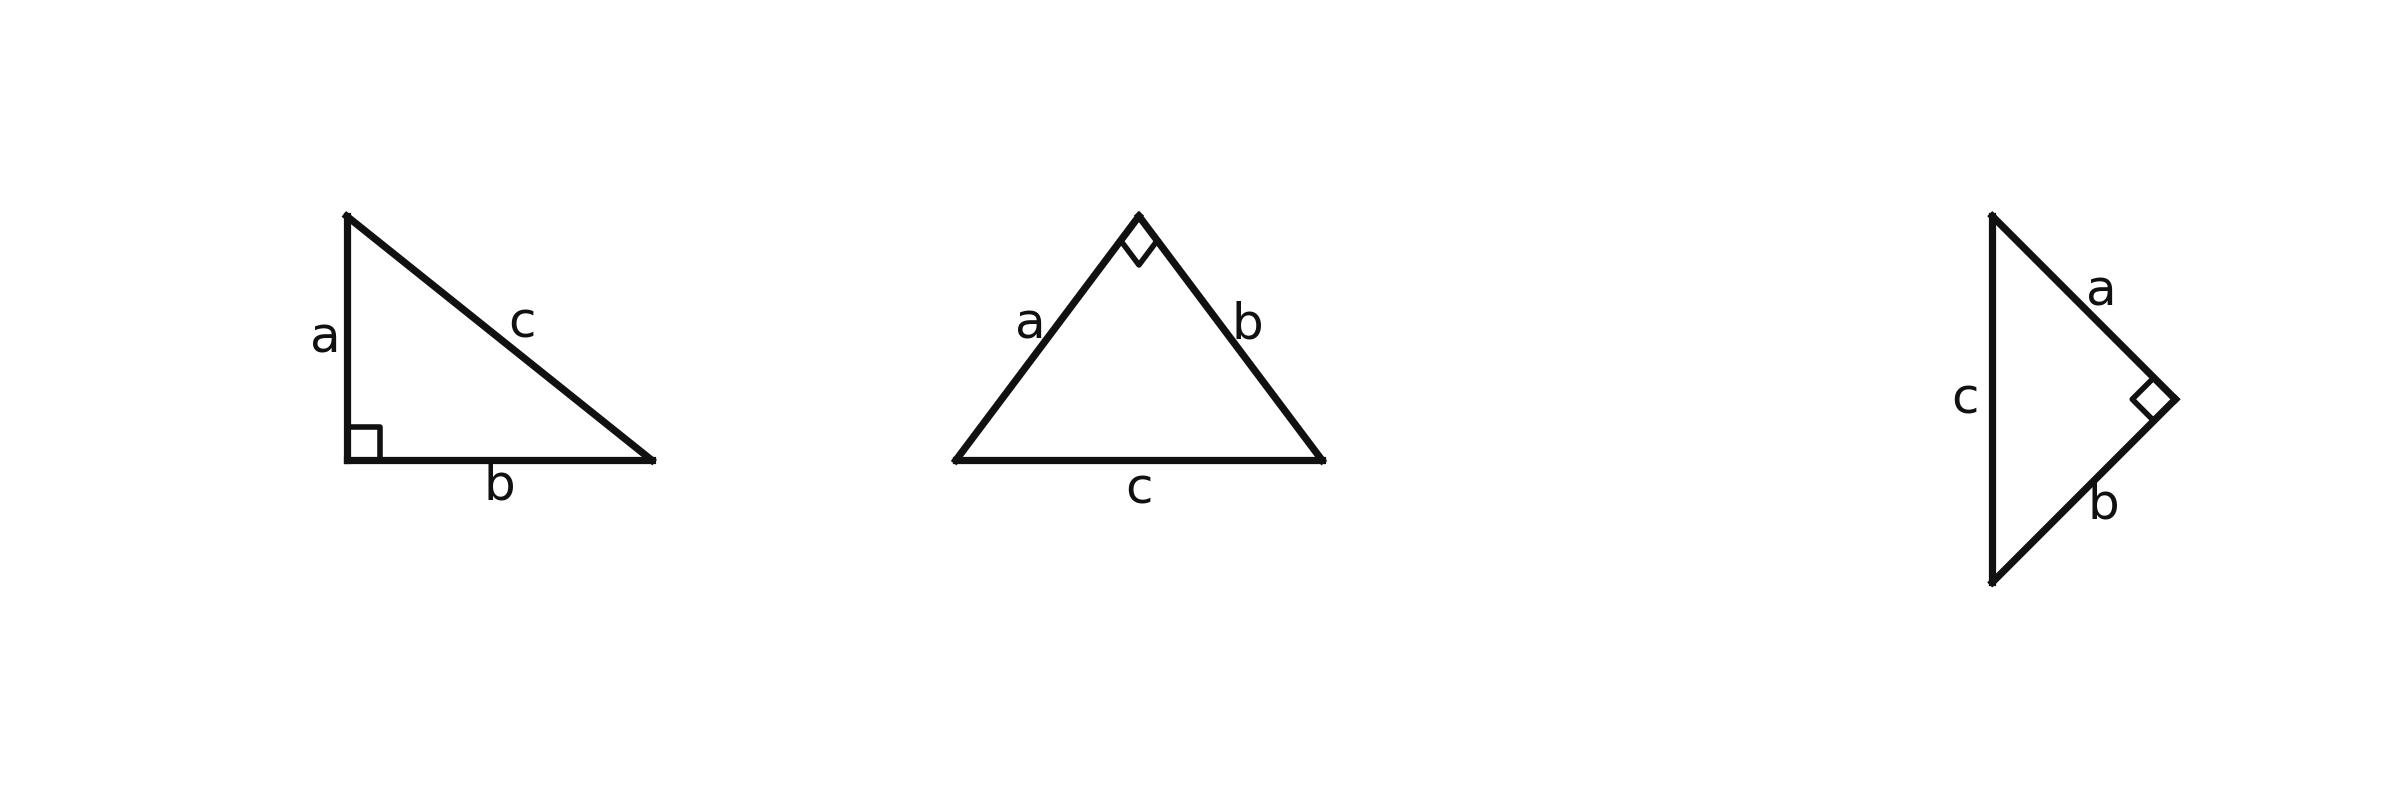
No matter how the triangle is drawn, the process is identical: locate the angle, look across to the opposite side, and call that side . Everything else follows naturally.
A Common Mistake to Avoid
The single most frequent error is accidentally placing a leg on the side of the equation. This typically happens when the triangle is drawn in an unfamiliar orientation and the longest‑looking side is not carefully checked against the right angle.
For example, picture a right triangle tipped so the hypotenuse lies flat along the bottom. A quick glance might tempt you to assign to a side on the left or right just because it appears tall. The fix is always the same: go back to the right‑angle marker. The side directly across from that small square is the hypotenuse — full stop. Build the habit of checking the marker first, and this mistake disappears.
Conclusion and Next Steps
In this lesson, we stated the Pythagorean theorem: for every right triangle, , where and are the legs and is the hypotenuse. We confirmed the pattern with two different triangles, practiced identifying the hypotenuse under varying letter names and orientations, and connected the equation back to the area relationship from the previous lesson.
Up next, the practice exercises will challenge you to fill in the verbal form of the theorem, match triangles to their correct equations, and write Pythagorean equations from diagrams turned in all sorts of directions. Time to put this theorem to work!
