Squares on the Sides
Introduction
In the first two lessons of Foundations of the Pythagorean Theorem, you learned to spot a right triangle by its angle and to label its three sides as legs and a hypotenuse. Now, in lesson three of five, you are past the halfway mark of the course and ready for the idea that ties everything together.
Today we take those side lengths and turn them into something you can see. We are going to build squares on each side of a right triangle and discover that the expressions , , and are not just abstract arithmetic — they represent real, measurable areas. This geometric picture is what gives the Pythagorean theorem its meaning, so let's build it step by step.
From Lengths to Shapes
So far, every side of a right triangle has simply been a length: a number of units from one vertex to another. A leg might be units long, and the hypotenuse might be units long, but those numbers only describe distance.
What happens when we attach a shape to one of those sides? Specifically, what if we use a side as the edge of a square? That single move turns a one-dimensional length into a two-dimensional area, and it is the key idea behind the entire Pythagorean theorem.
Building a Square on One Side
Imagine a right triangle whose shorter leg measures 3 units. Now picture placing a square flat against that side so the side itself becomes one edge of the square. Because the edge is units, every edge of the square is units.
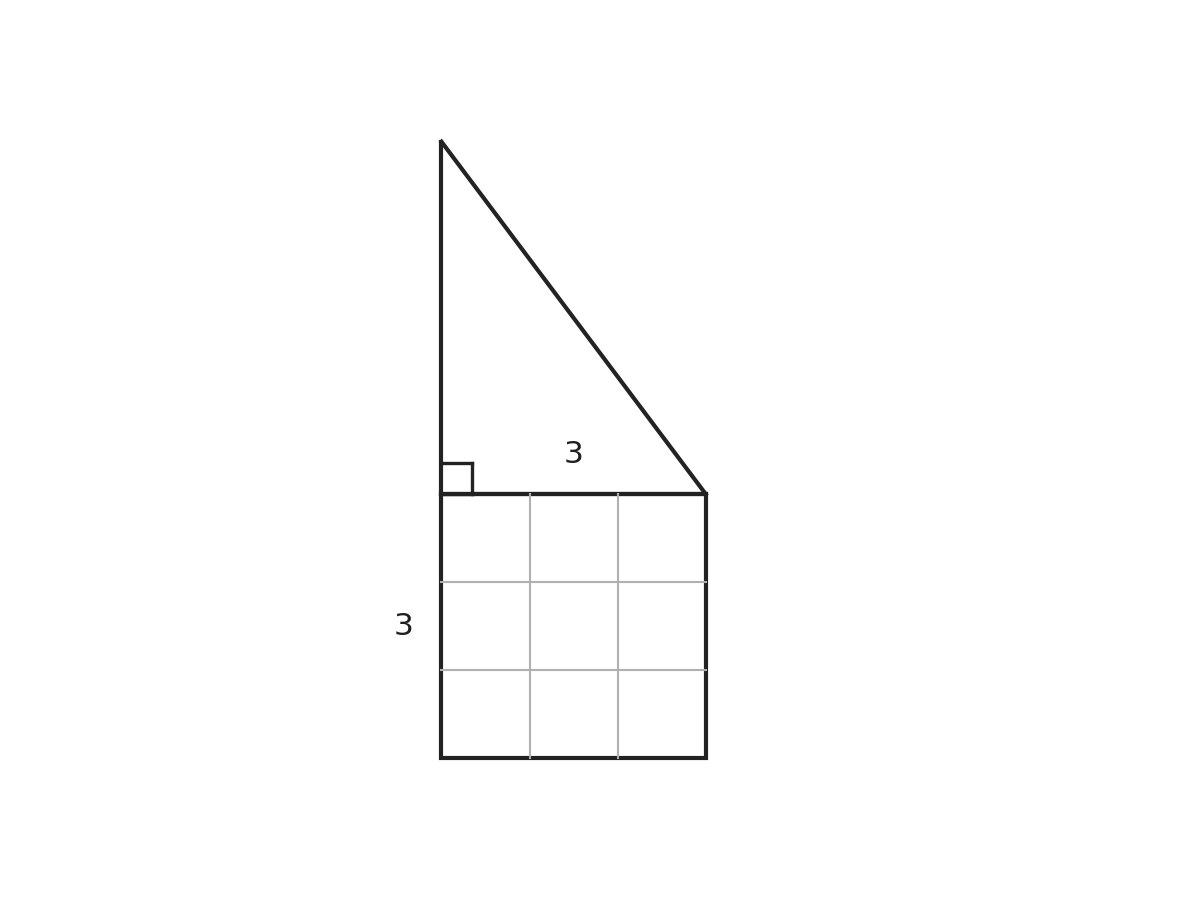
The area of that square is straightforward:
This is exactly why multiplying a number by itself is called "squaring." We are literally computing the area of a square whose edge has that length. The notation is not just shorthand for ; it describes a geometric shape you can draw and measure.
Three Sides, Three Squares
A right triangle has three sides, so we can build three squares — one on each side. Let's use the well-known 3-4-5 right triangle as our example. The two shorter sides ( and ) are the legs, and the longest side () is the hypotenuse.
| Side | Length | Square built on it | Area of that square |
|---|---|---|---|
| Leg | square | ||
| Leg | square | ||
| Hypotenuse | square |
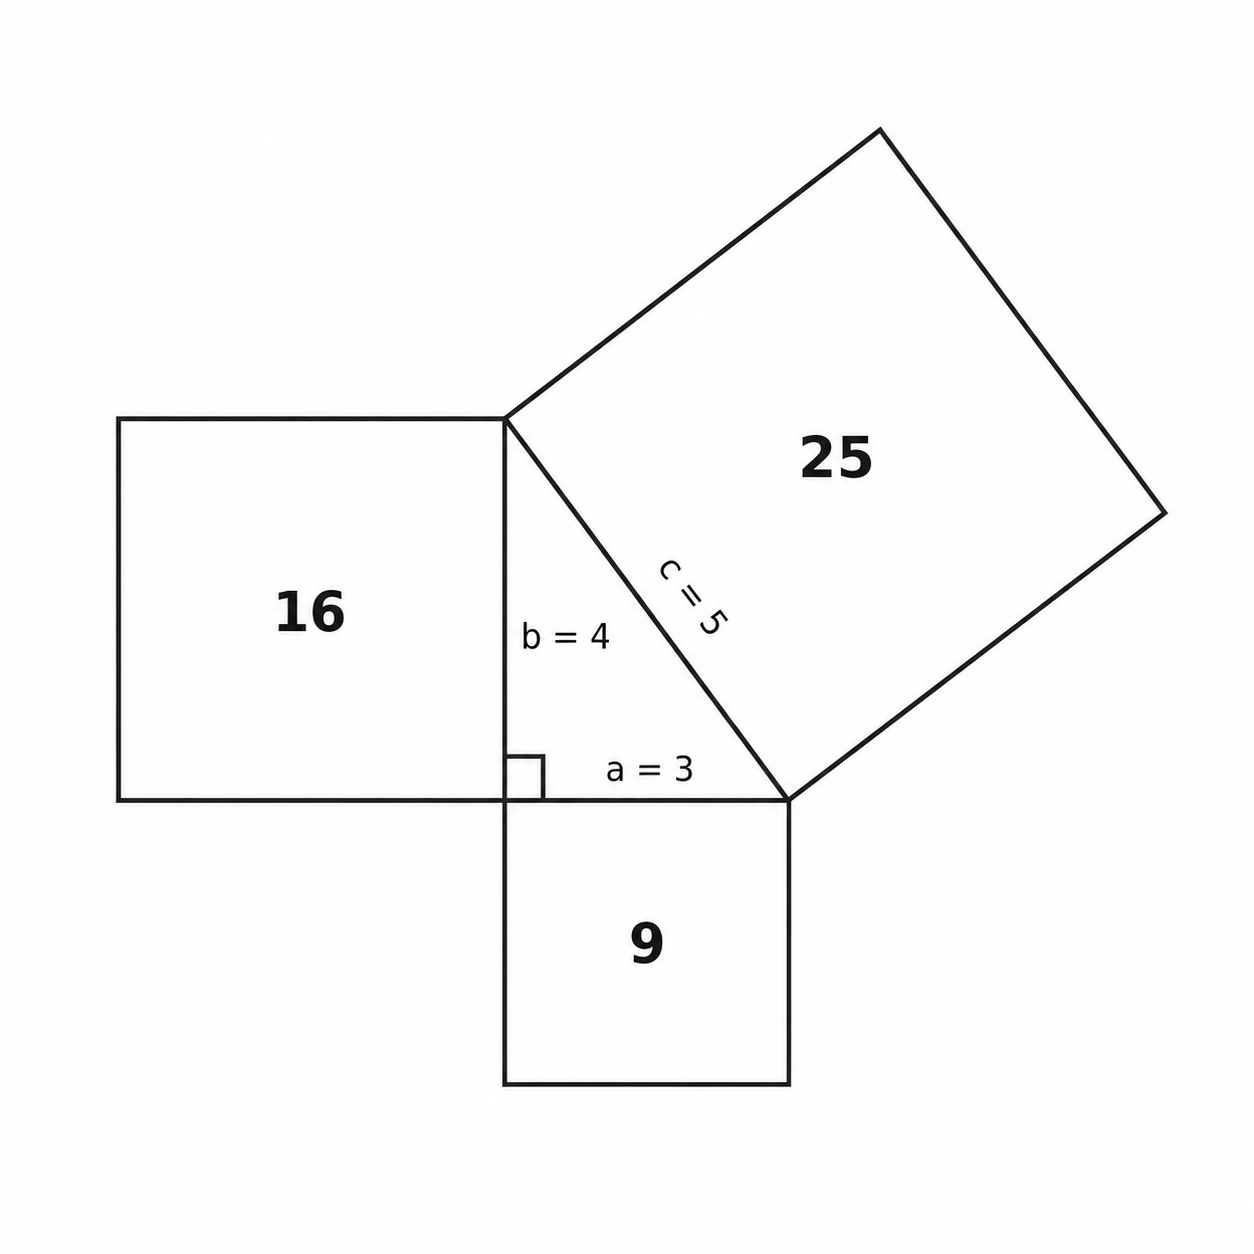
Each square is a real shape with a real area. The small square (area ) sits on the short leg, the medium square (area ) sits on the longer leg, and the large square (area ) sits on the hypotenuse. Notice that every side produces its own unique square — no two of these areas are the same.
What a², b², and c² Really Mean
When we label the sides of a right triangle , , and , the expressions , , and each stand for the area of the square built on that side:
- = area of the square on leg
- = area of the square on leg
- = area of the square on the hypotenuse
This is the core takeaway of the lesson. Every time you see in the context of a right triangle, picture an actual square sitting on side and think "that square's area." The same goes for and . Holding on to this mental image will make the Pythagorean theorem, which we state in the very next lesson, feel like a natural observation rather than a formula to memorize.
A Real-World Way to See It
Think about floor tiles. If you hold a square tile that is inches on each edge, it covers square inches of floor. The edge length tells you the size of the tile, and squaring it gives you how much surface the tile covers.
Now imagine three tiles of different sizes — each one pressed flat against a different side of a right triangle. The two smaller tiles sit on the legs, and the largest tile sits on the hypotenuse. In the next lesson, you will discover a surprising relationship among those three tile areas. For now, the important thing is to see that squaring a side length always produces a real, measurable area, not just a number.
Conclusion and Next Steps
In this lesson, we gave the expressions , , and a concrete, visual meaning. Each one is the area of a square built directly on the corresponding side of a right triangle. The notation is not merely " times " — it is the area of a real square whose edge is side , and the same holds for and .
Now it is your turn to make this idea your own. In the practice exercises ahead, you will match side lengths to square areas, build squares on triangle sides, and put into words exactly what "squaring" means geometrically. Jump in and bring these squares to life!
