Legs and Hypotenuse
Introduction
Welcome back to Foundations of the Pythagorean Theorem! This is the second lesson of the course, and you already have a solid start under your belt. In the first lesson, you learned to recognize right triangles by locating the angle. Now we are ready to take the next step and learn the names of a right triangle's three sides.
By the end of this lesson, you will be able to identify the legs and the hypotenuse of any right triangle, using the right angle as your anchor. These terms are the vocabulary that drives the Pythagorean theorem, so getting comfortable with them now will make everything ahead much smoother.
From Angles to Sides
So far, our attention has been on the angles inside a right triangle. Now we shift focus to the sides. Every triangle has three sides, but in a right triangle each side has a specific role and a specific name. Assigning these names correctly is what allows us to write the equation later in the course, with each letter referring to the right side.
The key to labeling is simple: start at the right angle. Once we know where the angle is, the names of all three sides follow automatically.
The Hypotenuse
The single most important side to identify is the hypotenuse. It is defined as the side that lies directly opposite the right angle. In other words, the hypotenuse is the one side that does not touch the corner at all.
Here is how to find it: locate the small square that marks the right angle, then look straight across the triangle to the side farthest from that corner. That side is the hypotenuse.
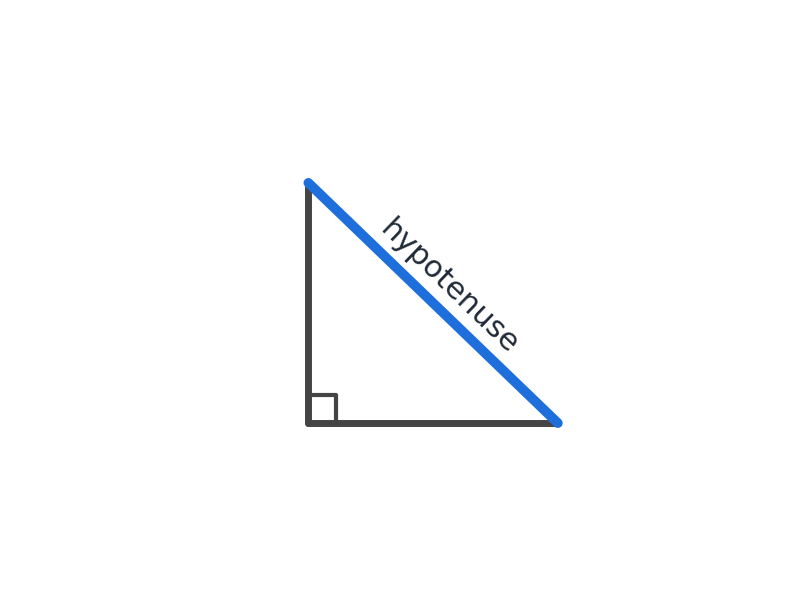
The hypotenuse is always the longest side of the triangle. This makes intuitive sense because the angle is the largest angle in a right triangle, and in any triangle the longest side always sits opposite the largest angle.
The Two Legs
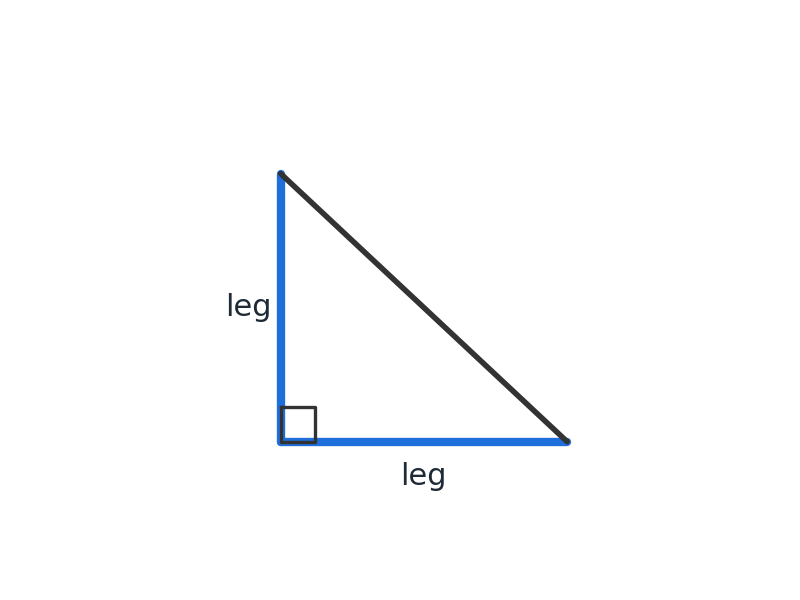
The remaining two sides are called the legs. These are the sides that come together to form the right angle. They literally create the corner where they meet.
Every right triangle has exactly two legs and one hypotenuse. Both legs are shorter than the hypotenuse. In typical textbook diagrams the legs often appear as a horizontal side and a vertical side, but that is just one possible arrangement — the legs can point in any direction.
A Real-World Picture
To make these names more concrete, picture a ladder leaning against a wall. The wall and the ground meet at a right angle, forming the two legs of a right triangle. The ladder itself, stretching diagonally from the ground up to the wall, is the hypotenuse — the side opposite that right angle and the longest of the three.
This same pattern appears everywhere: a wheelchair ramp against a building, a support cable anchoring a telephone pole, or the slope of a roof above an attic floor. In each case, two surfaces meet at (or near) , and the sloped surface connecting their endpoints plays the role of the hypotenuse.
Labeling Step by Step
Whenever you need to label the sides of a right triangle, follow this three-step process:
- Find the right angle. Scan all three corners for the small square symbol.
- Identify the hypotenuse. Look at the side directly opposite that right angle — the side that does not touch it. That is the hypotenuse.
- Label the legs. The two remaining sides, which form the right angle, are both legs.
The right angle is always your anchor point. Once you locate it, every side name falls into place.
Orientation Does Not Change the Names
In the previous lesson, we saw that rotating a right triangle does not stop it from being a right triangle. The same principle applies to the side names. No matter how the triangle is oriented, the hypotenuse is always opposite the right angle and the legs always form the right angle.
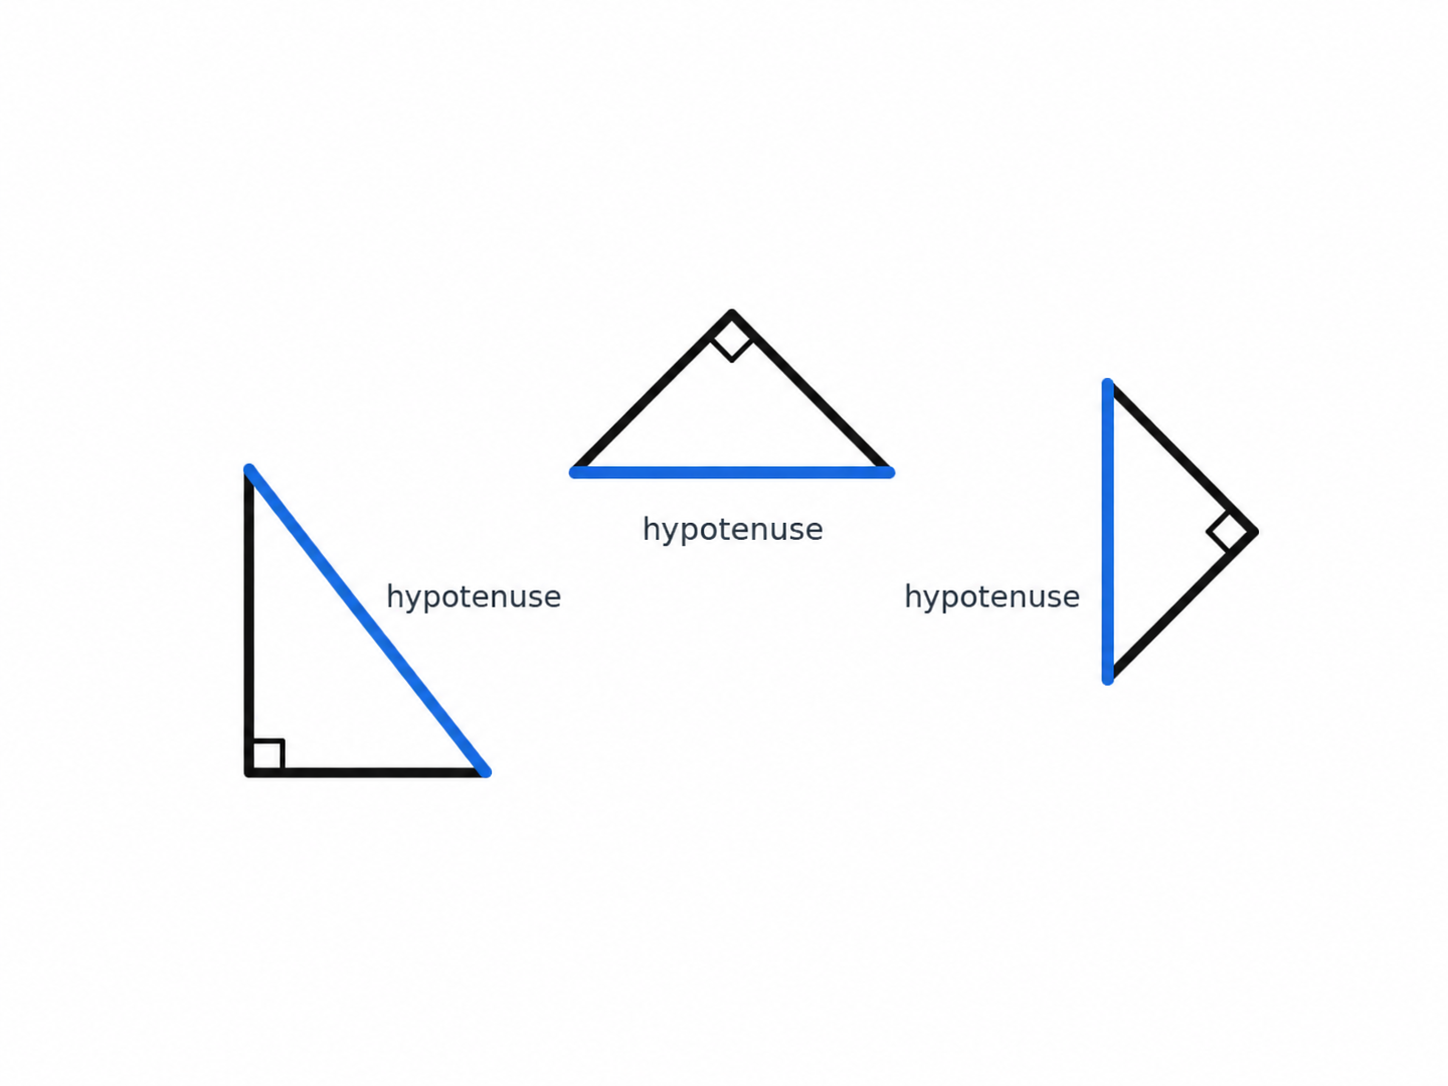
Notice how the hypotenuse can appear as a diagonal line, a horizontal line, or even a vertical line depending on how the triangle is turned. Its position on the page changes, but its identity does not. If you always begin by locating the right angle, you will label every side correctly every time.
A Common Mistake to Avoid
Many beginners assume the hypotenuse must be the "slanted" or "diagonal" side. This shortcut works only when the triangle sits in its most familiar position with the right angle at the bottom. When the triangle is rotated so the hypotenuse lies flat along the bottom or stands straight up on one side, it no longer looks slanted at all.
The safest habit is to never guess by appearance. Always locate the angle first, then identify the side opposite it. This rule is reliable in every situation, no matter how unfamiliar the triangle looks.
Conclusion and Next Steps
A right triangle's three sides each have a name: the hypotenuse is the longest side and sits opposite the right angle, while the two legs are the shorter sides that meet at the right angle. To label them correctly, always start by finding the marker and work outward from there — orientation never changes the names.
Up next is a set of practice exercises where you will identify legs and hypotenuses, label full diagrams, and match triangles in various orientations to the correct side descriptions. Time to prove that no triangle, no matter how it is turned, can stump you!
