Welcome to "Foundations of Ray Tracing in C++"! You're about to embark on one of the most rewarding journeys in computer graphics. By the end of this course, you'll have built your own ray tracer from scratch — a program capable of generating photorealistic 3D images that will mimic the real world.
Ray tracing is the technology behind the stunning visual effects in movies like Pixar's animated films, the realistic reflections in modern video games, and the lifelike architectural visualizations that help designers preview buildings before they're constructed. What makes this topic so exciting is that you'll be simulating the actual physics of light, creating images that capture how light bounces, reflects, and refracts just as it does in reality.
In this first lesson, we'll explore what ray tracing is, how it works at a high level, and what you'll build throughout this course. We'll also write your first ray tracing program — a simple "Hello, Raytracer!" that sets the foundation for everything to come. Don't worry if you're new to computer graphics; we'll start from the basics and build up gradually.
At its core, ray tracing is a technique for generating images by simulating how light actually works in the real world. Instead of using shortcuts or approximations, ray tracing follows the physical behavior of light rays as they travel through a scene, bounce off surfaces, pass through transparent materials, and eventually reach a camera.
Think about how you see the world around you. Light from sources like the sun or a lamp travels through space, hits objects, and bounces into your eyes. Your brain processes these light rays to create the image you perceive. Ray tracing does essentially the same thing, but in reverse — it traces rays backward from the camera into the scene to figure out what color each pixel should be.

This approach differs fundamentally from rasterization, which is the technique used in most video games and real-time graphics applications. Rasterization works by taking 3D objects and projecting them onto your 2D screen, then filling in the pixels. It's incredibly fast, which is why games can render 60 or more frames per second. However, rasterization struggles with certain effects that come naturally to ray tracing. Accurate reflections, realistic shadows, and light bending through glass are all challenging for rasterization because it doesn't actually simulate how light behaves — it uses clever tricks to approximate these effects.
Ray tracing, on the other hand, is computationally intensive. Each pixel might require tracing dozens or even thousands of rays through the scene, testing for intersections with objects, calculating how light bounces, and recursively following reflected and refracted rays. This is why ray tracing has traditionally been used in movies and architectural visualization, where you can take minutes or hours to render a single frame, rather than in real-time applications. However, modern hardware is changing this landscape, and ray tracing is increasingly appearing in video games and interactive applications.
You've likely already seen ray-traced images without realizing it. Every Pixar movie uses ray tracing to achieve its distinctive look. When architects show clients photorealistic renderings of buildings that haven't been built yet, they're using ray tracing. Games like Cyberpunk 2077 and Minecraft with RTX use ray tracing for reflections, shadows, and lighting. The technology is everywhere, and now you're going to learn how to build it yourself.
Let's break down how ray tracing actually works. Imagine you're holding a camera and looking at a scene. Your camera has a lens, and behind that lens is a sensor (or film) divided into a grid of pixels. Each pixel needs to capture the color of light coming from a specific direction in the scene.
The ray tracing process starts by casting a ray from the camera through each pixel into the scene. You can think of this ray as a straight line that extends from the camera's position, passes through the center of a pixel, and continues infinitely into the 3D world. This ray represents the path that light would have traveled to reach that pixel.
Once we have a ray, we need to figure out what it hits. This is called intersection testing. We check whether the ray intersects with any objects in our scene — spheres, planes, triangles, or more complex shapes. If the ray hits multiple objects, we care about the closest one because that's what would be visible from the camera's perspective. If the ray doesn't hit anything, we might color that pixel with a background color, like sky blue.
When we find an intersection point, the real magic begins. We need to calculate what color that point should be, which depends on several factors. What material is the object made of? Is it shiny metal, rough plastic, or transparent glass? Where are the light sources in the scene? Is the point in shadow, or is it directly illuminated?
This is where recursive rays come into play, and it's what makes ray tracing so powerful. If the surface is reflective, like a mirror, we cast a new ray that bounces off the surface in the direction of reflection. We then trace this new ray through the scene to see what it hits, and that color contributes to the color of our original intersection point. If the surface is transparent, like glass, we cast a refracted ray that bends as it passes through the material, following the laws of physics. For shadows, we cast rays toward each light source to see if anything blocks the light.
These recursive rays can bounce multiple times. A ray might hit a mirror, reflect to a glass ball, refract through the ball, reflect off another surface, and finally hit a light source. Each bounce contributes to the final color calculation, creating the complex interplay of light that makes ray-traced images look so realistic. This is why ray tracing can naturally handle effects that are difficult for other rendering techniques — it's literally simulating the physics of light.
Throughout this course, we'll build a complete ray tracer step by step, following an approach inspired by Peter Shirley's excellent Ray Tracing in One Weekend series. This series has taught thousands of people how to build ray tracers, and it's known for its clear, incremental approach that builds understanding through practical implementation.
We'll start simple. In the next few lessons, you'll learn how to generate your first image — just a simple gradient of colors. Then we'll add the ability to render basic shapes like spheres. You'll implement ray-sphere intersection testing and see your first 3D object appear in a rendered image. These early steps might seem basic, but they establish the fundamental structure that everything else builds upon.
As we progress, we'll add materials to our objects. You'll implement diffuse materials that scatter light in random directions, creating matte surfaces like chalk or unpolished stone. Then we'll add metals that reflect light, and you'll see your spheres become shiny and mirror-like. We'll implement transparent materials like glass, complete with refraction and the interesting optical effects that come with it.
Lighting is crucial for realistic images, so we'll explore different lighting models. You'll learn how to add light sources to your scene and calculate how they illuminate objects. We'll implement shadows by casting rays toward lights to check for obstructions. You'll add features like antialiasing to smooth out jagged edges, and depth of field to create that professional camera focus effect.
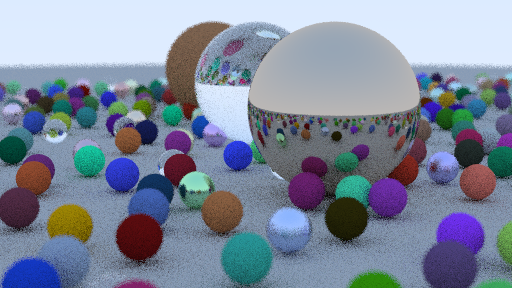
By the end of the course, you'll have a ray tracer capable of rendering complex scenes with multiple objects, different materials, realistic lighting, and sophisticated optical effects. You'll be able to create images that look like they were photographed in a real 3D world. More importantly, you'll understand the fundamental principles of how light works and how we can simulate it with code. This is a quick sneak peek of a scene your ray tracer will be able to render:
Let's look at your first program. Before we can render beautiful 3D scenes, we need to make sure you can compile and run C++ code. We'll start with the traditional "Hello, World!" program, but with a ray tracing twist.
Here's the complete program you'll write:
Let's understand what each part of this program does. The first line, #include <iostream>, tells the C++ compiler to include the input/output stream library. This library provides functionality for reading input and writing output, including the std::cout object we use to print text to the screen. The #include directive is how we bring in external code libraries that provide useful functionality we don't want to write ourselves.
The int main() function is the entry point of every C++ program. When you run your program, execution starts at the beginning of main() and proceeds line by line until it reaches the end. The int before main indicates that this function returns an integer value, which by convention tells the operating system whether the program succeeded or encountered an error.
Inside main(), we have one statement: std::cout << "Hello, Raytracer! 👋\n";. The std::cout object represents the standard output stream, which is typically your terminal or console. The operator sends data to this stream — in this case, our greeting message. The at the end of the string is a newline character that moves the cursor to the next line after printing. The semicolon at the end marks the end of this statement.
To compile and run your program on CodeSignal, follow these steps:
-
Compile the Program:
In the terminal, type the following command and press Enter:This command uses a tool called
maketo compile your C++ code. It reads instructions from a file calledMakefile(already set up for you) and produces an executable file in thebindirectory. -
Run the Program:
After compiling, run your program by typing:This command executes the compiled program. You should see the output:
If you make changes to your code, just repeat these steps: run make to recompile, then run ./bin/raytracer to see the new output.
In this lesson, you learned what ray tracing is and how it simulates the physics of light to create realistic images, in contrast to rasterization. You saw the big picture of what you'll build in this course: a ray tracer that gradually gains features like 3D shapes, materials, lighting, and optical effects. You also wrote your first C++ program, "Hello, Raytracer!", and learned how to compile and run it.
Next, you'll practice modifying this basic program and get comfortable with the compile-and-run workflow. In the following unit, you'll generate your first image by outputting a color gradient in the PPM format.
Welcome to the world of ray tracing. Let's build something amazing together!
