Welcome to the first lesson of the course, where we begin building the frontend for the LLM Prediction Game. In this course, you will create a web-based game in which players try to predict the next word generated by a large language model (LLM). The frontend is the part of the application that users see and interact with in their web browsers.
In this lesson, we will focus on creating the main HTML structure for the game. HTML (HyperText Markup Language) is the standard language used to create web pages. By the end of this lesson, you will understand how the HTML template for our game is organized and how it connects to the rest of the application.
Let’s quickly remind ourselves how the main files and folders are organized:
templates/: Folder containing HTML templates.index.htmlis the main page for the game.static/: Folder for static files like CSS and JavaScript.style.css: Stylesheet for the game.script.js: JavaScript file for interactivity.
Before we dive into the HTML itself, let’s talk about how Flask, our web framework, works with HTML files. Flask uses a system called "templates" to serve HTML pages to users. These templates are stored in a folder called templates inside your project.
When a user visits a certain page (like the homepage), Flask uses a function called render_template to send the correct HTML file to the browser. For example, if we want to show the main page of our game, we might have this code in our Flask app:
Here’s what’s happening:
- The
@routes.route("/", methods=["GET"])line tells Flask to run theindexfunction when someone visits the root URL (/). - Inside the function,
render_template('index.html')tells Flask to look for a file calledindex.htmlin thetemplatesfolder and send it to the user’s browser.
This is how Flask connects your Python code to the HTML that users see.
Now, let’s look at how the index.html file is built, step by step. We’ll focus on the main parts that make up the game’s interface.
Every HTML file starts with a basic structure:
- The
<!DOCTYPE html>line tells the browser this is an HTML5 document. - The
<head>section contains information about the page, such as its title and a link to a CSS file for styling. - The
<body>section is where all the visible content goes.
The expression {{ url_for('static', filename='style.css') }} is written in Jinja, the templating language Flask uses.
url_for is a Flask function that generates the correct URL for static files like CSS or JS. Using it helps avoid hardcoding file paths and ensures Flask can correctly serve files from the static/ folder—even if the app’s path changes later.
The double curly braces {{ }} tell Jinja to evaluate the expression and insert the result into the HTML.
Inside the <body>, we use a <div> with the class container to group all the game elements together:
This helps with layout and styling.
At the top of the container, we add a heading and a short description:
<h1>is the main title of the page.<p>withid="description"gives a short instruction to the player.
We want the user to start the game by clicking a button:
- The button with
id="start-button"will be used to begin the game.
Once the game starts, we show some information about the LLM and the prompts:
- This section is hidden at first (using the
hiddenclass via CSS, which we'll see in later units). - It will display the model name, system prompt, and user question.
We need a place to show the LLM’s response and a table to track guesses:
- The
#responsediv will show the LLM’s output. - The
#guess-tablewill list each guess, the correct word, and the score for that round.
Players need a way to enter their guesses:
- This section is also hidden at first.
- It contains a text input and a submit button for the player’s guess.
At the end of the game, we show the final score and a leaderboard:
- The result section lets the player see their score and enter their name.
- The leaderboard shows the top scores.
At the end of the file, we include a JavaScript file for interactivity:
- This line loads a JavaScript file that will handle user actions and update the page.
Let’s connect what we see in the HTML to the features of the game:
- The start button begins the game.
- The info section shows which LLM is being used and what the prompts are.
- The response area displays the LLM’s output as the game progresses.
- The guess input lets the player type in their prediction for the next word.
- The guess table keeps track of each guess, the correct answer, and the score for that round.
- The result section shows the player’s final score and lets them submit it.
- The leaderboard displays the top scores from all players.
Each of these elements will be made interactive with JavaScript and connected to the backend using Flask, but for now, our focus is on understanding and building the HTML structure.
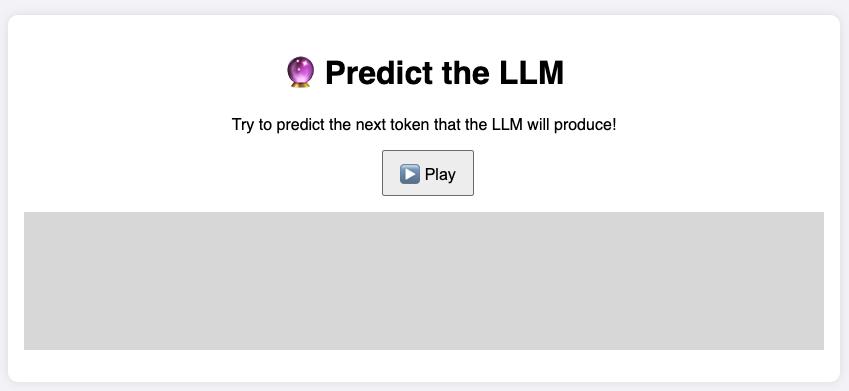
At the end, we are aiming for a page similar to this
In this lesson, you learned how the main HTML template for the LLM Prediction Game is organized. We covered how Flask serves HTML files, broke down the structure of index.html, and explained how each part of the page supports the game’s features.
In the practice exercises that follow, you’ll get hands-on experience working with this HTML file. You’ll identify and edit different elements, preparing you for the next steps, where we’ll add interactivity and connect the frontend to the backend. Great job getting started — let’s move on to practicing what you’ve learned!
