Welcome back to Advanced Rendering and Visual Effects! We've reached the fifth lesson in our journey, and today we're diving into one of the most essential post-processing techniques in modern graphics: professional Gaussian blur implementation. In our previous lesson, we mastered smooth transparency with alpha blending, creating compelling holographic displays through careful rendering order and dynamic opacity. Now, we'll enhance our post-processing arsenal with a mathematically precise blur effect.
Today's focus is on implementing a high-quality Gaussian blur that goes beyond simple averaging filters. We'll explore the mathematical foundation of Gaussian kernels, build an efficient sampling strategy in our shader, and integrate the blur seamlessly into our existing rendering pipeline. The framebuffer and multi-pass rendering skills we've developed will prove invaluable as we add this sophisticated post-processing effect to our holographic display system.
Gaussian blur is fundamentally different from simpler techniques like box filtering. While a box filter averages all neighboring pixels with equal importance, a Gaussian blur applies weights based on the famous bell-curve distribution. Pixels closer to the center have a stronger influence, while those farther away contribute less. This creates a naturally smooth, organic-looking blur that closely mimics how light scatters in real optical systems.
A key property of Gaussian blur is its separability. A 2D blur can be split into two 1D passes (one horizontal, one vertical) to dramatically improve performance. While this two-pass method is the industry standard for high-performance applications, implementing a direct 2D kernel, as we will today, provides a clearer understanding of the underlying mathematics. It also offers direct artistic control over the kernel's shape and sampling, which is perfect for creating stylized visual effects.
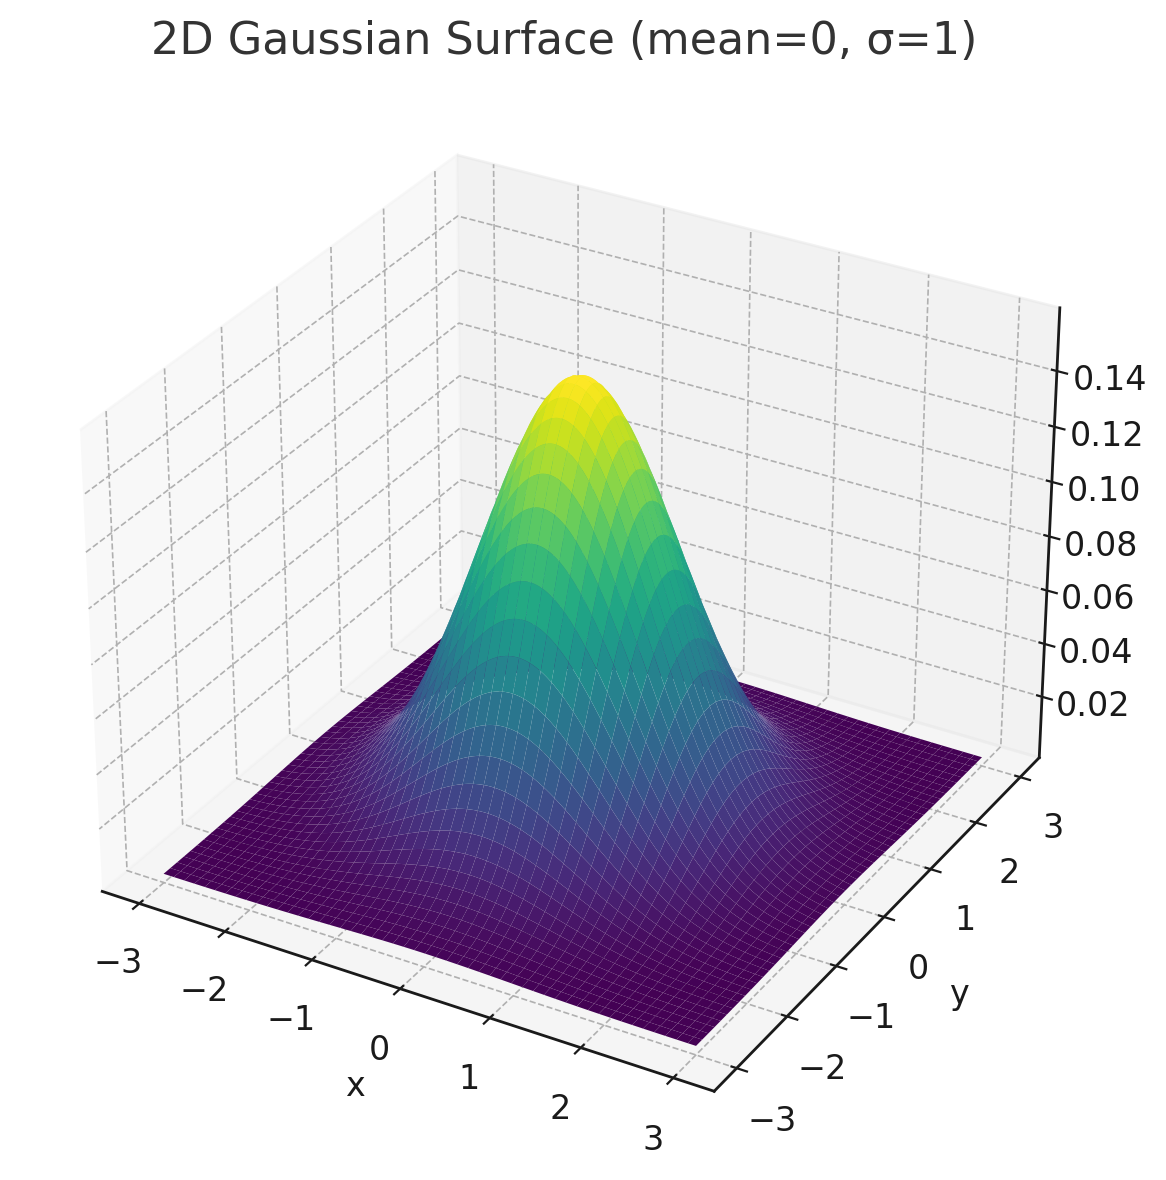
The heart of a Gaussian blur is the Gaussian function, which defines how much influence each neighboring pixel has on the final blurred color. For a 2D image, the function is:
To use the Gaussian function in a shader, we pre-calculate the function's value at discrete points to create a grid of weights, known as a kernel.
This array is a snapshot of the Gaussian function for a grid. Notice the values are highest in the center (0.150342) and fall off symmetrically. Critically, the sum of all 25 weights is 1.0, which ensures the blur doesn't change the overall brightness of the image.
Our Gaussian blur implementation is a dedicated shader function that performs the convolution. It samples the texture at multiple points around the current pixel and combines them using our pre-calculated weights.
This function starts by calculating texelSize, the size of a single pixel in texture coordinates. The nested loops iterate from -2 to 2 on both axes, creating the grid. In each iteration, it calculates an offset, samples the texture at that offset, multiplies the color by the corresponding weight from our weights array, and adds it to the result.
A key to efficient and powerful blurs in shaders is a smart sampling strategy. Instead of sampling adjacent pixels, we introduce a blurRadius to scale our sampling distance. This allows us to achieve a strong blur effect without needing a massive, computationally expensive kernel.
By multiplying our offsets by blurRadius, we effectively "stretch" our kernel over a larger area. This powerful trick simulates a much larger kernel with the same number of texture samples, giving us artistic control over the blur's intensity. The GPU's built-in linear texture filtering helps smooth the result, making this a highly effective technique for real-time graphics.
The true power of a professional blur filter emerges when it's used as a building block for more complex effects. In our shader, we use the Gaussian blur as a pre-processing step for our cartoon-style edge detection.
By blurring the image before detecting edges, we remove high-frequency noise and minor details. This allows the edge detection algorithm to focus only on the major structural lines in the image, resulting in cleaner, bolder, and more stable outlines. This multi-stage approach, where one effect prepares the image for another, is a hallmark of professional post-processing pipelines.
Our professional Gaussian blur implementation transforms the rendered scene with smooth, mathematically precise blurring that maintains visual coherence. The effect creates a soft, dreamy quality while preserving the overall structure and color balance of the original image. Notice how the blur naturally falls off from the center, creating depth and focus that draws the eye to key elements in the scene.
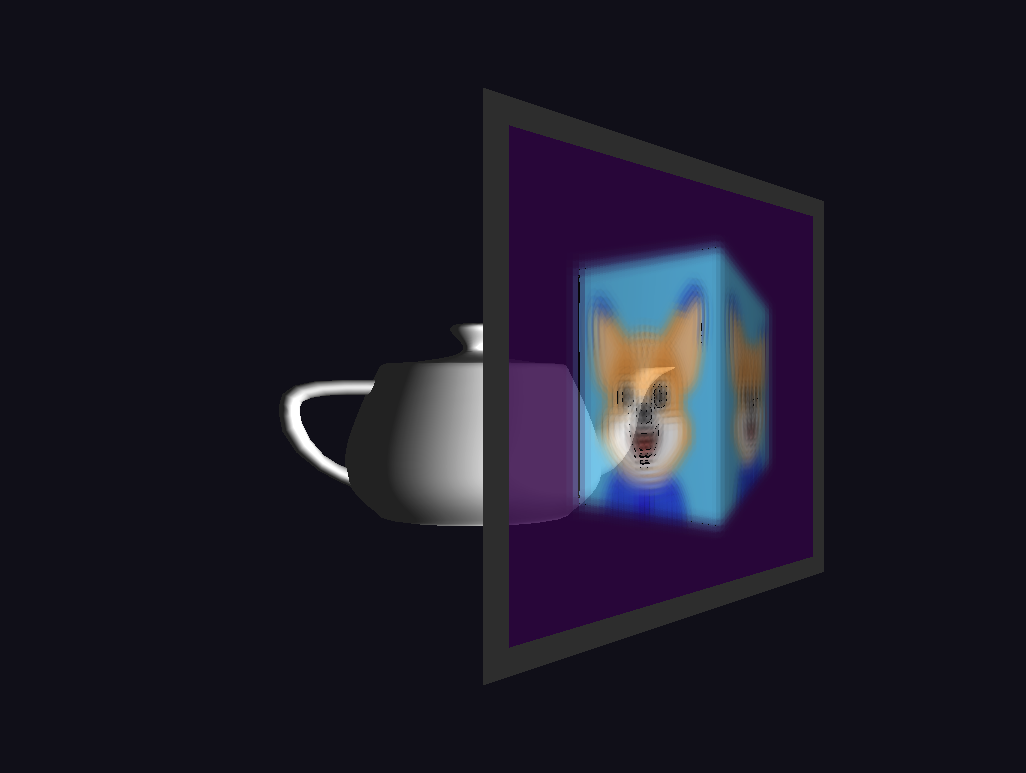
The pre-calculated kernel weights ensure consistent quality across different viewing angles and lighting conditions. This foundation blur effect serves as an excellent base for more complex post-processing chains, demonstrating how professional-grade techniques can elevate the visual impact of real-time graphics. The seamless integration with our existing framebuffer pipeline shows the power of modular shader design in building sophisticated visual effects.
We have successfully implemented a mathematically precise Gaussian blur system, demonstrating a professional-grade post-processing technique. By understanding the theory behind Gaussian kernels and using an efficient, scalable sampling strategy, we've created a flexible blur effect that serves both functional and artistic purposes. This approach provides the power to achieve everything from subtle smoothing to dramatic stylistic blurs.
The skills mastered here, from kernel implementation to combining effects in a multi-pass pipeline, are foundational for countless advanced rendering techniques. As you move into the practice exercises, you will have the chance to experiment with these blur parameters and see firsthand how high-quality post-processing can transform your rendered scenes into visually stunning experiences.