Composition API Fundamentals
Introduction & Lesson Overview
Welcome back! In the previous lesson, you explored the structure of a modern Vue.js project. You learned how files like public/index.html, src/main.js, and App.vue work together to create a clean and organized application. You also saw how Vue uses Single File Components (SFCs) and scoped styles to keep your code modular and easy to manage. This foundation is important because, as your projects grow, you will need to keep your code organized and maintainable.
In this lesson, we will build on that foundation by introducing you to one of Vue’s most powerful features: the Composition API. The Composition API is a modern way to manage state and logic in your components. By the end of this lesson, you will understand how to use the Composition API to create reactive variables, bind them to your template, and respond to user input. You will see these concepts in action through a simple greeting card example, and you will be ready to apply them in your own projects.
What Is The Composition API?
The Composition API is a set of new features introduced in Vue 3 that give you more flexibility and control over your component logic. Before the Composition API, Vue used the Options API, where you would organize your code by options like data, methods, and computed. While the Options API is still supported, the Composition API makes it easier to organize and reuse logic, especially in larger or more complex components.
With the Composition API, you write your logic inside a special <script setup> block in your component. This approach lets you group related code together, making your components easier to read and maintain. It also makes it simpler to share logic between components. Many developers find the Composition API to be more straightforward and powerful, especially as their apps grow.
Creating Reactive State With ref
One of the most important features of the Composition API is the ability to create reactive state using the ref function. A reactive variable is a value that Vue will automatically keep in sync with your template. When the value changes, the template updates automatically.
To use ref, you first import it from Vue. Then, you call ref with an initial value. For example, in the App.vue file from our greeting card example, you will see the following code:
Here, greeting and recipient are both reactive variables. You can think of them as special containers that hold values. In your JavaScript code, you access or change their values using .value, like recipient.value = 'Alex'. However, as you will see in the next section, Vue makes it even easier when you use these variables in your template.
Automatic Ref Unwrapping In The Template
One of the nice features of Vue is that it automatically "unwraps" refs when you use them in your template. This means you do not need to write .value in your HTML. For example, in the template section of App.vue, you can simply write:
Even though greeting and recipient are refs, Vue will display their current values in the template. If you change recipient.value in your script, the displayed name will update automatically.
Vue also makes it easy to create two-way data binding with the v-model directive. In the greeting card example, you will see an input field like this:
The v-model directive connects the input field to the recipient ref. When the user types in the input, the value of recipient updates automatically. If you change recipient in your script, the input field will also update. This two-way binding is a powerful feature that keeps your data and your UI in sync.
Walkthrough Of The Greeting Card Component Example
Let’s look at how all these pieces come together in the greeting card example. In the App.vue file, you define two reactive variables, greeting and recipient, using the ref function. The template displays the greeting and the recipient’s name. There is also an input field that lets the user change the recipient’s name.
Here is the relevant part of the component:
When the page loads, you will see:
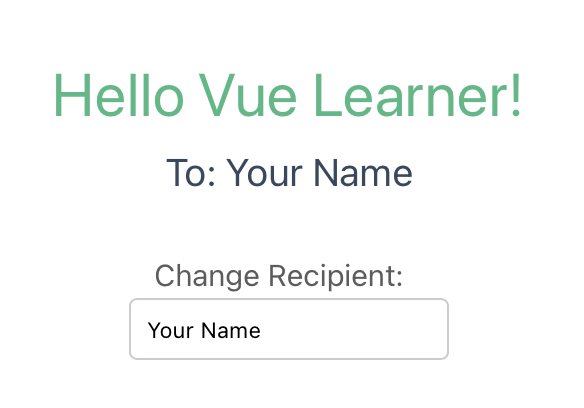
If you type a new name into the input field, the text under "To:" will update instantly. This is possible because recipient is a reactive variable, and the v-model directive keeps the input and the variable in sync. This example shows how the Composition API and Vue’s reactivity system make it easy to build interactive user interfaces.
Summary & Preparation For Hands-On Practice
In this lesson, you learned the basics of the Composition API in Vue. You saw how to create reactive variables using ref, how Vue automatically unwraps these variables in your template, and how to use v-model for two-way data binding. The greeting card example showed how these features work together to create a simple, interactive component.
You are now ready to practice these concepts yourself. In the next exercises, you will create and use reactive variables, bind them to your template, and respond to user input. This hands-on practice will help you become comfortable with the Composition API and prepare you for more advanced features in Vue. Keep up the great work!
