Welcome to the next step in your journey of creating stunning AI-generated images! In the previous lesson, you explored how artistic styles and quality modifiers can enhance the visual output of your images. Now, we will build on that foundation by introducing you to photography modifiers. These modifiers are crucial for adding realism and artistic flair to your images, allowing you to simulate various photographic techniques and styles.
Photography modifiers include elements such as camera proximity, camera position, lighting, camera settings, lens types, and film types. By incorporating these into your prompts, you can guide the AI to generate images that mimic real-world photography, providing a more immersive and authentic visual experience.
Let's delve into the different types of photography modifiers and understand their impact on image aesthetics. These modifiers allow you to simulate various photographic techniques, enhancing the realism and artistic quality of your images.
-
Camera Proximity: This modifier affects how close or far the camera appears to be from the subject. For example, a close-up shot can highlight details, while a zoomed-out shot provides a broader context.
-
Camera Position: This refers to the angle or perspective from which the photo is taken. An aerial view can offer a bird's-eye perspective, while a shot from below can create a sense of grandeur.
-
Lighting: Lighting modifiers can dramatically change the mood of an image. Natural lighting provides a soft, realistic look, while dramatic lighting can add intensity and focus.
-
Camera Settings: These include effects like motion blur, soft focus, and bokeh, which can add depth and artistic flair to your images.
-
Lens Types: Different lenses, such as fisheye or macro, can alter the field of view and distortion, creating unique visual effects.
-
Film Types: This modifier can simulate the look of different film types, such as black and white or polaroid, adding a vintage or classic feel to your images.
By understanding and utilizing these modifiers, you can create images that not only look realistic but also convey the desired artistic expression. A helpful habit with Gemini's image models is to weave these modifiers into a flowing, descriptive sentence rather than tacking them on as a comma-separated list — the model's language understanding rewards a coherent scene description.
Now, let's see how to implement these photography modifiers in your code. We'll use the provided code snippet to demonstrate how to define prompts with specific photography styles and generate images.
In the code, we start by initializing the Gemini client with your API key. This client serves as the connection between your code and the Gemini API. We then define a list of prompts, each incorporating different photography modifiers:
For each prompt, we use the generate_content method to request an image from the Gemini image model. The method takes the model name, the prompt (passed inside contents), and a configuration that asks for an image back. In this example, we specify the model as "gemini-3.1-flash-image" and request an image for each prompt.
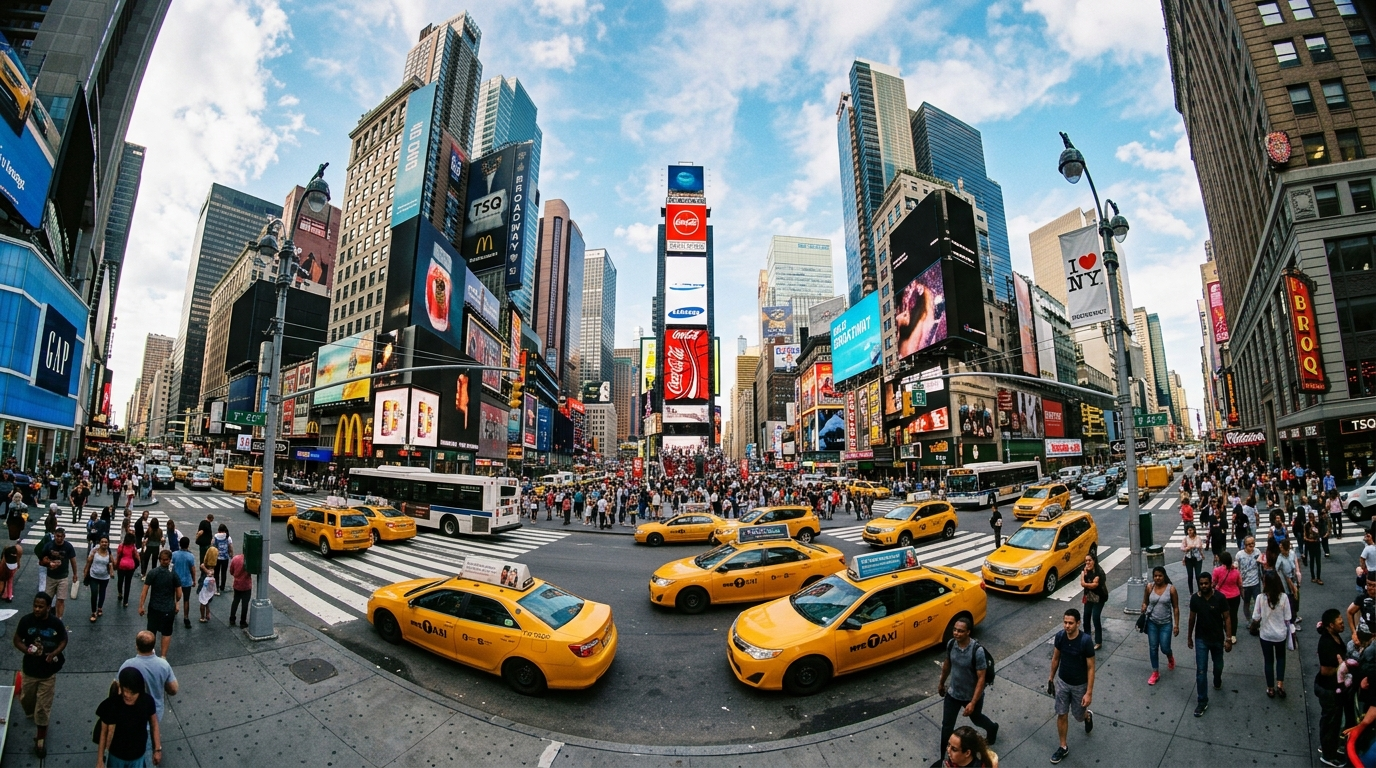
Here is how the image generated by the prompt A street in New York City, taken with a fisheye lens, wide-angle perspective will look like:
Let's walk through an example to see how these concepts come together in practice. We'll use the code provided to generate images with different photography modifiers.
In this example, we loop through each prompt, generate an image, and save it using the PIL library. The generated images will reflect the specified photography modifiers, allowing you to observe how these elements influence the final output. For instance, a portrait with natural lighting will have a soft, realistic appearance, while a fisheye lens will create a wide-angle perspective.
In this lesson, you learned about the different types of photography modifiers and how to implement them in your image generation code. By incorporating these modifiers into your prompts, you can create images that mimic real-world photography, enhancing both realism and artistic expression.
As you move on to the practice exercises, take the opportunity to experiment with different combinations of photography modifiers. This hands-on practice will reinforce your understanding and prepare you for more advanced topics in the upcoming lessons. Keep exploring and enjoy the journey of creating stunning images with AI!
