Props and Component Communication
Introduction and Context
Welcome back to the Building with Vue Components course. In the previous lesson, you learned how to use Vue’s Composition API to build a simple to-do list application. You created a parent component, App.vue, that managed the list of tasks, and a child component, TodoItem.vue, that displayed each task. You also learned how to pass data from the parent to the child using props and how to render a list of components dynamically with v-for.
In this lesson, we will build on that foundation. Our main goal is to help you understand how components in Vue communicate with each other, not just from parent to child, but also from child to parent. You will learn how to use props to pass data down and how to use custom events to send actions or information back up. By the end of this lesson, you will be able to create interactive components that can both receive data and notify their parent when something happens, such as marking a task as complete or deleting it. This is a key skill for building real-world Vue applications.
Understanding Props in Vue
Let’s start by revisiting props. As you saw in the last lesson, props are a way for a parent component to pass data to a child component. This is a one-way flow: the parent owns the data, and the child receives a copy of it. This keeps your application predictable and easier to debug.
For example, in your App.vue, you have a list of to-do items stored in a reactive variable called todos. When you render the list, you pass each todo object to the TodoItem component using the :todo="todo" syntax. Here’s a reminder of how that looks:
Inside the TodoItem.vue component, you declare that you expect a todo prop using the defineProps macro. This tells Vue that the component needs a todo object to work with:
The required: true option tells Vue that this prop must be provided by the parent component. If you forget to pass the todo prop, Vue will show a warning in the console during development, helping you catch mistakes early. This is especially useful in larger projects where it's easy to miss passing data to child components.
With this setup, each TodoItem receives its own todo object and can display the task's text. This pattern is very common in Vue and helps you keep your components focused and reusable.
Custom Events and Component Communication
While props are great for passing data down from parent to child, sometimes you need the child to communicate back to the parent. For example, when a user checks off a task or deletes it, the child component needs to let the parent know so the parent can update the main list.
Vue solves this with custom events. A child component can emit an event, and the parent can listen for it and respond. To do this, you use the defineEmits macro—just like defineProps, this is a special Vue function that's automatically available in <script setup> and doesn't need to be imported.
In your to-do list, the TodoItem component emits two custom events: toggle-complete and delete-todo. When the user interacts with the checkbox or the delete button, the child emits the appropriate event, passing the todo.id as a payload.
Here's how this looks in the child component:
When the checkbox is changed, the child emits a toggle-complete event with the todo.id. When the delete button is clicked, it emits a delete-todo event with the same id. The parent component listens for these events and updates the list accordingly.
Code Walkthrough of App.vue and TodoItem.vue
Let’s walk through the current code example to see how props and custom events work together in practice.
In App.vue, you import the TodoItem component and define your list of to-dos using ref. You also define two handler functions: handleToggleComplete and handleDeleteTodo. These functions update the state when the child component emits an event.
In the template, you render the list of TodoItem components. For each item, you pass the todo object as a prop and listen for the toggle-complete and delete-todo events. When these events are triggered, the corresponding handler is called:
In TodoItem.vue, you receive the todo prop and use the defineEmits macro to declare the events you will emit. The checkbox and delete button both use the emit function to send events to the parent:
When you run this code, the output in the browser will look like this:
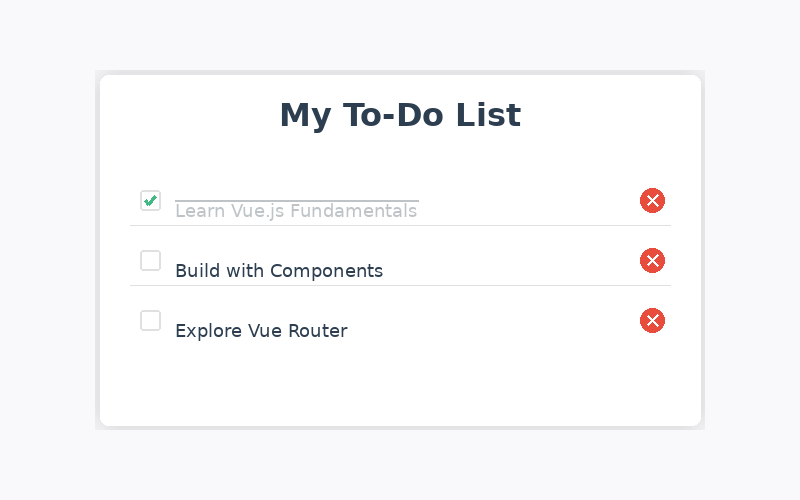
You can check or uncheck tasks and delete them. The list updates automatically because the parent component manages the state and responds to the events from the child.
Best Practices and Tips
When working with props and custom events, it is important to keep your components focused and their responsibilities clear. The parent should own the main state and handle any changes, while the child should focus on displaying data and notifying the parent when something happens. This separation makes your code easier to maintain and reuse.
Always validate your props using the defineProps macro, specifying the expected type and whether the prop is required. This helps catch errors early and makes your components more robust. When emitting events, use clear and descriptive event names, such as toggle-complete or delete-todo, so it is obvious what action is being requested.
In real-world projects, try to keep your components as simple as possible. If a component starts to handle too many responsibilities, consider breaking it into smaller pieces. Also, remember that in the CodeSignal environment, all necessary libraries are pre-installed, so you can focus on writing and understanding your code rather than setting up the environment.
Summary and Preparation for Hands-On Practice
In this lesson, you learned how to use props to pass data from a parent to a child component and how to use custom events to send actions or information back from the child to the parent. You saw how these patterns work together to create interactive and maintainable Vue applications. By following best practices, you can keep your components clean, focused, and easy to work with.
Next, you will get hands-on practice with these concepts. You will have the chance to modify the to-do list, handle events, and see how changes in one component can affect the whole application. This will help you build confidence and prepare for more advanced topics in Vue component development.
