Building Composition API Components
Introduction: Setting the Context and Lesson Goals
Welcome to your first lesson in the "Building with Vue Components" course. In this lesson, you will learn how to build a simple to-do list application using Vue’s Composition API. By the end of this lesson, you will be able to create a parent component that manages a list of tasks and a child component that displays each task. You will also understand how to pass data between these components using props.
The Composition API is a modern way to write Vue components. It helps you organize your code better, especially as your applications grow larger. Today, you will see how the Composition API makes it easier to manage state and share logic between components. This lesson will set the foundation for everything else you will build in this course.
Overview of the Composition API and <script setup>
Vue’s Composition API introduces new ways to write and organize your component logic. Two important features you will use are ref and defineProps. The ref function allows you to create reactive variables, which means Vue will automatically update the user interface when these variables change. The defineProps macro lets a component receive data from its parent.
You will also notice the use of the <script setup> block in the code examples. This is a special way to write Vue components that makes your code cleaner and easier to read. With <script setup>, you do not need to write as much boilerplate code, and everything you define inside is available directly in your template.
For example, in your parent component, you will use ref to create a list of to-do items. In your child component, you will use defineProps to receive a single to-do item from the parent.
Managing State in the Parent Component (App.vue)
In a Vue application, the parent component is often responsible for managing the main state of the app. In this lesson, your parent component is App.vue, and it will hold the list of to-do items. You will use the ref function from the Composition API to make this list reactive.
Here is how the state is managed in App.vue:
In this code, todos is a reactive array of objects. Each object represents a to-do item with an id, text, and completed status. Because todos is created with ref, any changes to this array will automatically update the user interface.
Building the TodoItem Child Component
To keep your code organized, it is good practice to break your application into smaller components. In this lesson, you will create a TodoItem component that is responsible for displaying a single to-do item.
The child component uses the defineProps macro to declare that it expects a todo prop from its parent. Here is what the TodoItem.vue component looks like:
In this example, the todo prop is an object that contains the details of a single to-do item. The component simply displays the text property of the todo object. This approach keeps the child component focused on presentation, while the parent manages the data.
Integrating Components with v-for and Props
Now that you have both the parent and child components, you need to connect them. In Vue, you can use the v-for directive to render a list of components. You also use the :key attribute to help Vue keep track of each item in the list, which improves performance and avoids rendering bugs.
Here is how you render the list of to-do items in App.vue:
In this template, v-for="todo in todos" tells Vue to loop over each item in the todos array. For each item, a TodoItem component is created. The :todo="todo" part passes the current to-do item as a prop to the child component. The :key="todo.id" helps Vue identify each item uniquely.
When this code runs, the output in the browser will look like this:
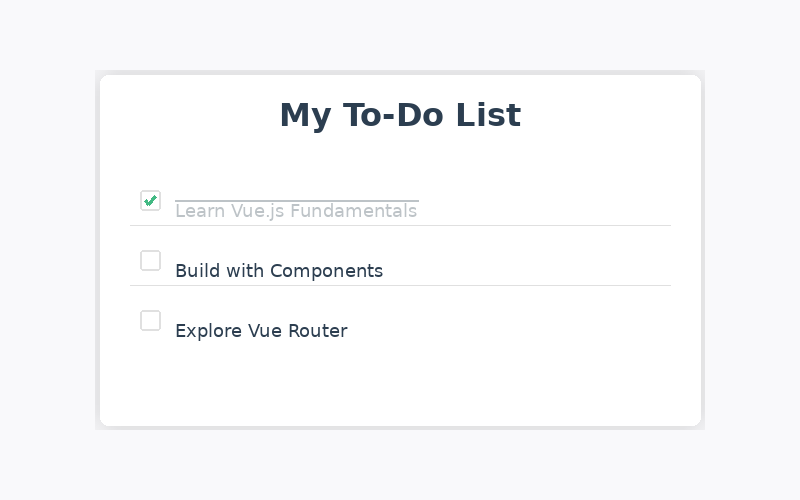
Each bullet point is a separate TodoItem component, and the list is generated dynamically from the todos array.
Summary and Next Steps
In this lesson, you learned how to use Vue’s Composition API to build a simple to-do list application. You saw how the parent component manages the state using ref, and how the child component receives data using defineProps. You also learned how to use v-for and props to render a list of components and pass data between them.
These are the building blocks for creating more complex Vue applications. In the next part of the course, you will get hands-on practice with these concepts. You will have the chance to modify the to-do list, add new features, and deepen your understanding of how components communicate in Vue.
