Editing and Using Images Responsibly
Editing and Using Images Responsibly ✂️
Generating an image from scratch is one workflow. The other, often more common in day-to-day design work, is taking an image you already have and changing one specific thing about it. That's editing, and it's where AI tools save the most time: an About-page team photo that needs a former teammate removed (make sure the reason is defensible and the edit doesn't misrepresent the team), a case-study cover with the wrong background, a design-system announcement graphic with a distracting object. But editing also concentrates the risk. The closer an edited image looks to a real photograph, the more carefully you have to handle what it says, what it implies about real people, and how you publish it — because a public-facing image on your product's About page or a launch post can read as a claim about your team and your users.
By the end of this lesson, you'll be able to:
- Identify the edit types AI tools can support — cropping, background changes, object removal, inpainting, outpainting, and style adjustments.
- Write image-edit instructions using the Image Edit Brief to preserve required elements while changing only the targeted area — after clearing a Pre-Edit Approval Gate for any edit that alters real people or public assets.
- Evaluate AI-generated or AI-edited images for brand, audience, accessibility, accuracy, and disclosure risks before sharing.
Know the Edit Types AI Can Actually Do 🎨
Before you write any instruction, it helps to know what's on the menu, because the right vocabulary gets you a faster, cleaner result:
| Edit Type | What It Does | Watch Out For |
|---|---|---|
| Cropping | Trims the frame to a new aspect ratio or focal point | Cutting off something important, or breaking a slide's safe area |
| Background change | Swaps what's behind the subject while keeping the subject intact | Mismatched lighting between subject and new background |
| Object removal | Erases something unwanted and fills the gap with a plausible patch | Ghosted edges where the object used to be |
| Inpainting | Masks a region and generates new content to appear there | Warped hands, regenerated faces, invented details |
| Outpainting | Extends the image beyond its original edges to widen the canvas | Visible seams where the new canvas meets the original |
| Style adjustment | Shifts the overall look: color grade, illustration treatment, lighting feel | Drift away from your design system's visual language |
Most real edits are some combination of these. A "fix the About-page team photo" request is usually object removal (the person who left) plus a background change plus a light color match. Naming the edit type in your head first makes the instructions you write next much sharper, because each type has its own failure modes — and when the edit touches a real person's face or the makeup of a team, drift becomes an accuracy and authenticity problem, not just a cosmetic one.
Clear the Gate, Then Write the Image Edit Brief ✍️
Before you touch the tool, one question comes first when the edit alters a real person or a public-facing asset: are you even allowed to make this change? That's the Pre-Edit Approval Gate, and it runs before any brief:
- Permission/Consent: are you authorized to alter this person's likeness or this asset?
- Business Reason: is there a legitimate, documented need for the edit?
- Appropriateness & Accuracy: does the edit misrepresent history, people, or events — for example, erasing a former teammate from a public team photo?
- Escalation: does this need design-lead, legal, or brand sign-off first?
If any answer is unclear, you escalate rather than edit. Removing someone from an About-page team photo may be perfectly reasonable — or it may raise consent and historical-accuracy questions you're not the one to decide. The gate keeps you from quietly rewriting a real record.
Once you've cleared the gate, free-form editing requests like "remove the person who left and change the background" are how good team photos get ruined. The model has no idea what you consider untouchable, so it'll happily redraw a remaining person's face, shift their position, or warp the lighting. The fix is the Image Edit Brief, a four-part instruction:
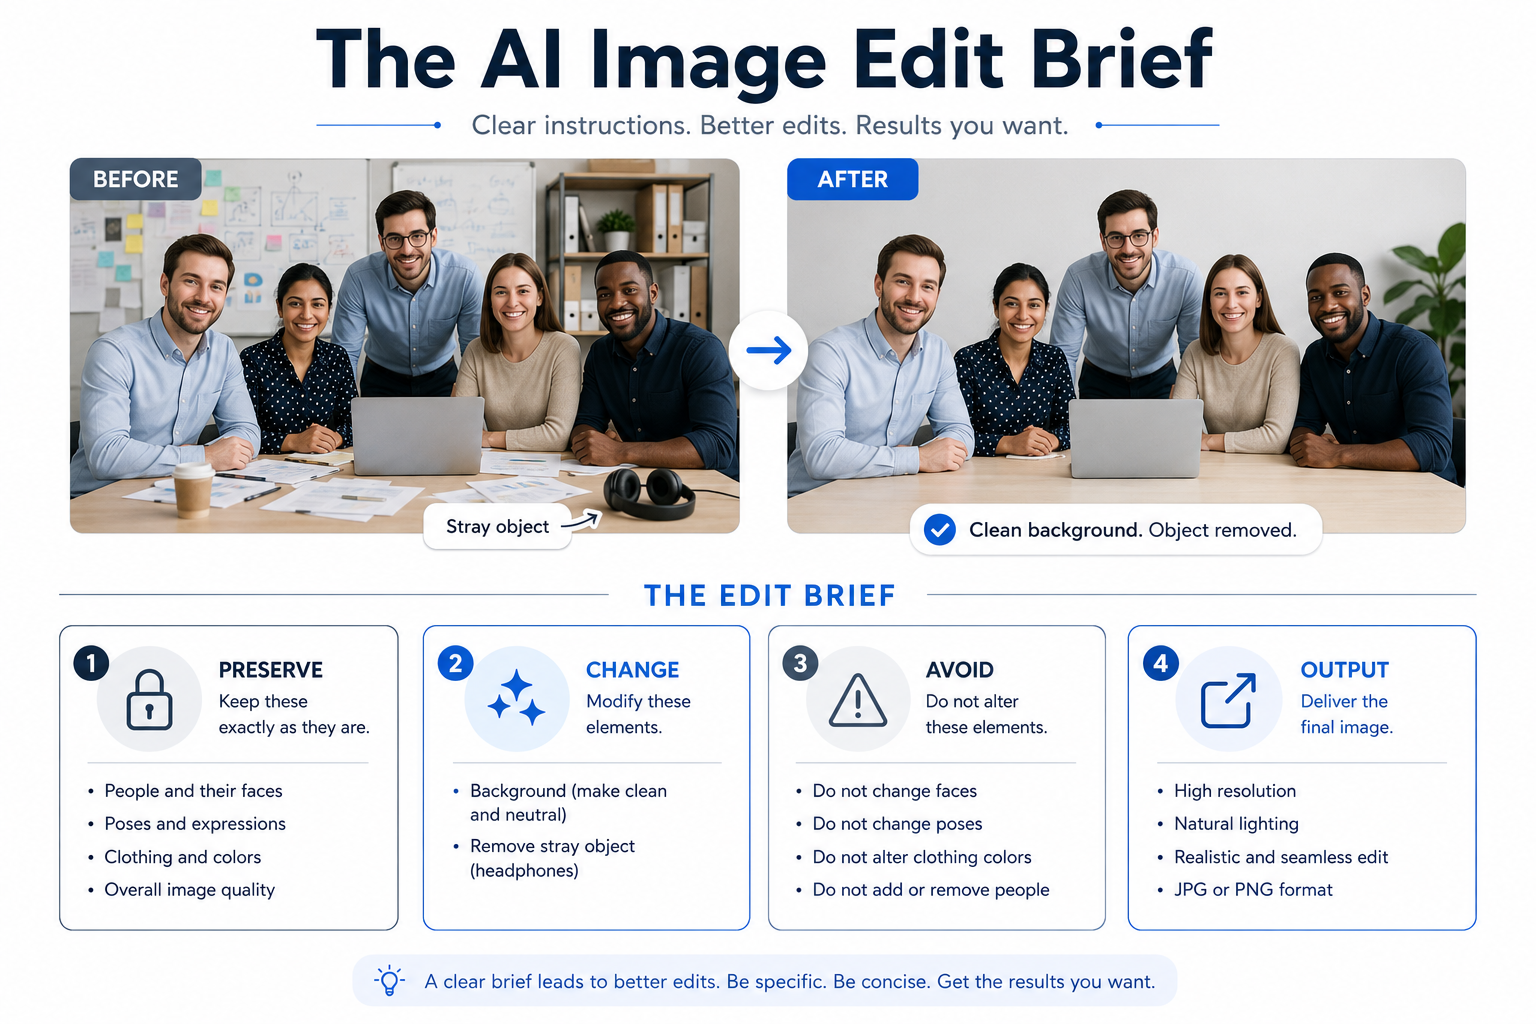
- Preserve: what must remain exactly as-is.
- Change: the specific edit, described concretely.
- Avoid: artifacts, drift, or unintended modifications.
- Output: final format, dimensions, and where it's going.
Preserve is the part people skip. You have to explicitly name the faces, positions, and lighting of the people who stay — anything you're not willing to lose, especially anything that affects how real people are represented. Change should be one or two surgical edits, not a wish list. Avoid catches the predictable failure modes: face drift, warped shoulders, mismatched lighting, seams. Output ties the edit to its real use: an About page has different demands than an internal slide.
Let's look at what an edit conversation between Ryan and Nova sounds like:
- Ryan: What's the edit?
- Nova: Take the teammate who left out of the design team photo and freshen up the background to match the new studio.
- Ryan: That'll come back with the remaining people's faces slightly redrawn. What are you preserving?
- Nova: The faces, positions, and lighting of everyone who stays. They come back pixel-for-pixel.
- Ryan: Good. And Avoid?
- Nova: No face drift, no warped shoulders, no seam where the person was, no mismatched lighting between the people and the new background.
Notice Ryan's pressure: name what stays before you name what changes, and here "what stays" includes the real people whose likeness you can't distort. That order is the whole brief.
Evaluate Before You Ship 🚦
A clean edit doesn't automatically mean a publishable asset. Before any AI-generated or AI-edited image goes out under your product's name — especially an About page or a launch-day social post — run it through five checks:
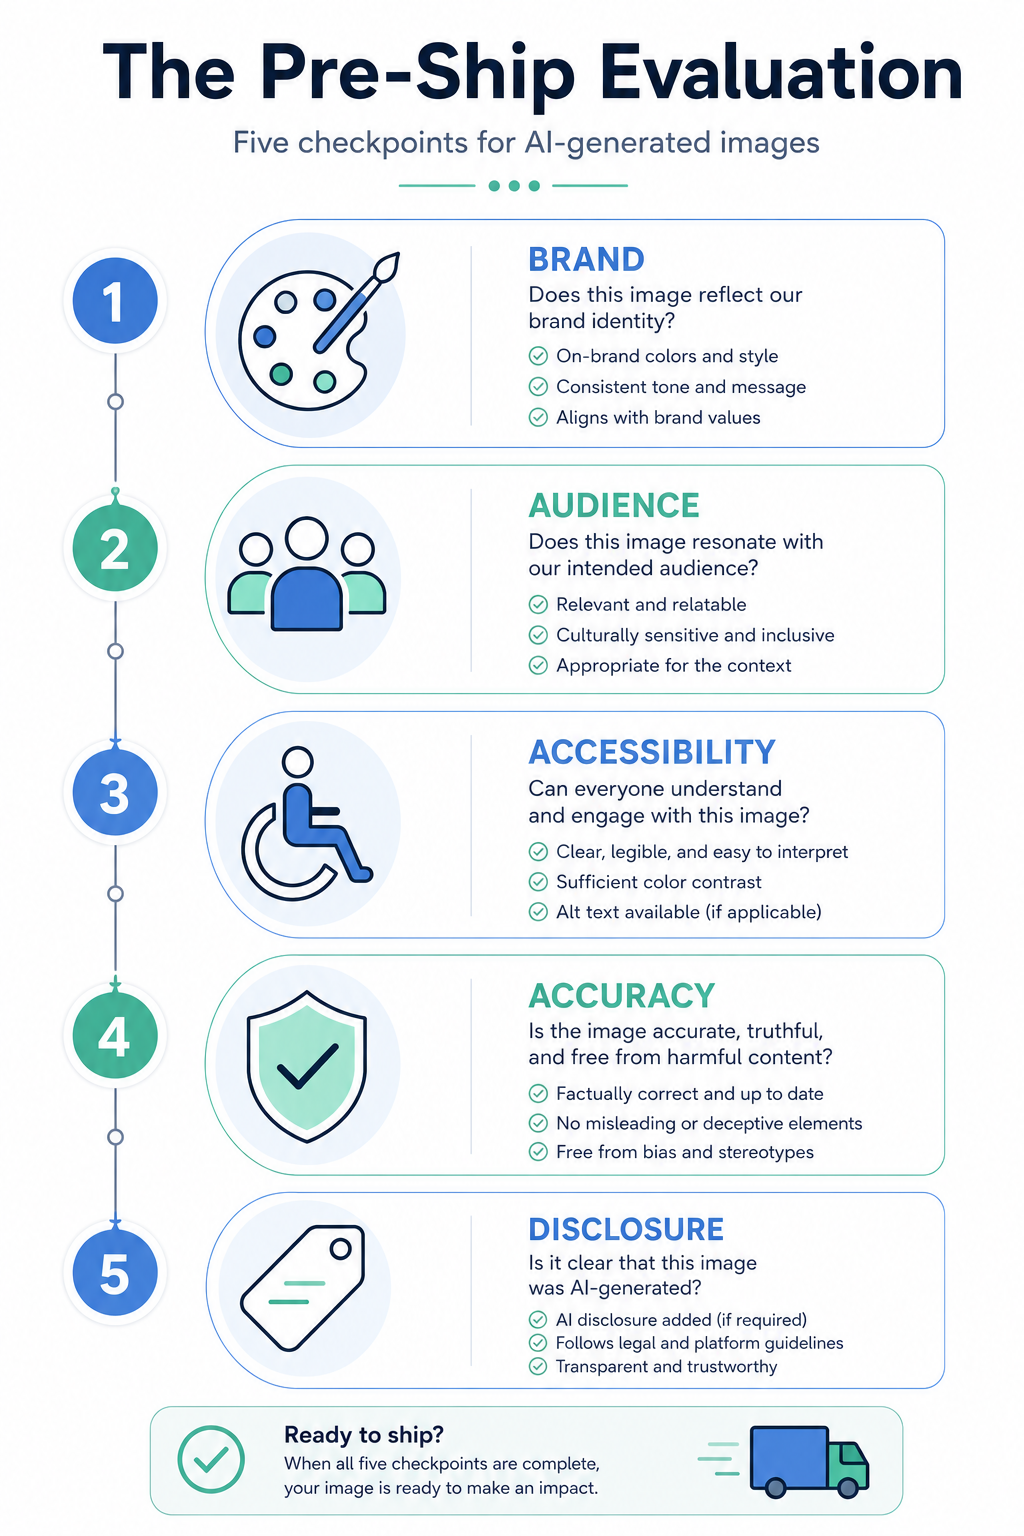
- Brand: does it match the visual system, or does it read as generic stock?
- Audience: will the users and customers seeing it interpret it the way you intend, on this channel?
- Accessibility: does it need alt text, and is the contrast high enough where a headline overlays it?
- Accuracy: does the image imply something untrue — that these are real customers, a real testimonial, a team makeup that doesn't reflect reality?
- Disclosure: if the image is AI-generated or substantially AI-edited, do platform rules or your audience's expectations call for labeling it (for example "illustration, not a real user")?
The accuracy and disclosure checks are where teams get burned. An AI image of "our users using the product," placed next to launch copy, reads as a depiction of real customers even if you never said so — and if the depicted people or their roles don't reflect the actual user base, that's a stereotype and a misrepresentation risk; if the faces resemble real people, it's a likeness/rights problem, and the framing can imply a customer testimonial that never happened. For likeness-sensitive or public-facing images, a broader Responsible Visual Use Review also asks: do real people consent to this use; do you have rights to the source and style; does the edit imply something false; can you trace what's generated vs. edited vs. original; who signs off before publishing; and does the use require an "AI-generated" or "AI-edited" label? It also helps to run a lightweight Visual Preflight before you generate or edit — write down the intended use and audience, the criteria you'll judge against, the approved/non-sensitive source assets you'll use, and the consent/rights/disclosure needs — so you decide what "acceptable" means before producing anything.
The move when a risk surfaces is not always to scrap the asset: sometimes you revise the prompt, sometimes you change the caption or placement, sometimes you add a disclosure line, sometimes you swap in approved photography. The judgment call is yours, but it has to be a call, not a default.
The throughline of this unit: edits and AI images need a stated intent (the gate and the brief) and a stated standard (the five checks plus the Responsible Visual Use Review), or you'll publish something nobody actually approved — and on an About page or a launch post, "published" reads as a claim about your team and your users. Before this becomes real, you'll get on a call with a brand lead who wants to ship an AI launch image tomorrow and isn't sure the risk is worth a delay. Your job is to name the specific concerns, propose options, and land on a defensible call together: revise the prompt, change the usage plan, or kill the asset. Bring specifics — vague risk talk loses to a publish deadline every time.
