Building Pygame Game States
Introduction
Welcome to Polishing your first Pygame game! We already have a playable dodge-game prototype: the player moves with the arrow keys, red obstacles fall from above, the score increases when an obstacle is dodged, and sound effects play for points and collisions.
The game currently has only one phase. It begins immediately and closes after a collision. Real games usually move between phases such as a title screen, active play, and a game-over screen.
In this lesson, we will add a game_state variable that identifies the current phase and build a start screen that waits for the Enter key.
The game_state Variable: One String, Many Phases
A simple state machine lets the game be in one named phase at a time. Add game_state next to the other setup values before the loop:
Strings work well because names such as "start" and "playing" are readable, easy to compare with ==, and easy to extend later.
The assignment belongs before the loop. If game_state = "start" were assigned inside the loop, it would run on every iteration and reset the phase to "start", preventing a transition to "playing" from persisting.
Branching the Game Loop with if / elif
The state variable controls which block runs during each frame:
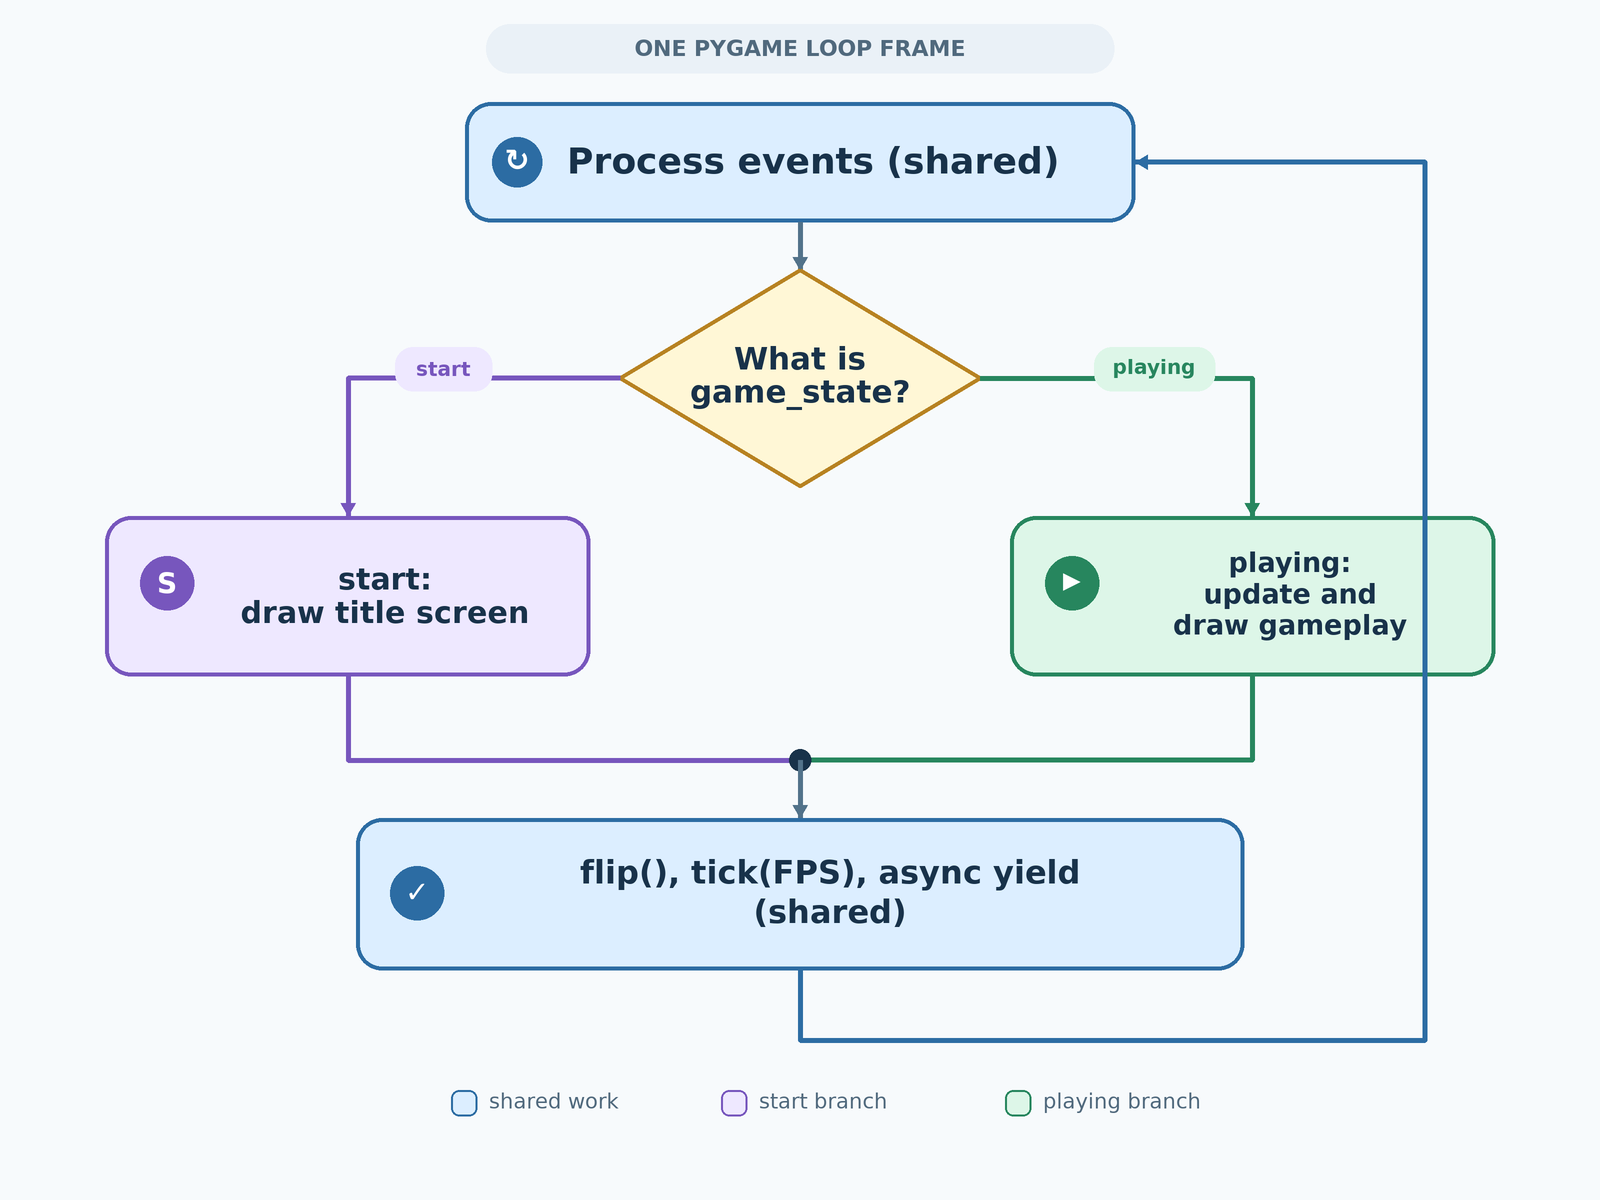
Some work is shared by every state:
- Event processing must always run so the window can close.
pygame.display.flip()presents the completed frame.clock.tick(FPS)controls the frame rate.await asyncio.sleep(0)yields control in the asynchronous environment.
Movement, obstacle updates, collision checks, and gameplay drawing belong only in the "playing" branch. Moving those lines into the branch changes their indentation but not their behavior.
Because game_state starts as "start", gameplay no longer updates immediately. Before we draw the start screen, the result is simply a blank window filled with the background color.
Adding a Title Font
The title should be larger than the score and prompt text, so create a second font during setup:
Font objects should be created once before the loop and reused instead of being recreated every frame.
Drawing the Start Screen
The "start" branch fills the background and displays two centered lines:
get_rect(center=(...)) creates a rectangle for the rendered text and positions it by its center. This avoids manually measuring the text width.
Reacting to Keypresses with KEYDOWN Events
Movement uses pygame.key.get_pressed() because it should continue while a key is held. A state transition should happen once when a key is pressed, so it belongs in a KEYDOWN event:
The state check ensures that Enter starts gameplay only from the start screen. Later, the same key can have a different purpose in the game-over state.
Tracing the Finished Program
The final loop has a clear structure:
The start screen is drawn until the player presses Enter. That event changes game_state to "playing", allowing the gameplay branch to run. The player, obstacles, and score were already created during setup, so the game begins immediately.
A collision still ends the program in this unit. In the next unit, we will replace that exit with a "game_over" state.
Conclusion and Next Steps
A game_state string now identifies the current phase, if/elif branches route each frame to the correct behavior, and KEYDOWN events trigger one-time transitions. This structure will support the game-over screen, restarting, music, and difficulty scaling added later in the course.
