Welcome to lesson four of five in Measurements in the Kitchen! You have already built a solid foundation: classifying kitchen units as volume or weight, converting volume units, and converting weight units. With all those conversion skills in your toolkit, it might seem like you can freely swap between cups and grams whenever a recipe calls for it. In this lesson, we slow down and look at a common trap that catches many cooks: assuming that a volume measurement and a weight measurement can always stand in for each other. By the end, you will know exactly why they cannot and when it really matters.
Be a part of our community of 1M+ users who develop and demonstrate their skills on CodeSignal
As you may recall from the very first lesson, volume measures how much space something takes up, while weight measures how heavy it is. A cup is always the same amount of space — about 237 mL — no matter what you put inside it. But different ingredients have different masses packed into that same space.
Think of filling a cup with feathers and then filling the same cup with sand. Both cups hold the same volume, yet the cup of sand is much heavier. The same logic applies to kitchen ingredients: a cup of flour, a cup of sugar, and a cup of honey each fill the same measuring cup, but they land on the scale at very different numbers. This difference comes down to a property called density, which we will explore next.
Density is simply how much mass is packed into a given volume. A dense ingredient is heavier per cup; a light, airy ingredient is lighter per cup. We can express this relationship with a short formula:
weight=volume×density
Because every ingredient has its own density, the same 1 cup of volume produces a different weight for each one. This is the core reason volume and weight are not interchangeable in the kitchen.
You do not need to memorize density values. The practical takeaway is straightforward: whenever you swap a volume measurement for a weight measurement (or the other way around), the result depends entirely on which ingredient you are measuring.
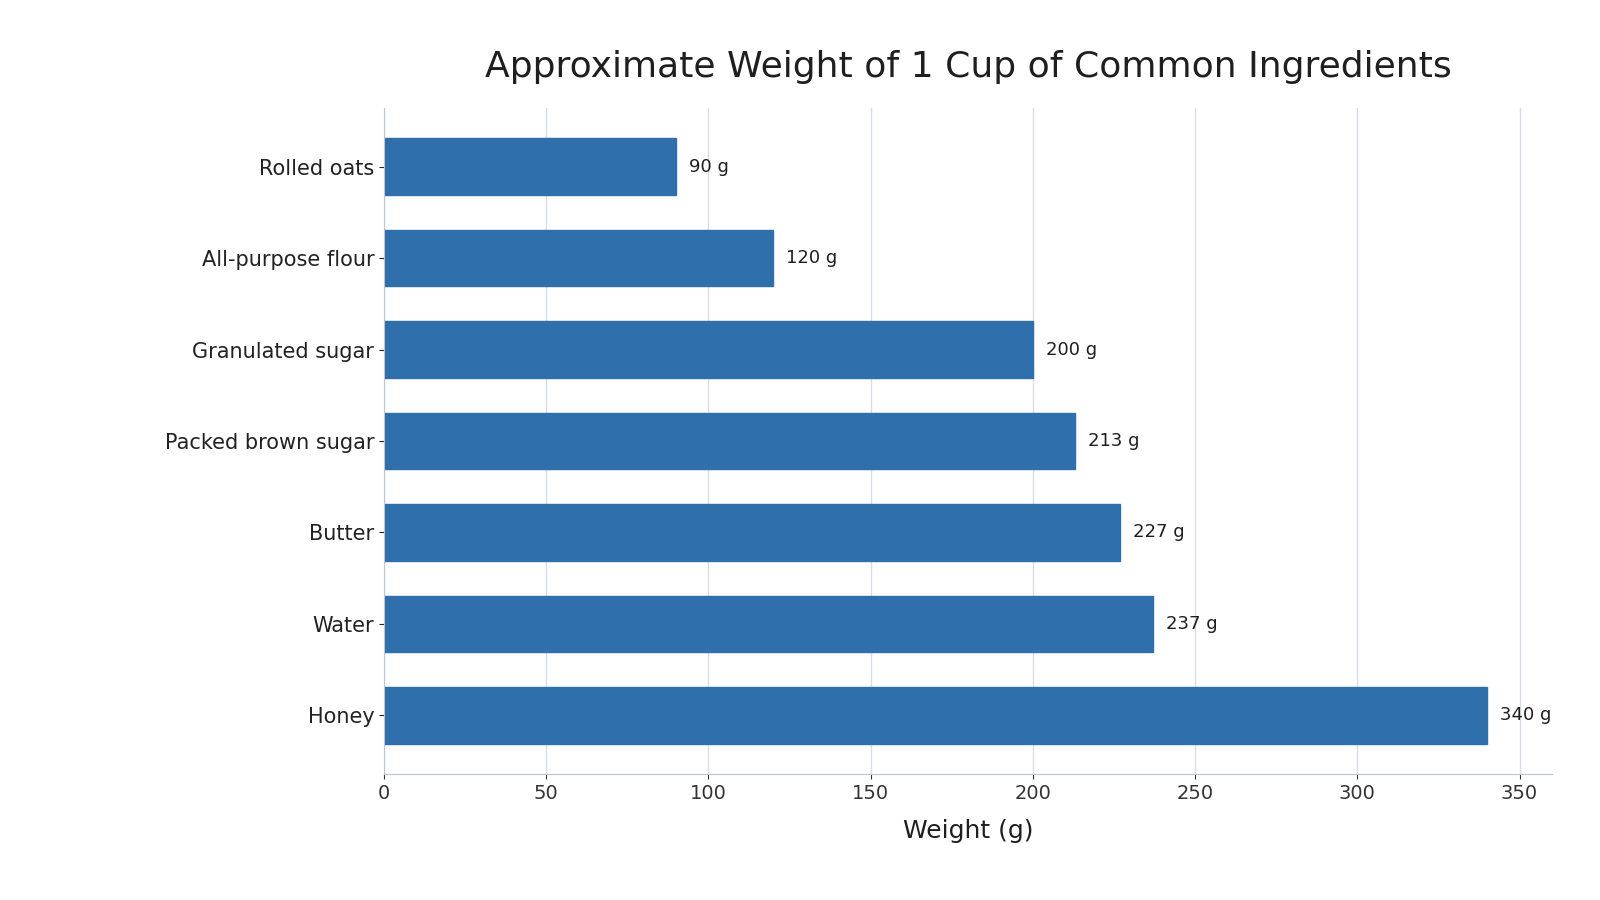
The table below shows approximate weights for 1 cup of several common ingredients. Take a moment to notice how wide the range is.
Ingredient
Weight of 1 Cup
All-purpose flour
≈120 g
Rolled oats
≈90 g
Granulated sugar
≈200 g
Packed brown sugar
≈213 g
Butter
≈227 g
Honey
≈340 g
Water
≈237 g
Here is the same comparison as a quick visual.
The lightest ingredient on this list — rolled oats at 90 g — and the heaviest — honey at 340 g — differ by 250 g, even though they both fill the exact same cup. That gap is large enough to ruin a recipe if you assume every cup weighs the same.
Let us compare two of the most common baking ingredients side by side to see how this plays out in a real scenario. Suppose a recipe asks for 200 g of flour. If a cook assumes "one cup is one cup" and scoops out 1 cup, that only gives about 120 g of flour — 80 g short:
200 g−120 g=80 g (shortfall)
That missing 80 g is roughly 32 of a cup of flour. In a cake, that much missing flour means less structure, and the batter may not set properly.
Now flip the scenario: the recipe says 200 g of granulated sugar. Here, 1 cup happens to land right at about 200 g. The swap works for sugar in this case, but only by coincidence — not because cups and grams are interchangeable in general. This example shows why blindly replacing a gram value with a cup value (or vice versa) is risky: the result depends on the ingredient, and even small errors can change the texture or structure of a dish.
One of the most common mix-ups in the kitchen involves fluid ounces (fl oz) and ounces (oz). As you learned in the first lesson, a fluid ounce is a unit of volume and an ounce is a unit of weight. Their names sound almost identical, but they measure completely different things.
For water, the numbers happen to line up closely: 1 fl oz of water weighs roughly 1 oz. This convenient coincidence leads many people to believe the two units are the same. But for most other ingredients the match breaks down — 1 fl oz of honey weighs noticeably more than 1 oz, and 1 fl oz of flour weighs less than 1 oz.
The safe rule: treat fl oz and oz as entirely separate units unless the ingredient is water or a water-like liquid such as milk or juice.
Not every cooking situation demands perfect weight accuracy. Here is a practical way to think about when the volume/weight distinction really counts:
Baking (bread, cakes, pastries): Ratios of flour, sugar, fat, and liquid control the structure and rise. Even a 10–15% error in flour can turn a moist cake into a dry brick. When a baking recipe gives a weight, use a scale.
Savory cooking (soups, stews, stir-fries): These dishes are more forgiving. Adding a little extra chopped onion or broth rarely causes a failure, so cup measures are usually fine.
High-precision items (macarons, chocolate tempering): Professional pastry recipes almost always use grams for a reason. Substituting volume measures in these recipes is a gamble.
Beyond the ingredient itself, the way you scoop also matters. Volume measurements can vary by 20–30% depending on how you fill and pack the cup: one cup of flour can weigh anywhere from 110 g to 145 g. A kitchen scale removes that guesswork entirely, which is why serious baking recipes specify weight.
Before we wrap up, here are three simple rules you can carry into any recipe:
Same volume ≠ same weight. Always check the specific ingredient before assuming a cup value equals a gram value.
fl oz ≠ oz (except for water and very similar liquids). Do not treat fluid ounces and ounces as the same unit.
When a recipe gives weight, weigh. This is especially important in baking, where precision directly affects the outcome. If the recipe says 200 g of flour, reach for a scale rather than estimating with cups.
In this lesson we explored why volume and weight measurements are not safely interchangeable. Different ingredients have different densities, so the same cup can hold 90 g of oats or 340 g of honey. We also revisited the fluid ounce versus ounce confusion and identified when precision matters most — particularly in baking. These insights tie together everything you have learned in the previous three lessons about classifying, converting, and now choosing the right type of measurement.
Up next, you will put this knowledge to work in a set of practice exercises where you will bust common myths, match ingredients to their true cup weights, and reason through a real baking scenario. Let's see how sharp your measurement instincts have become!