Conceptually designing our Image Stitcher Pipeline
Introduction to Panorama Stitching
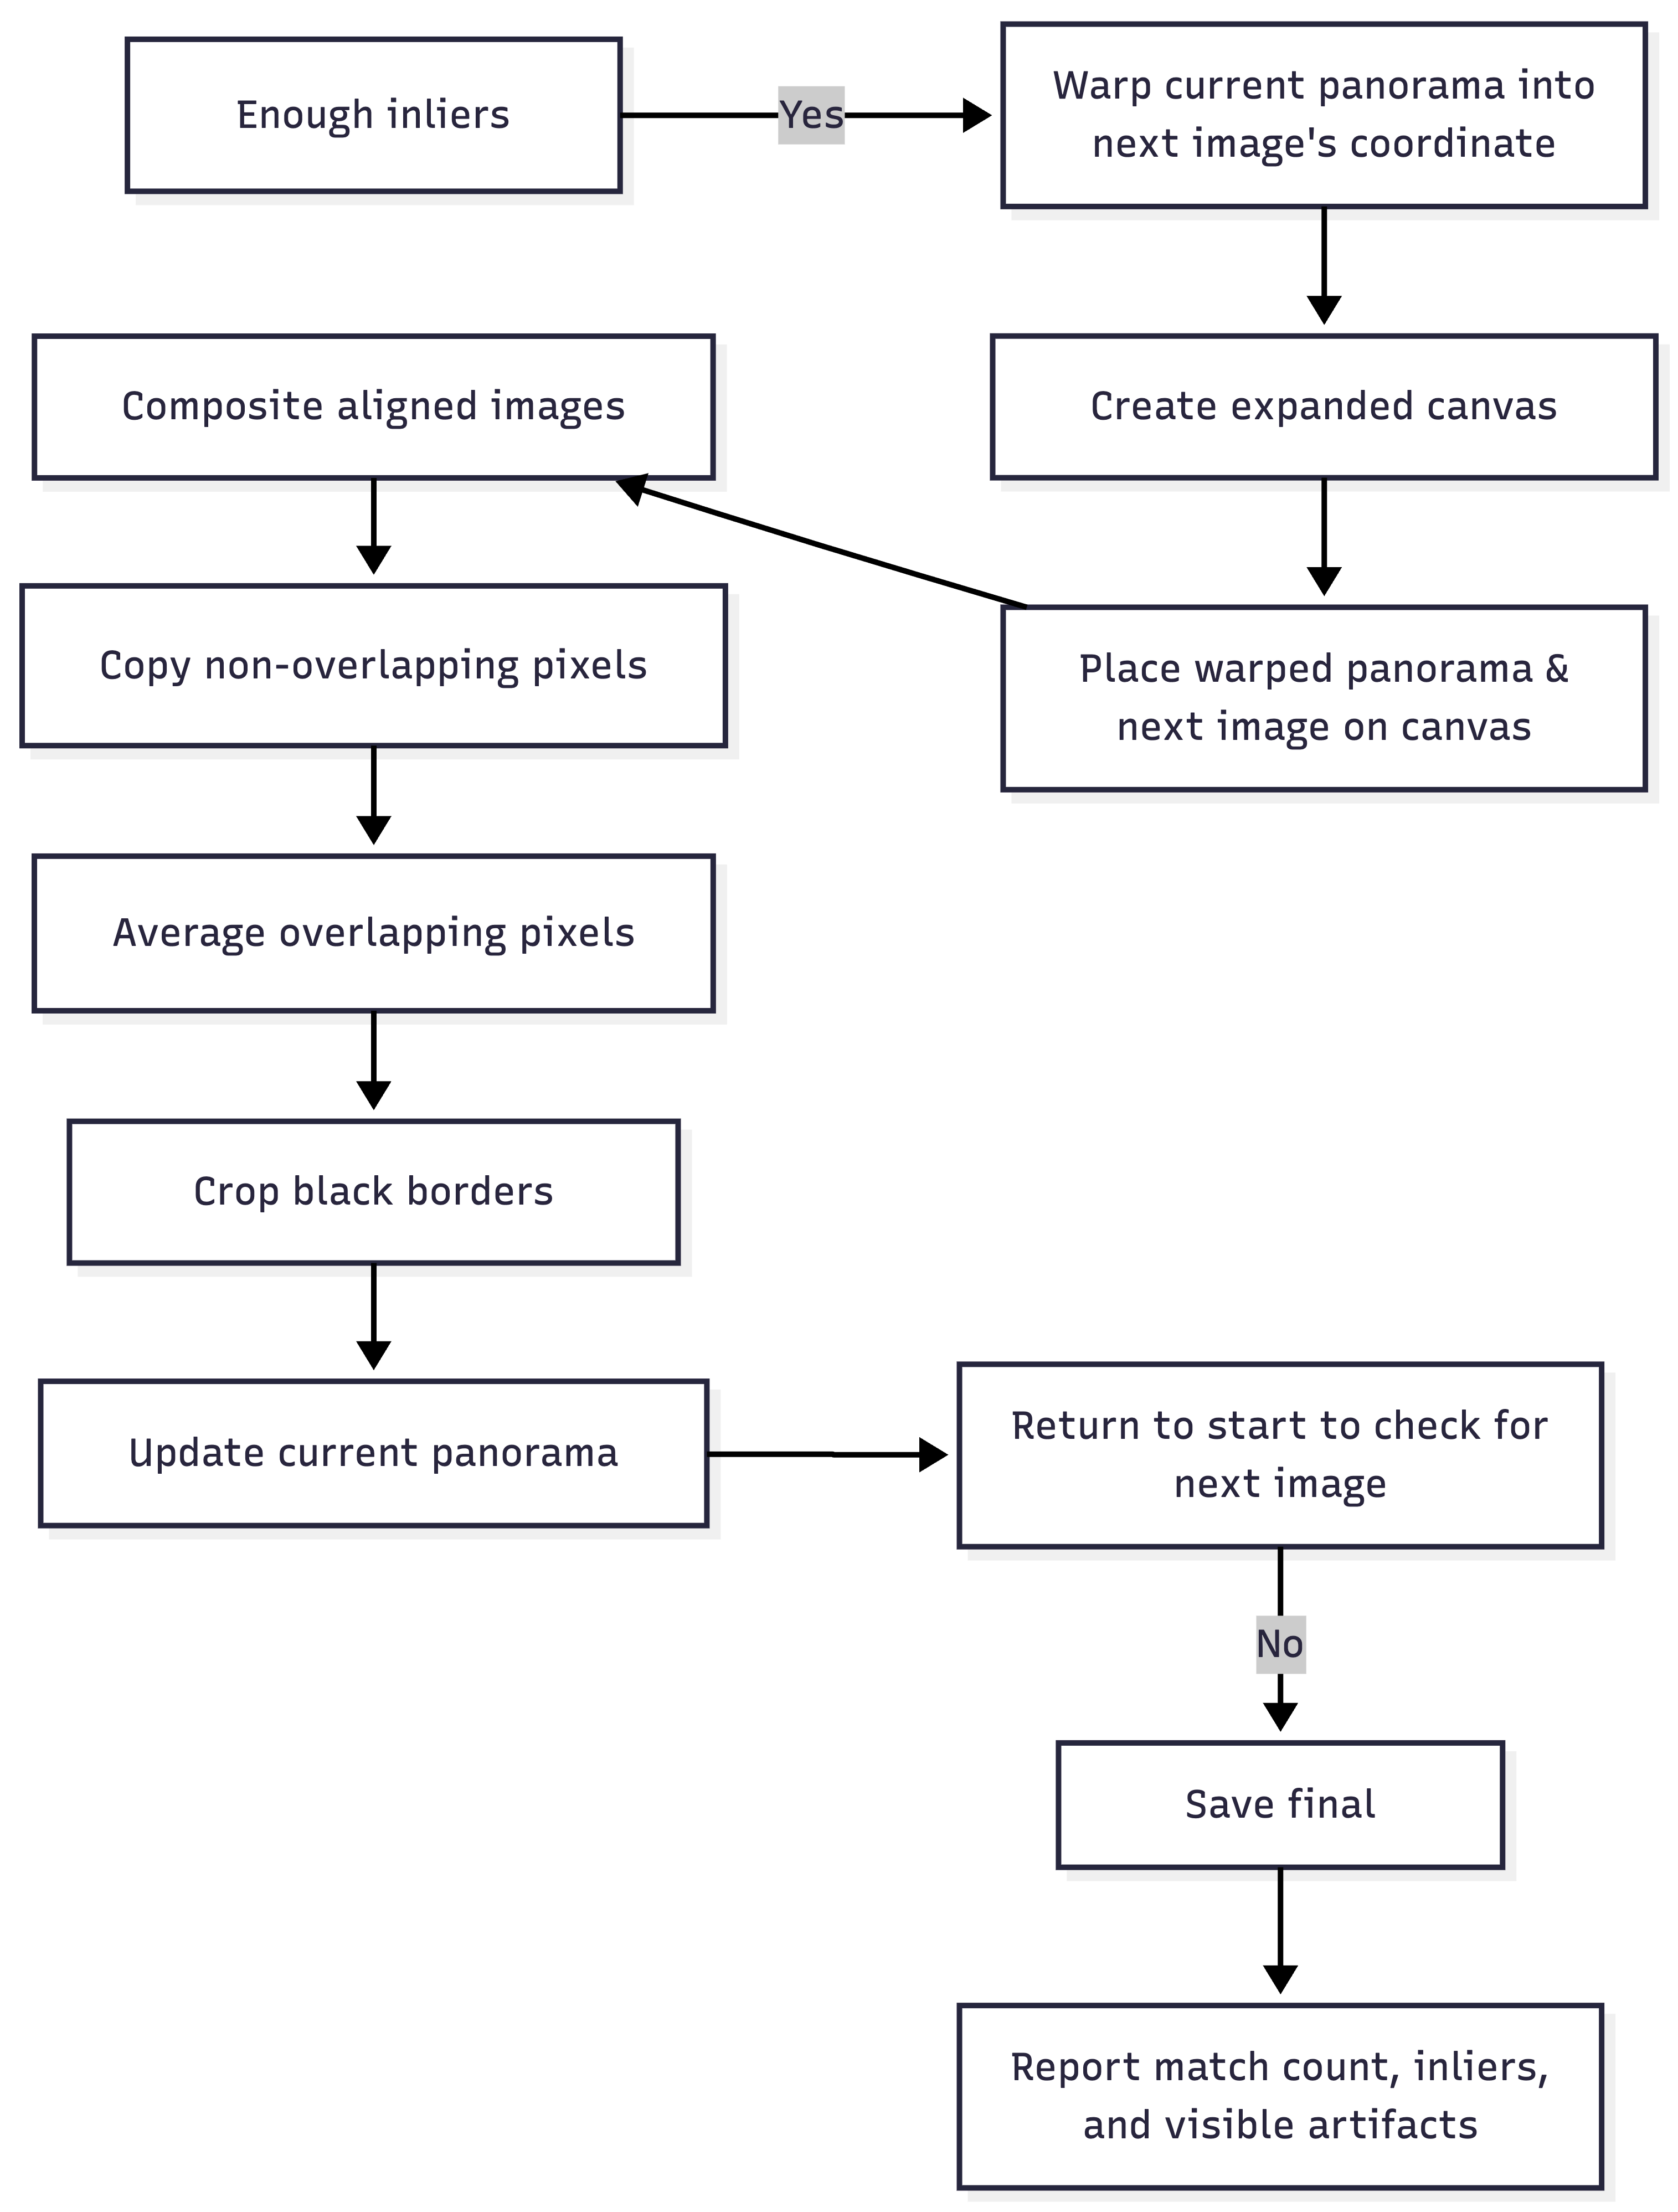
Welcome to the course! Over the next five units, we are going to build the core tools behind a Panorama Stitcher using Python. Have you ever taken a panoramic photo on your phone where you slowly sweep the camera across a landscape? Behind the scenes, your phone is rapidly taking normal photos and aligning them into one long image.
Before we write any Python code, we need a plan. A computer does not understand a scene the way a person does. To a computer, an image is just a giant grid of numbers. Therefore, we must define a strict, logical pipeline for our software to follow.
Let us look at how our program will start. We begin by organizing our raw materials.
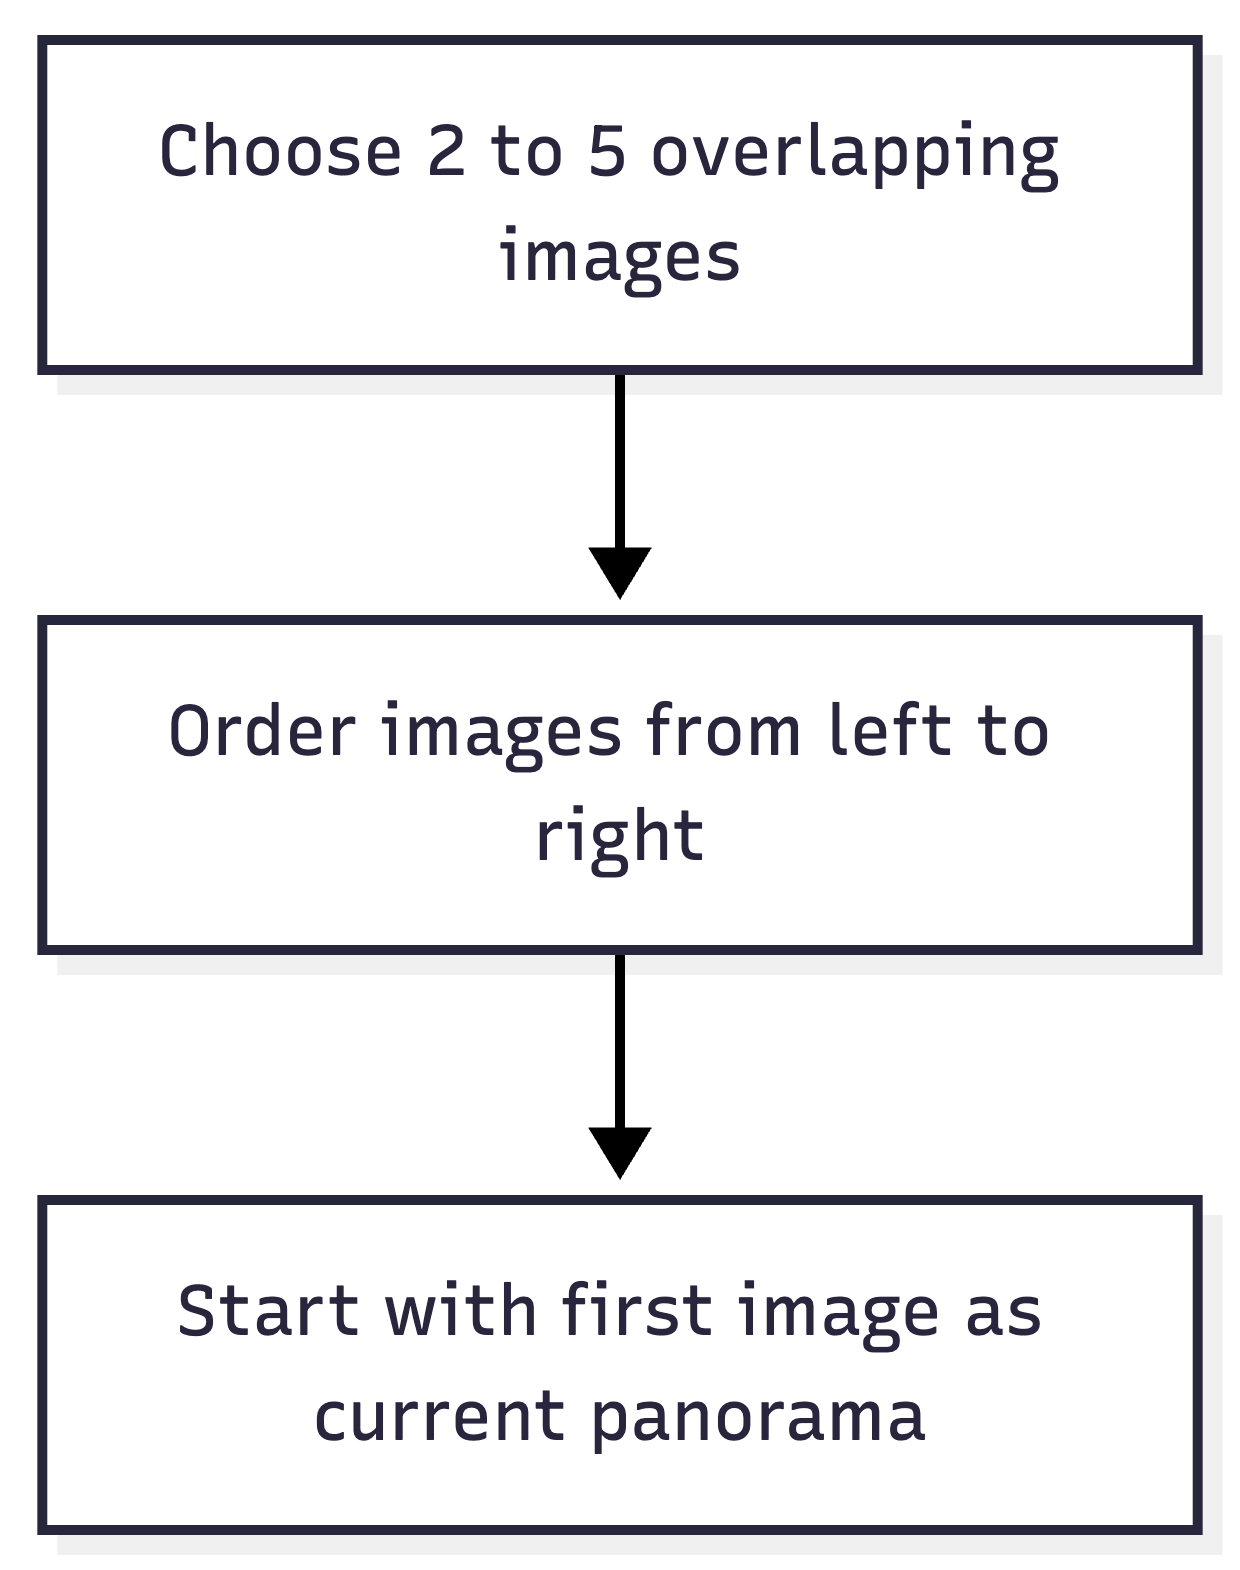
- Choose images: We start with a small batch of overlapping images.
- Order them: We arrange them logically from left to right so that the computer knows the intended physical layout.
- Set the base: We take the very first image and treat it as our starting
panorama canvas. Every subsequent image will be attached to this growing canvas.
The Golden Rule of Input Images
A panorama stitcher is only as good as the photos you feed it. To attach two images together, they must share common physical space. This is called overlap.
For our pipeline, a good pair of images usually has roughly 30–50% overlap. However, overlap is not just about standing in the same spot; it is about recognizable visual landmarks. The shared content should include textures, edges, signs, rocks, bricks, or windows. If the overlap consists only of a blank blue sky, flat white walls, or moving objects like cars, the computer will get confused.
Here is how our pipeline handles checking the next image:
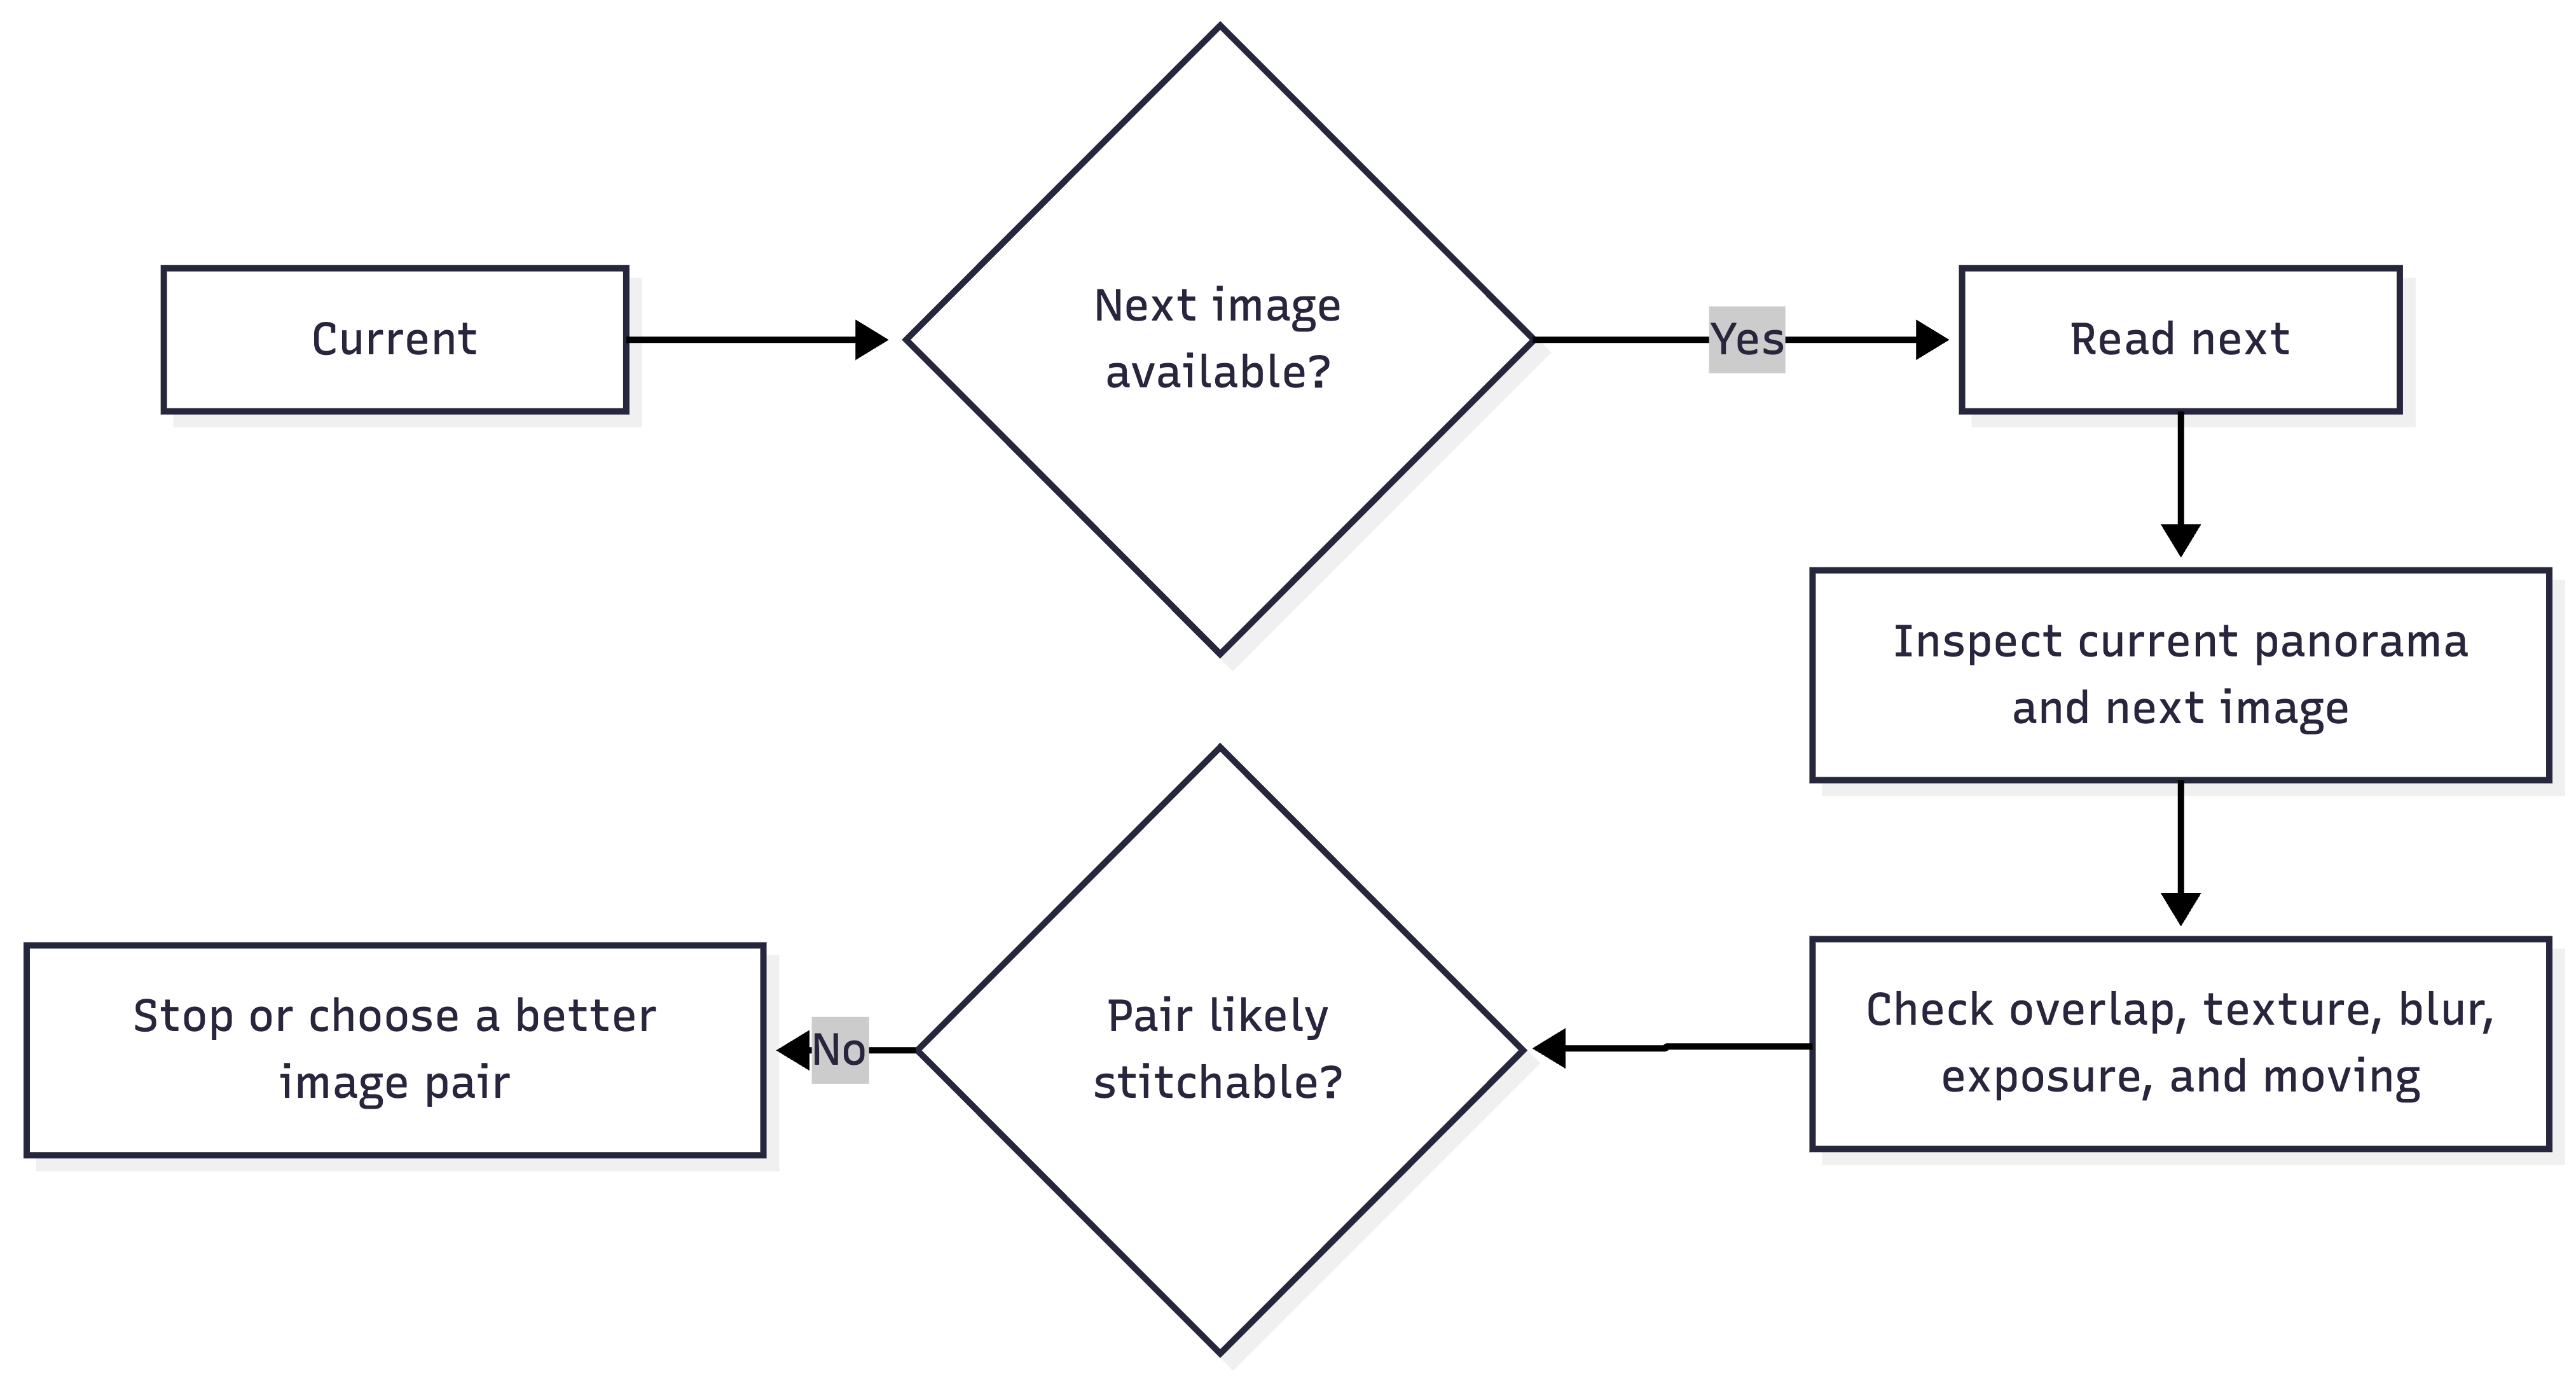
- Inspect the images: We check if the next image has good overlap, limited blur, and high texture.
- Make a decision: If the images are poor — meaning they have too few landmarks, too many repeating identical patterns, or lots of moving foreground objects — our pipeline will stop and warn us to pick better photos.
Phase 1: Preprocessing and Feature Detection
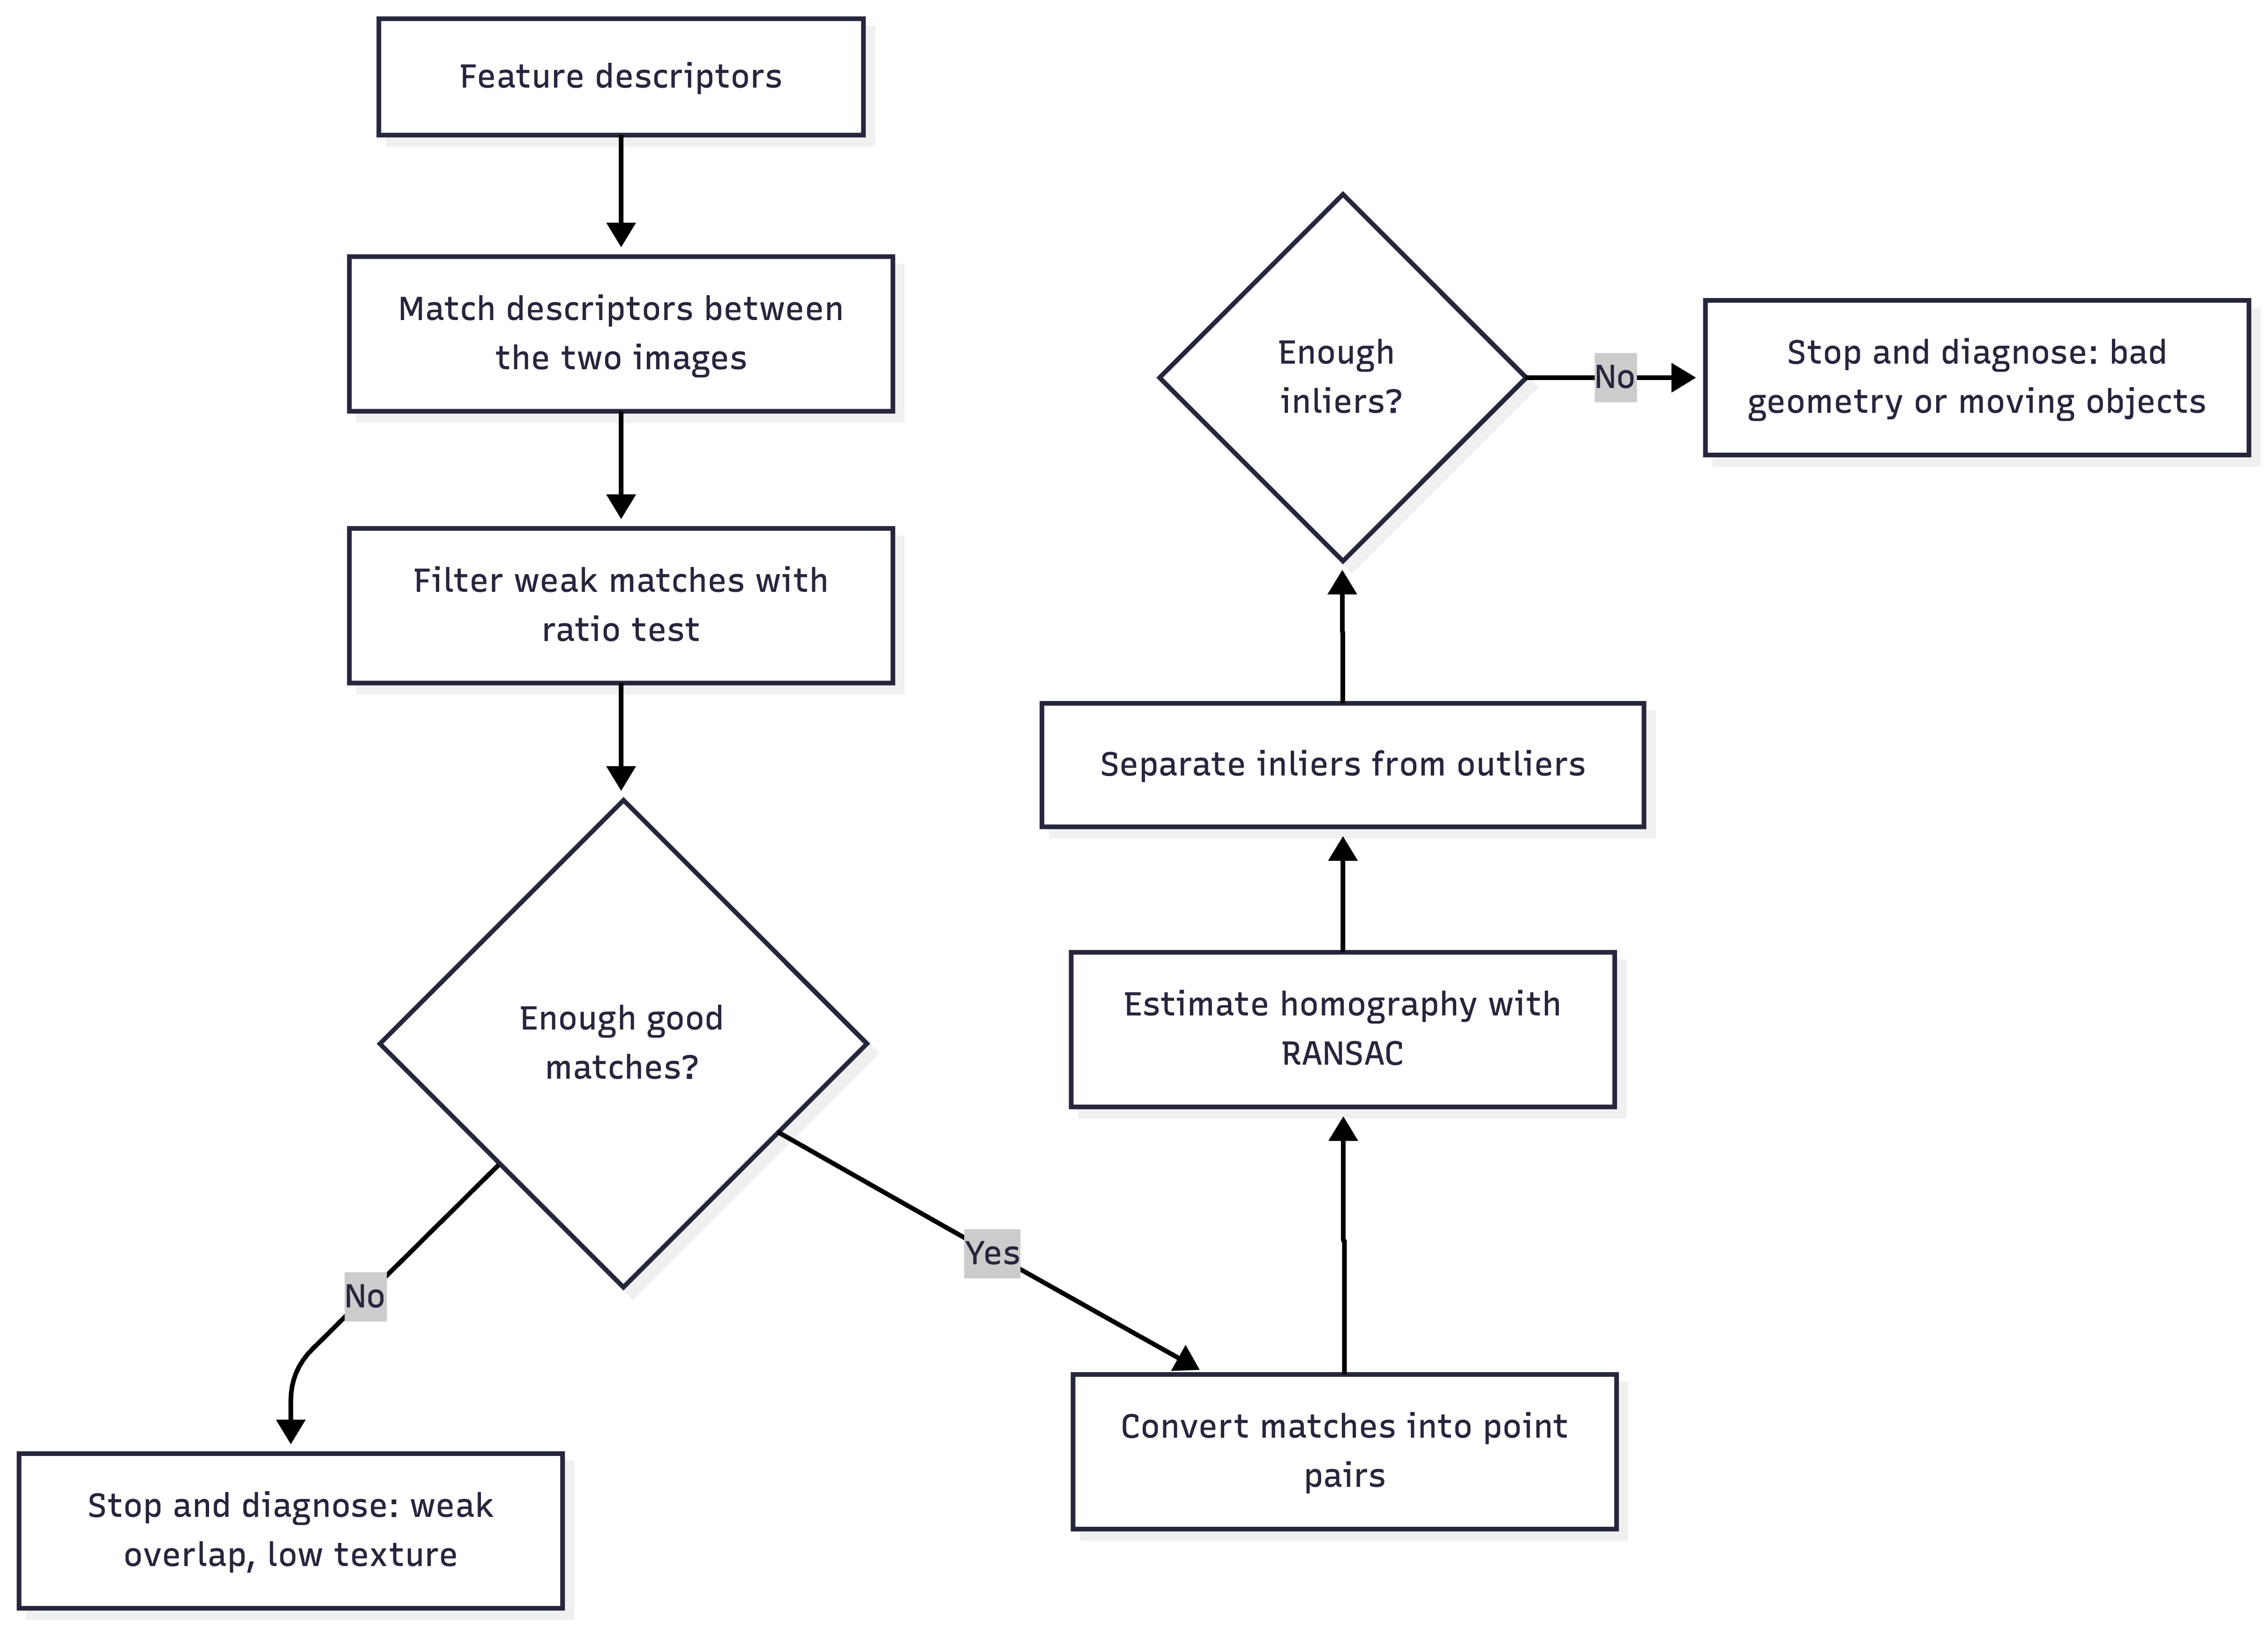
Once we confirm that we have a good pair of images, we need to help the computer find those distinct landmarks we just talked about. We call these landmarks local features.
Before looking for features, it helps to simplify the images. Color is great for humans, but it adds unnecessary data for a computer trying to match shapes. So, we preprocess the image by converting it to grayscale.
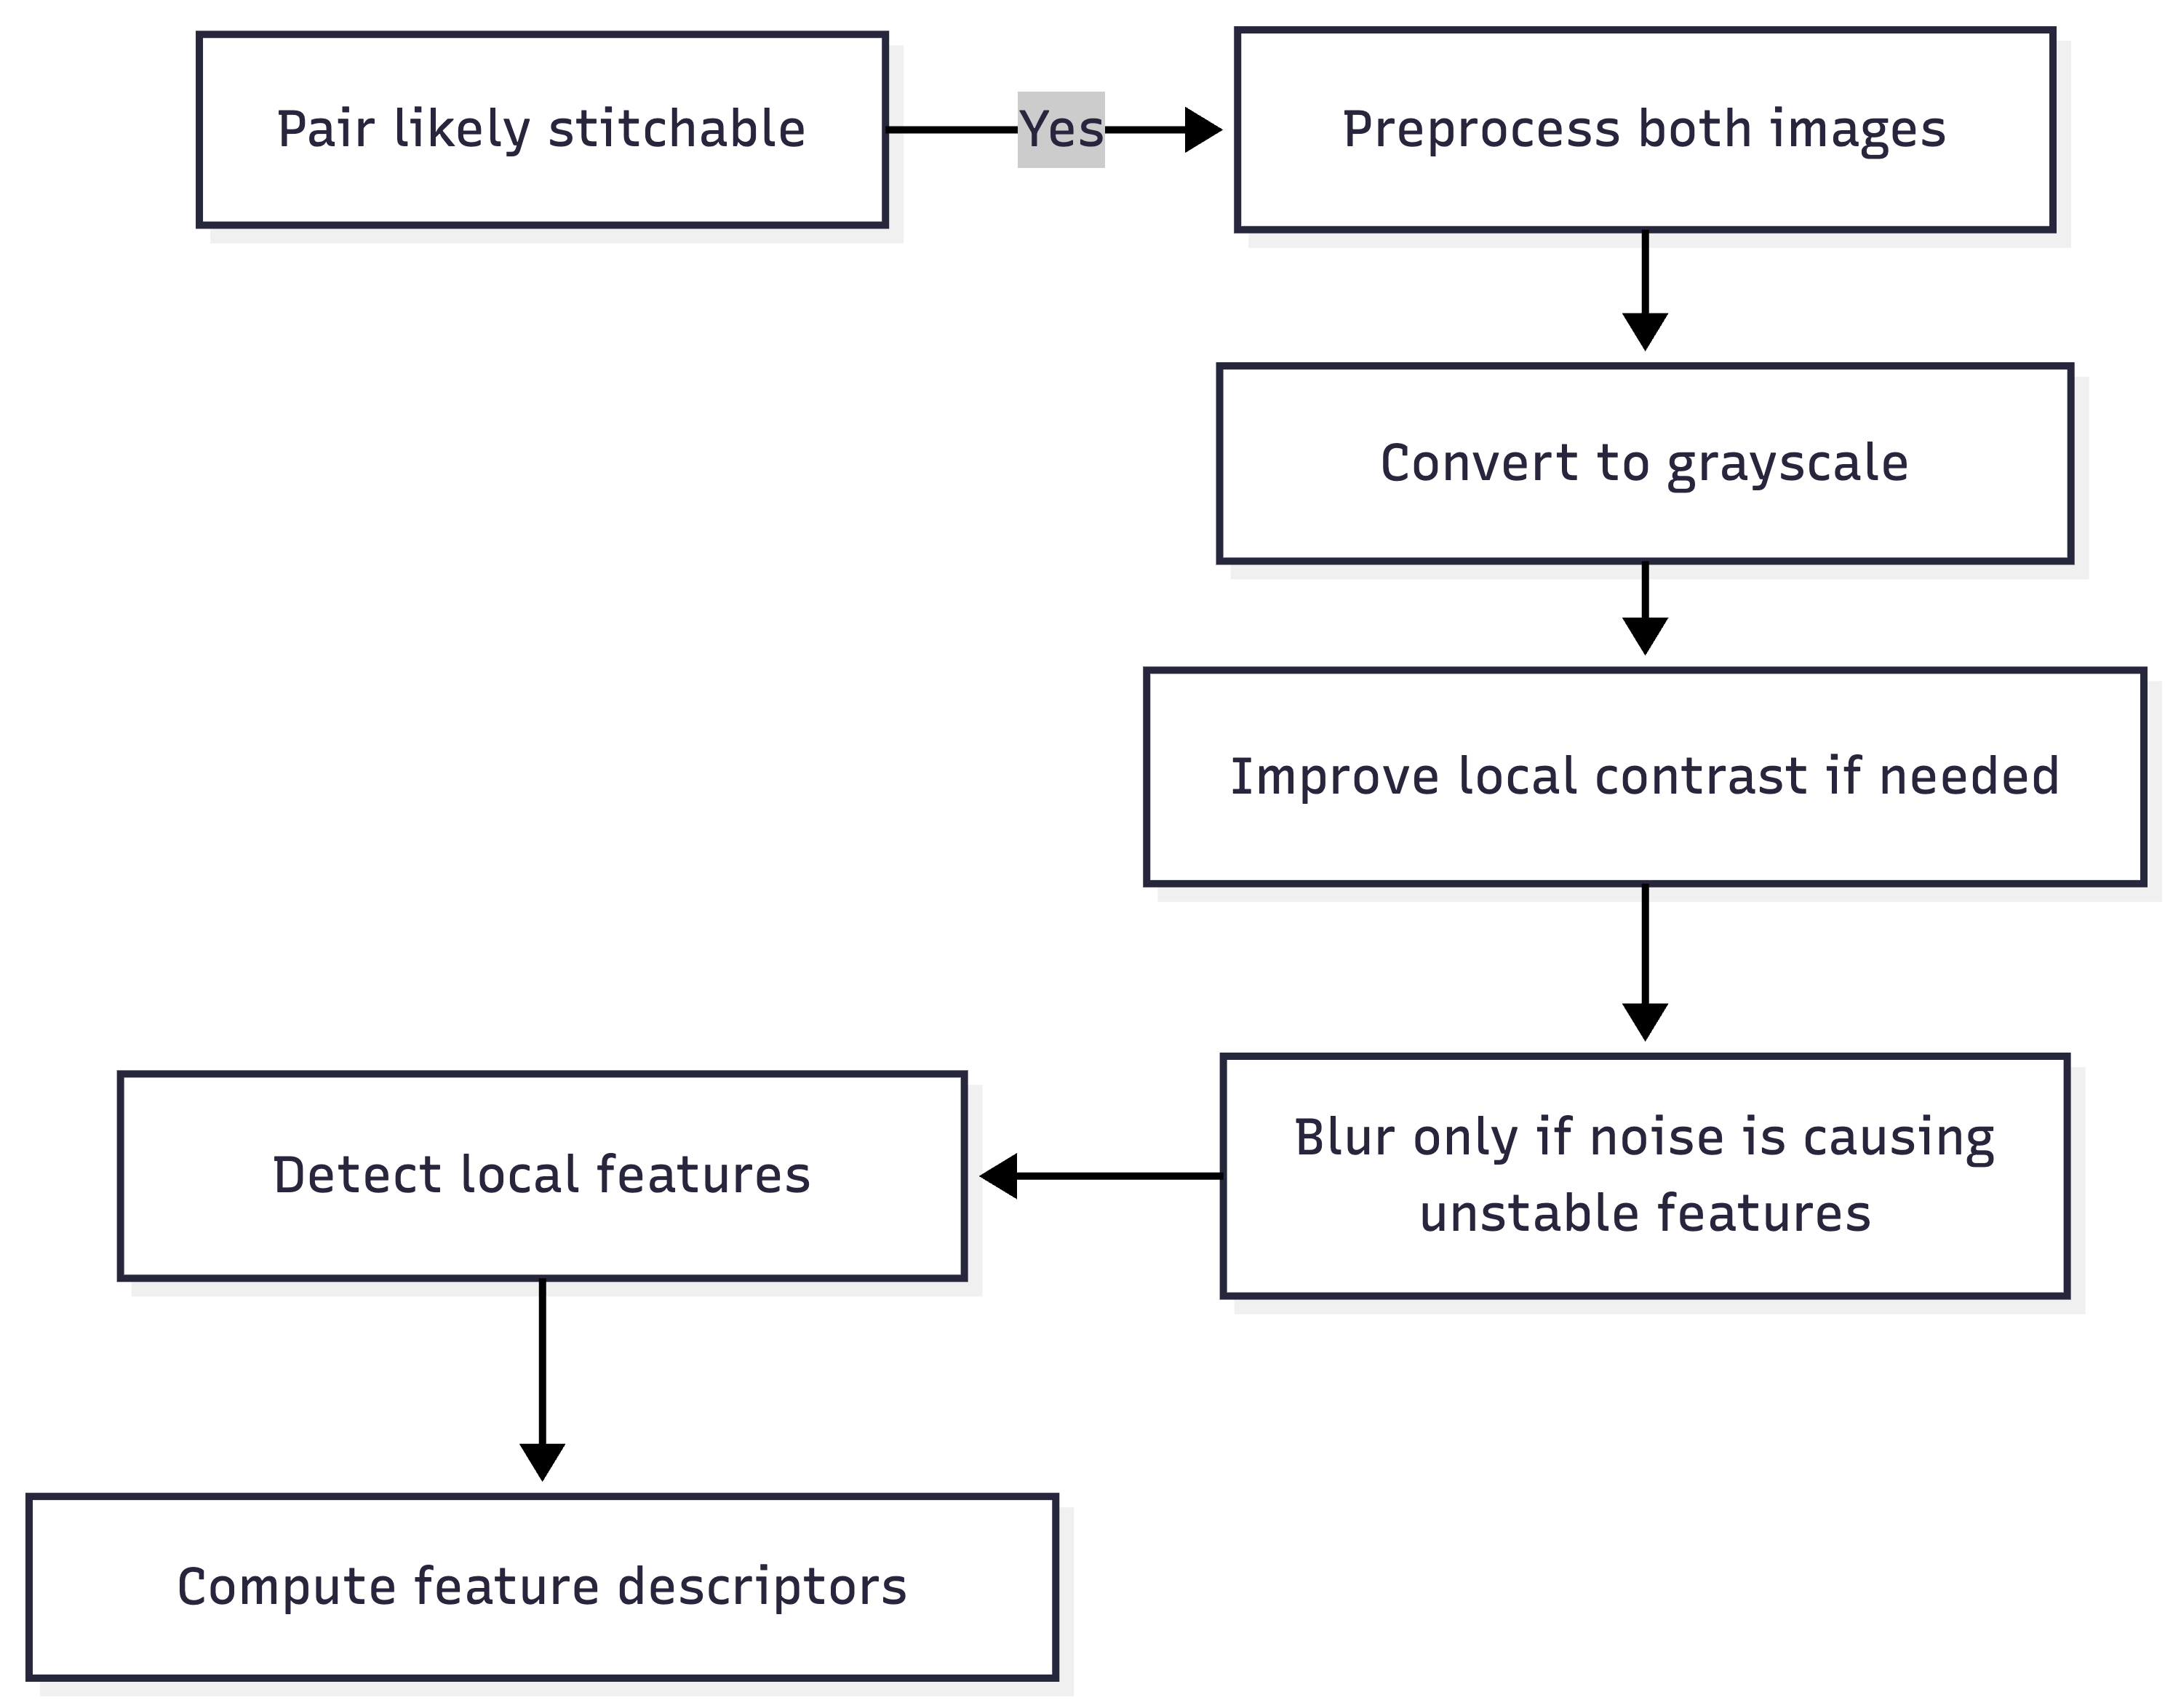
- Convert to
grayscaleand improve contrast: This makes the math easier and helps edges and textures stand out. - Detect
local features: The computer scans the image looking for points of interest, like the sharp corner of a window or the unique shape of a rock. - Compute
descriptors: For every feature found, the computer creates adescriptor, which is essentially a digital fingerprint describing what the pixels around that landmark look like.