Creating 2D Arrays
Introduction
Welcome to Creating and Selecting from 2D NumPy Arrays. This is our first lesson in the course, where we’ll begin by turning a list of data into a table and learning how to describe its layout. We’ll use a coffee shop’s drink orders to build a 2D NumPy array, then inspect it using three attributes and the built-in len function. As we move through the course, we’ll create tables in different ways and learn how to select parts of them.
Building a 2D Array from a Nested List
Tables are useful when each row holds a group of related values. In NumPy, we can create a table by passing a nested list to np.array: each inner list becomes one row, and matching positions across the rows form the columns. Here, the rows represent weekdays, and the four positions in each row represent drink types.
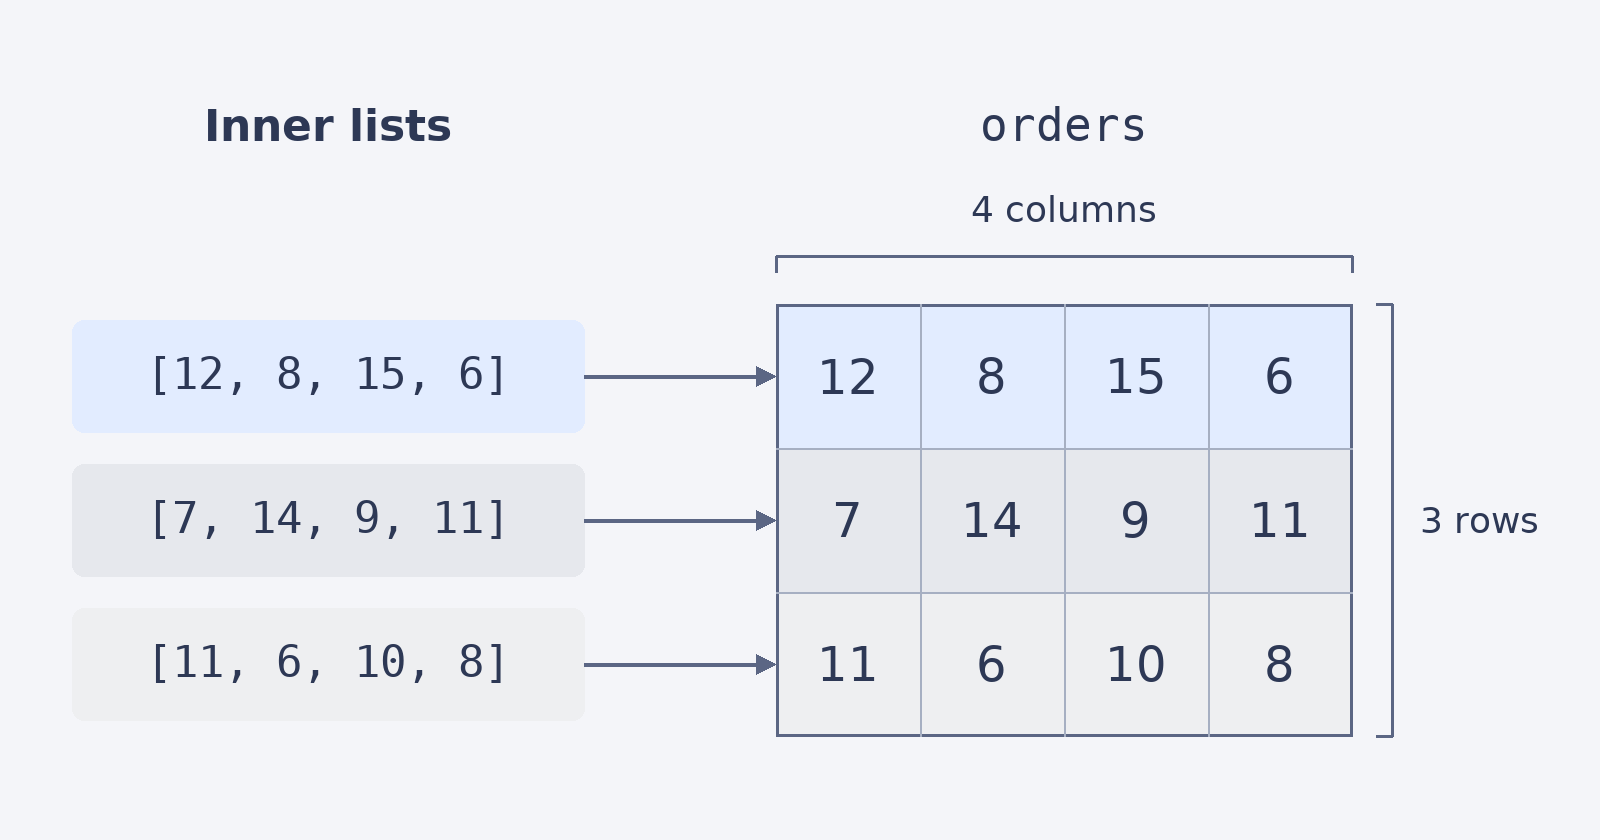
The outer list contains three inner lists, so orders has three rows. Each inner list contains four numbers, so there are four columns. NumPy stores those values together as a 2D array, ready for us to inspect.
The grid below shows how each inner list becomes a row, with matching positions lined up in columns.
When Tables Go Wrong: Ragged Lists
A table needs a consistent number of columns in every row. If one inner list is shorter or longer than the others, the nested list is ragged. NumPy cannot form a regular rectangular array from it, so creating the array raises a ValueError about an inhomogeneous shape.
The first row has three numbers, but the second has only two. That mismatch is the problem, not the values themselves. Before creating a 2D table, check that every inner list has the same length. Then each row has a matching position for every column.
Reading the Layout with `shape`
